Passes Configuration
The Wallet Composer is a tool created to design and configure passes easily through the web browser.
Using the Wallet delivery wizard, passes can be delivered via SMS or email, using subscription lists to establish recipients and personalized data within those passes, or generate a QR encoded URL for delivery (using the information from social networks).
You can also generate (if you choose) compatible passes with Google Pay that will be delivered to Android devices that try to download your pass.
The Messangi platform detects the capabilities of the device that downloads the pass and offers the best format for the end-user platform.
To create a Wallet campaign you need two components: a Wallet template and a subscription list with the recipients (mobile phone numbers or email addresses) and their personalized data (if necessary).
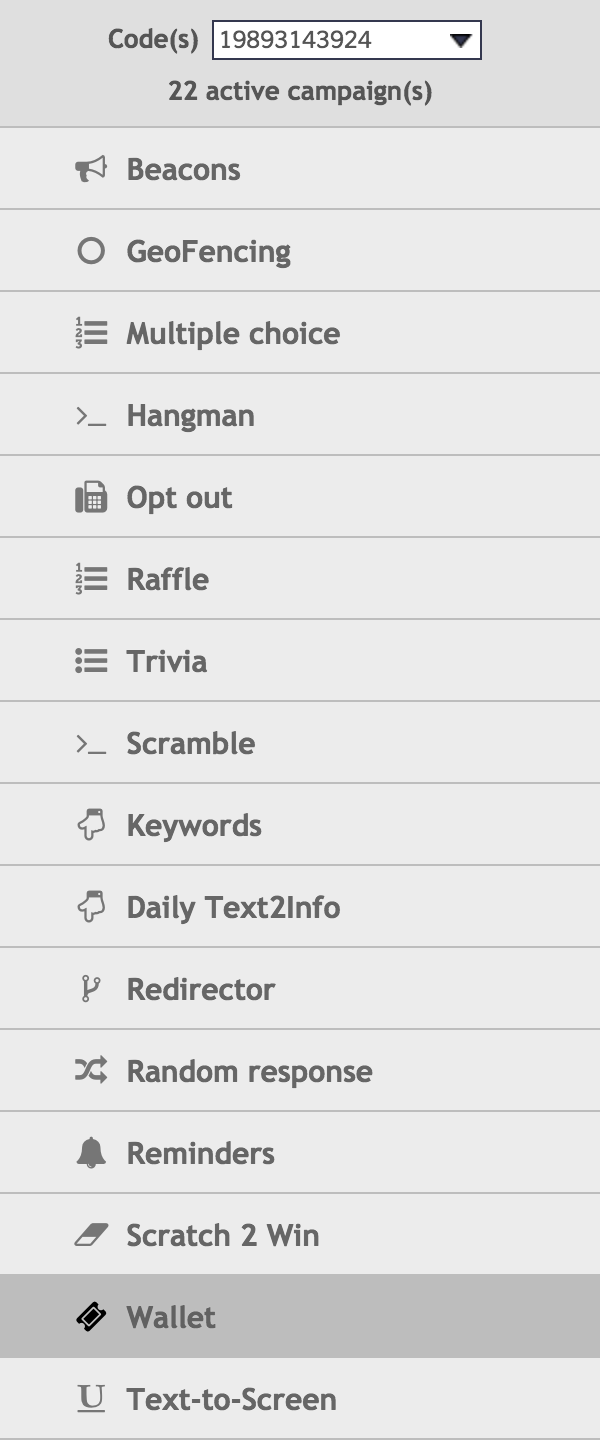
From the main menu, select the option Interactive campaigns and then Wallet .
Pass Structure
Wallet passes can be viewed in different ways:
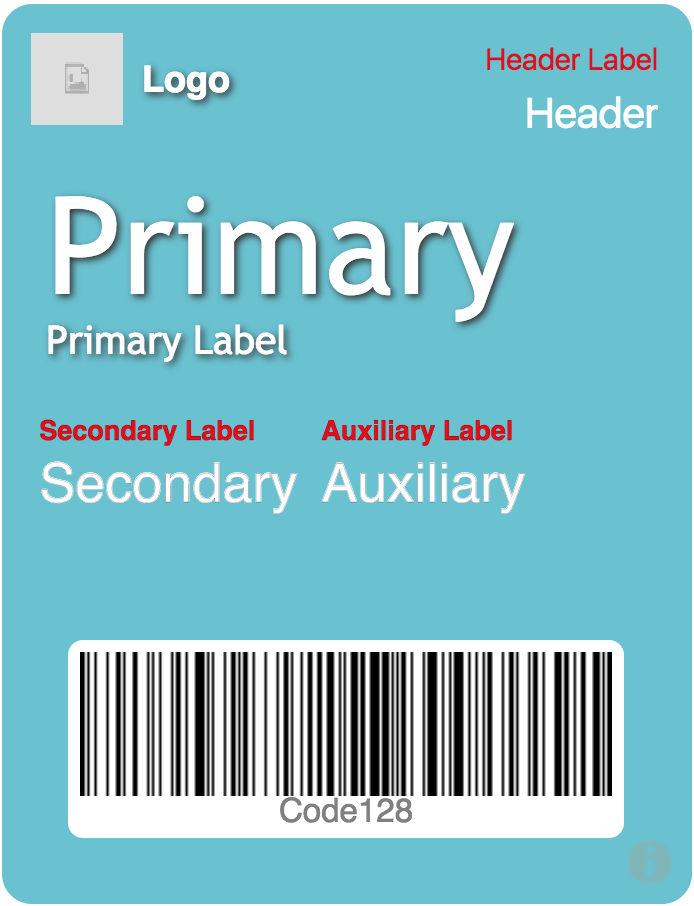
- Visually , a pass has a front side and a back side. On the front, you can see different images, a bar code and the main content text. Images are named: logo (top left corner), icon (for notifications on the lock screen), thumbnail (right half), footer (above the barcode), background (behind text, barcode and other images) and strip (upper half of the pass). Text written in passes is divided into 5 specific places, called: logo text (upper center), header (top right corner), primary fields (upper half), secondary fields (lower half) and auxiliary fields (lower half). To access fields on the back side, you must touch the i button in the lower right corner of the pass. Fields on the front should be short and accurate, while those on the back can have as much content as necessary (eg directions or terms and conditions).
- A pass is a file compressed in zip format with the extension .pkpass. This file contains: a JSON (plain text) with the structure of the pass (texts, barcode, metadata), images in PNG format and a digital signature.
- It is a technological infrastructure with four components: a wallet app to show passes (native on iOS, for Android devices you can use the application One World Wallets or Google Pay if configured), the pass itself (.pkpass file), a server that broadcasts passes (Messangi servers) and a set of third-party servers (Apple's and others) that allow PUSH notifications to update delivered passes, depending on the end user's device platform.
- As an interactive technology , a pass can be aware of time and space, by establishing within its metadata: a relevant date , an expiration date , associations to a geographical location with its coordinates and / or associations with bluetooth mobile devices known as iBeacons . It allows passes to be displayed on the lock screen when the time comes or when the device that stores the pass is around a place or near the signal of an iBeacon device.
Creating a Wallet Template
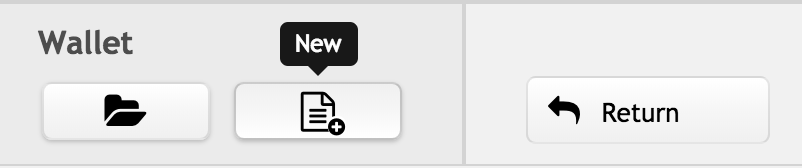
To create a Wallet template, you must select the New button on the toolbar.
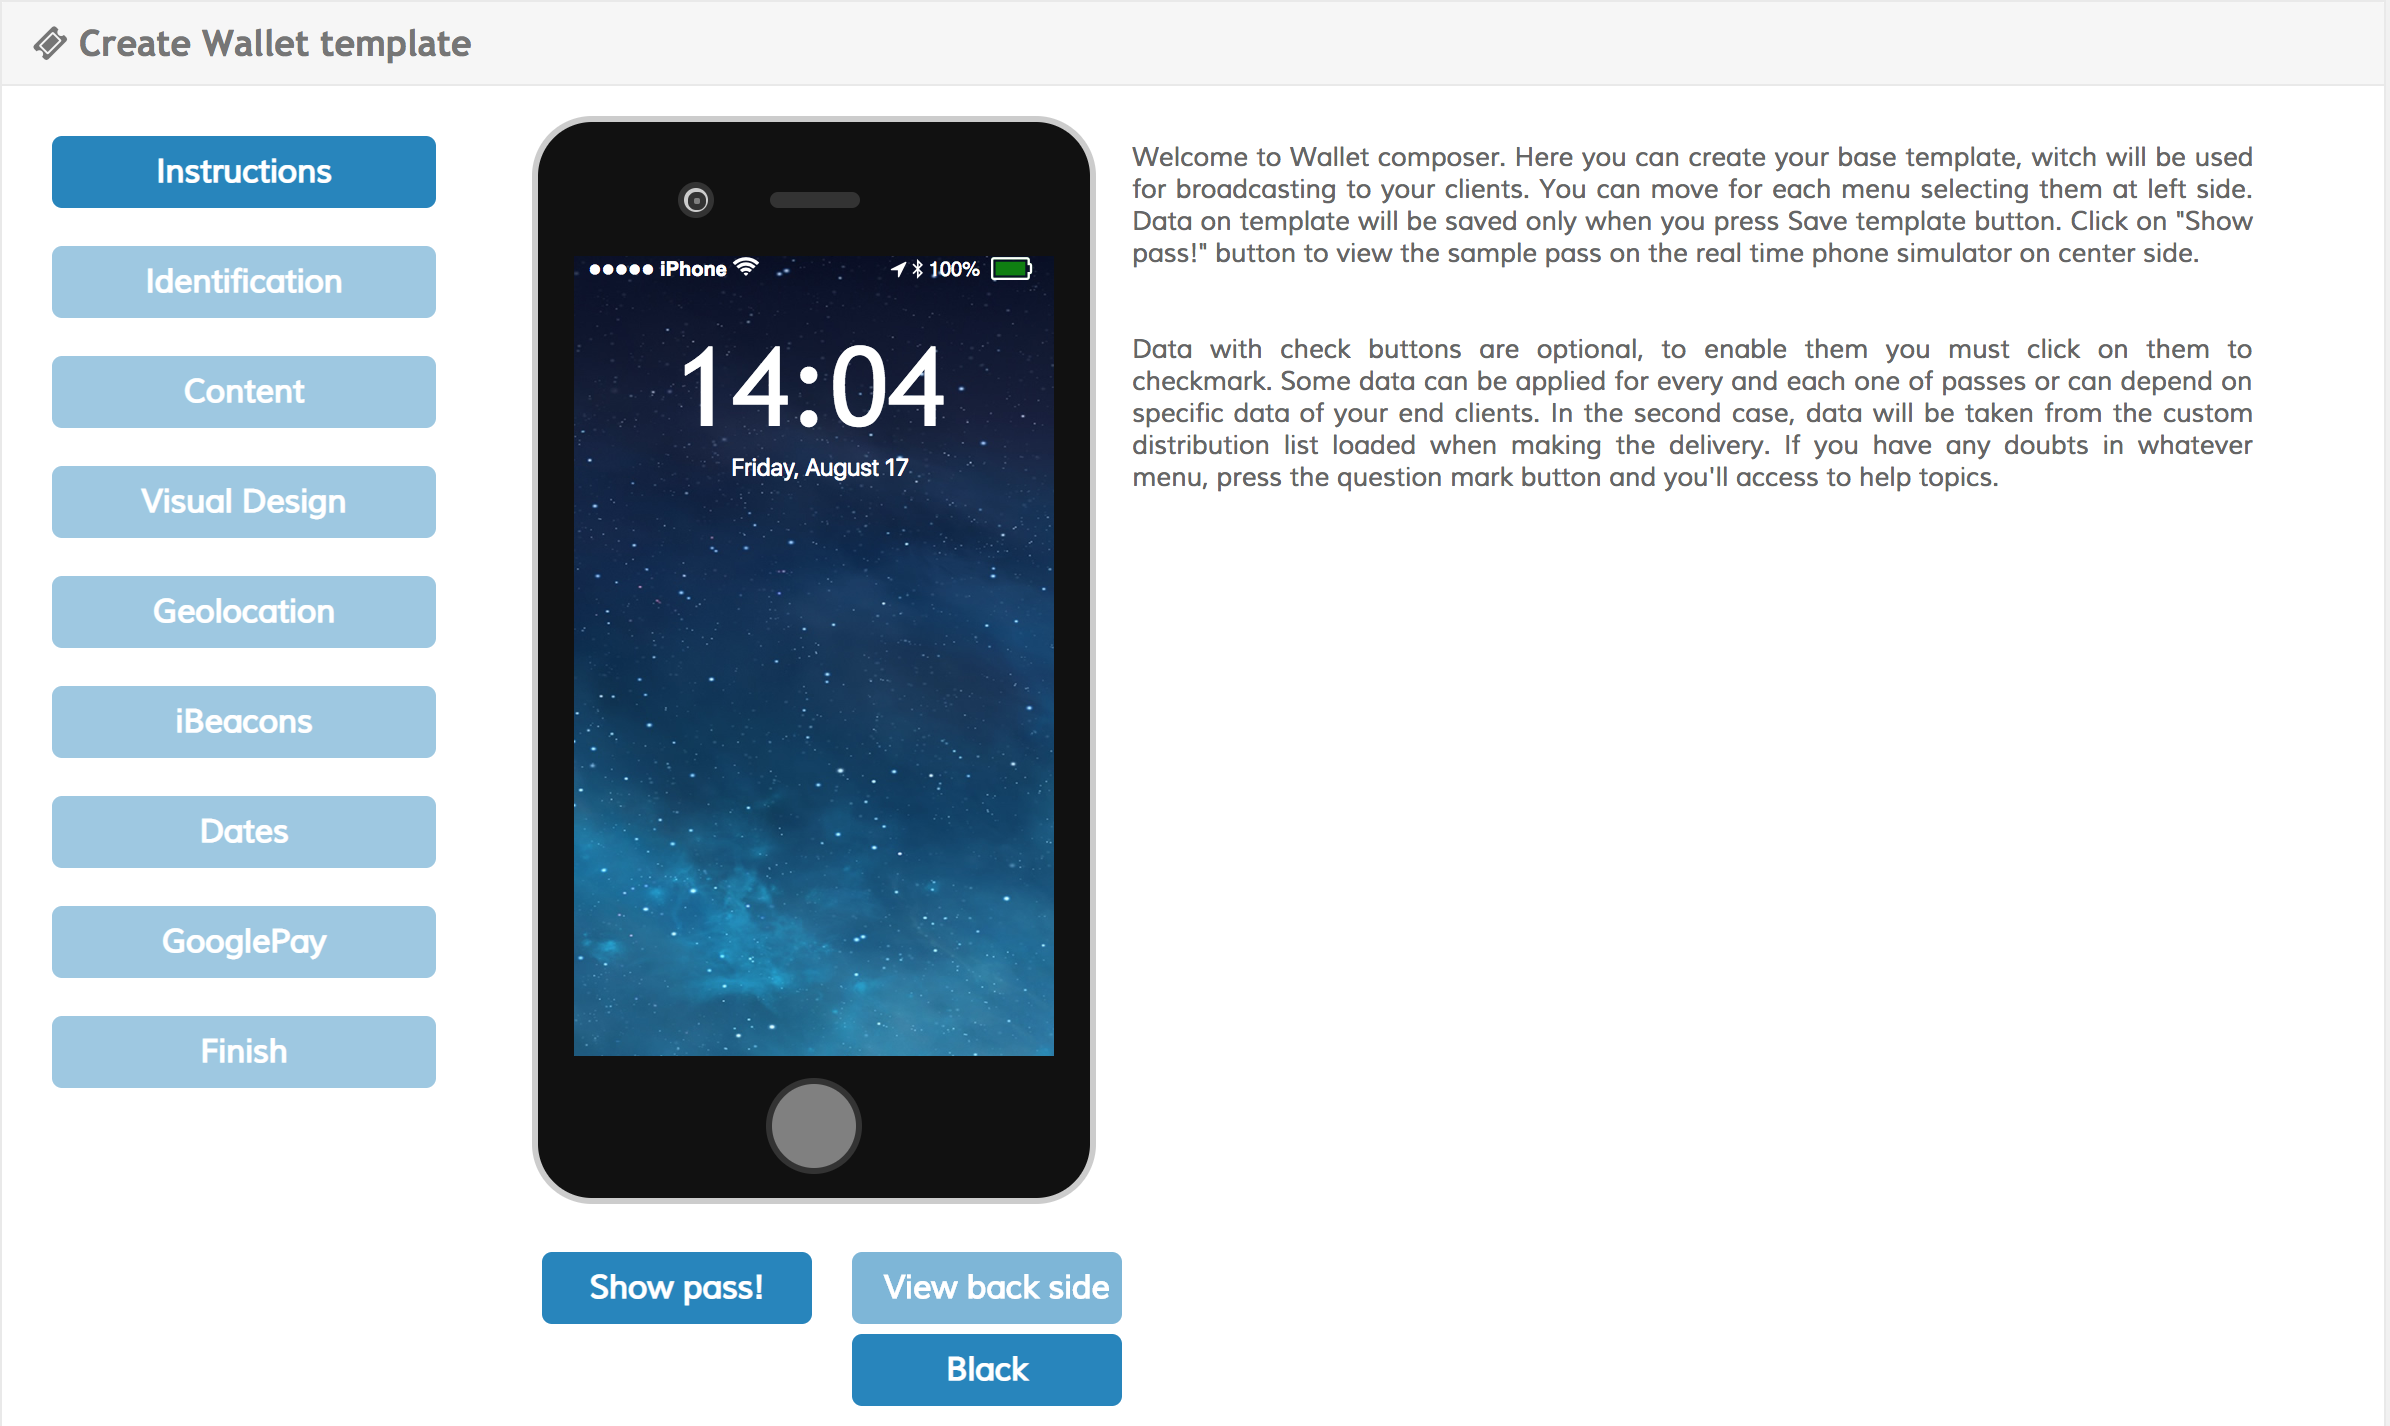
This will open the Wallet template composer . To start creating passes, click Show pass! . You can click again to see the animation of the pass when it is opened on a mobile device.
Instructions
The Instructions tab shows a brief overview of the steps required to set up a pass.
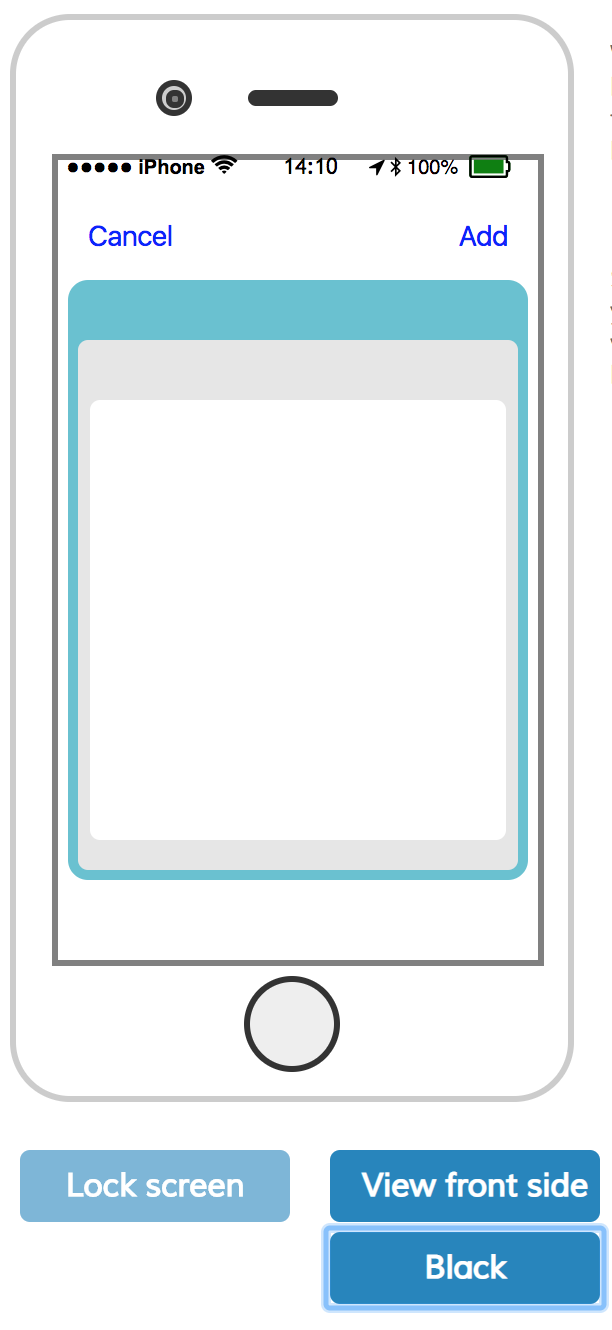
The mobile phone simulator has several viewing options:
Pressing the Show pass! button displays the pass and enables the View back side button.

Pressing the View back side button displays the back of the pass and disables the Lock screen button.
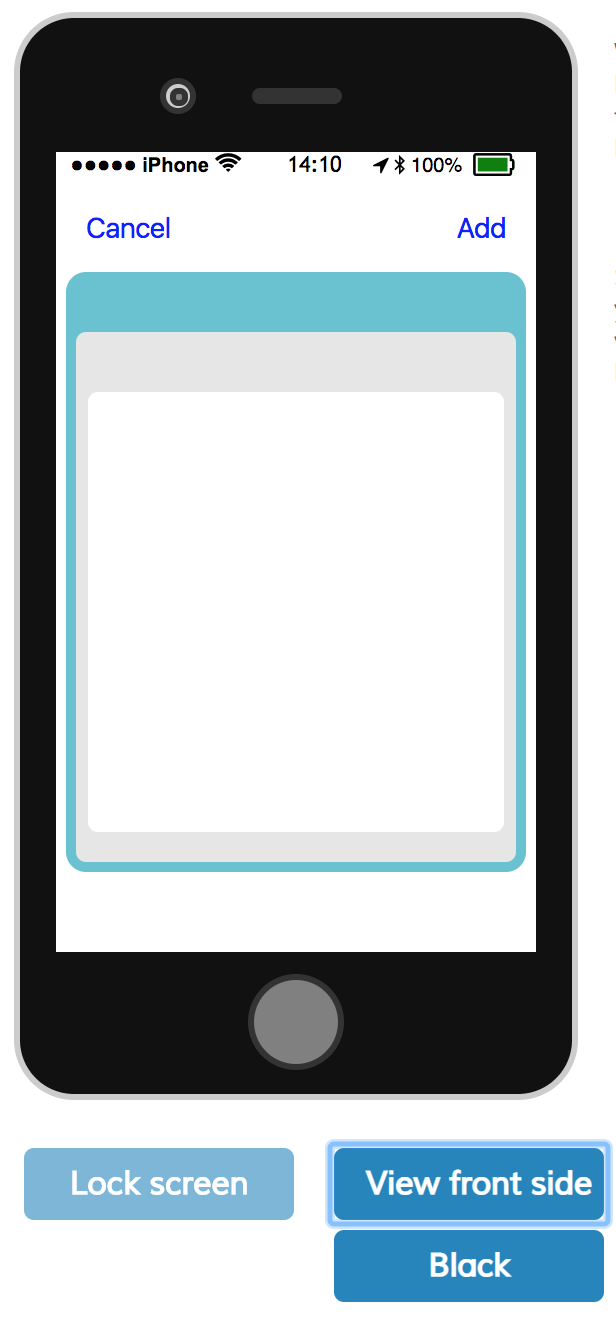
By pressing the color selector button we alternate the phone simulator color between Black and White .
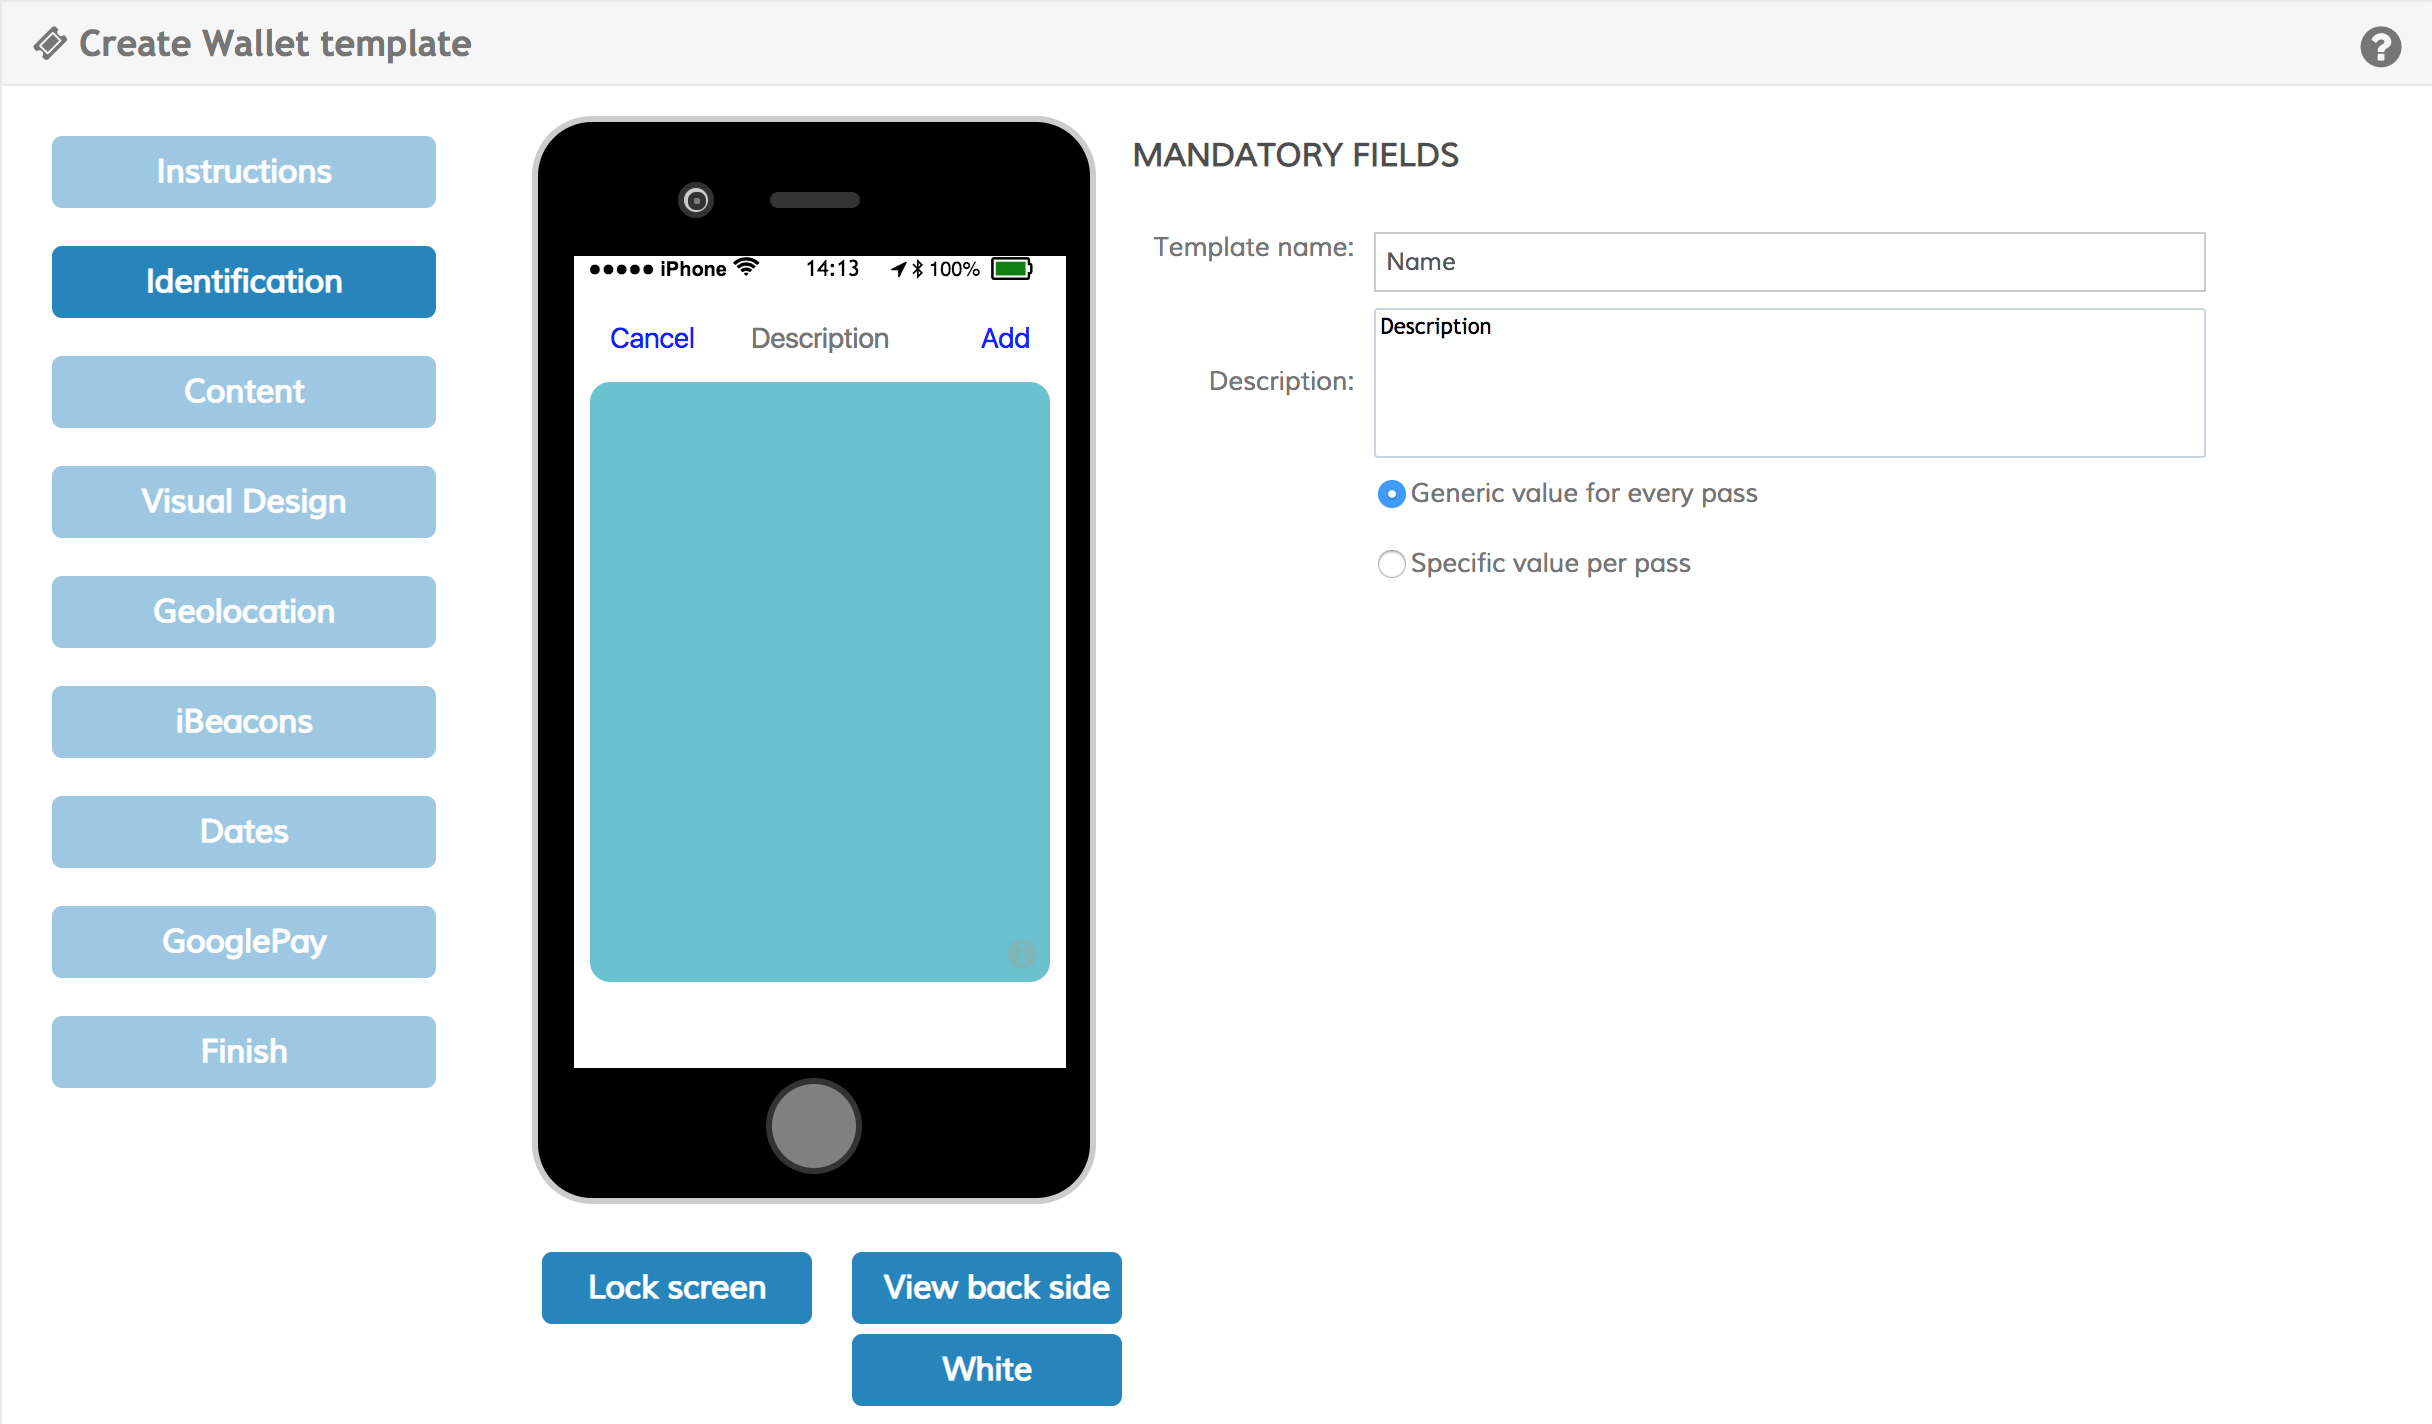
Identification
In the Identification tab, you must establish a name for the template and a brief description. The description field can be customized for each user to whom the pass is delivered, or it can be a generic description for all passes.
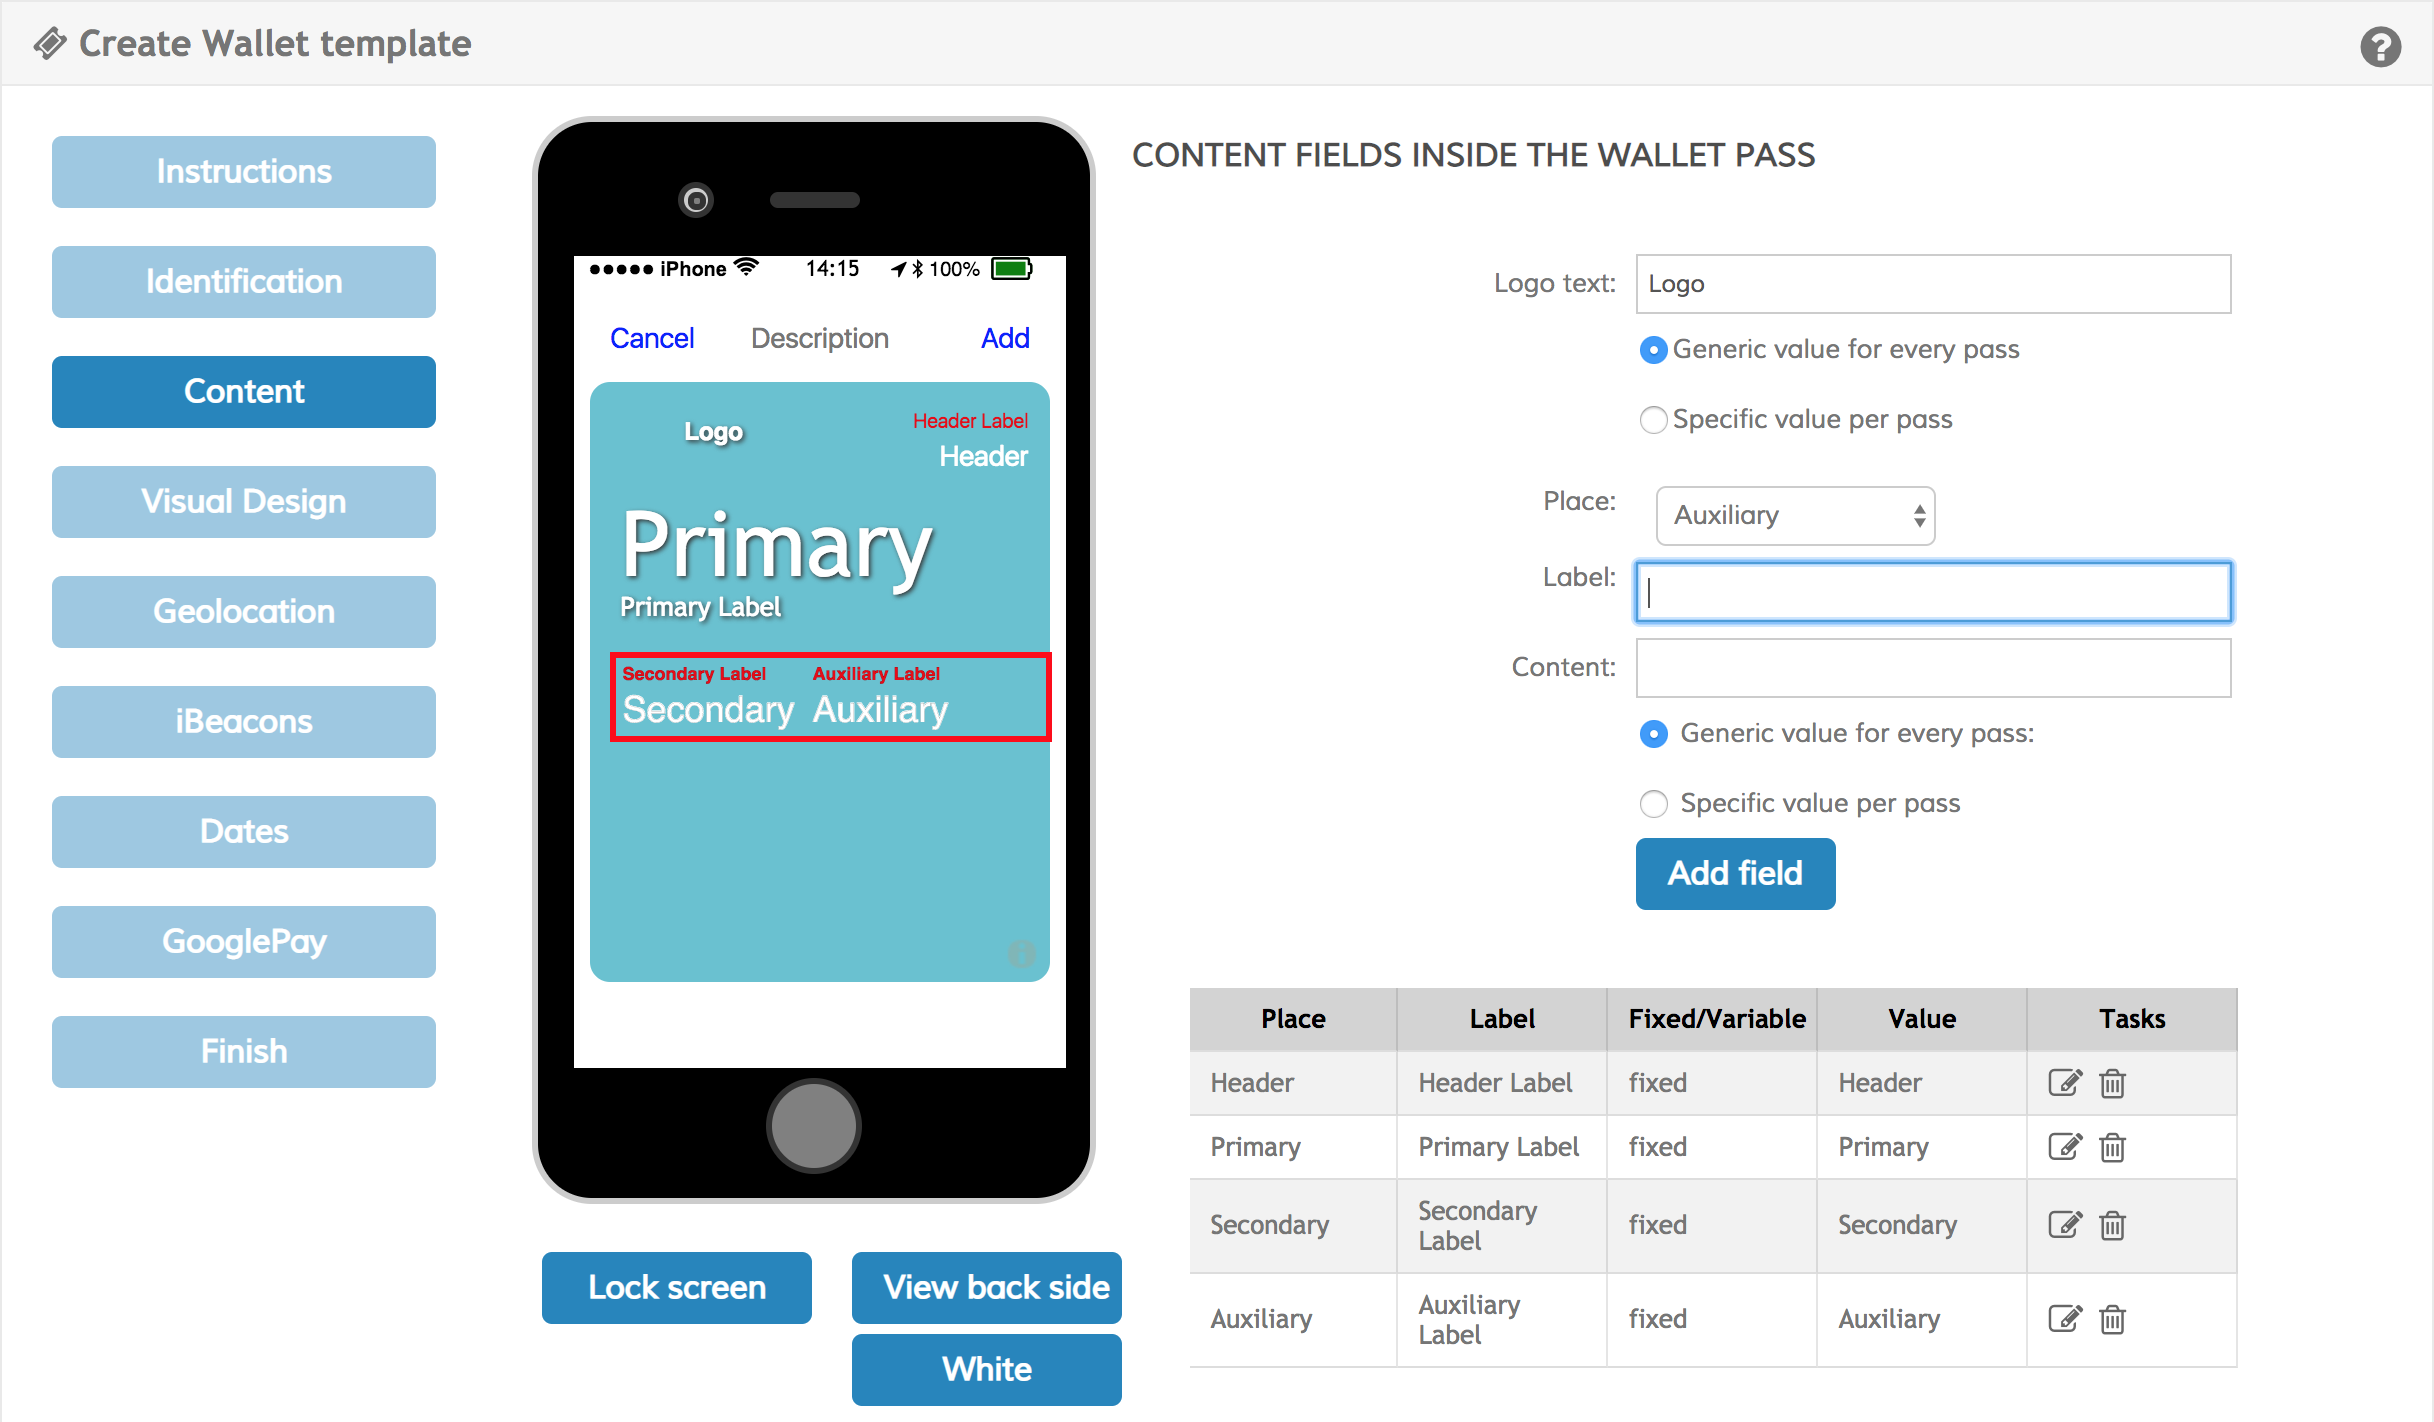
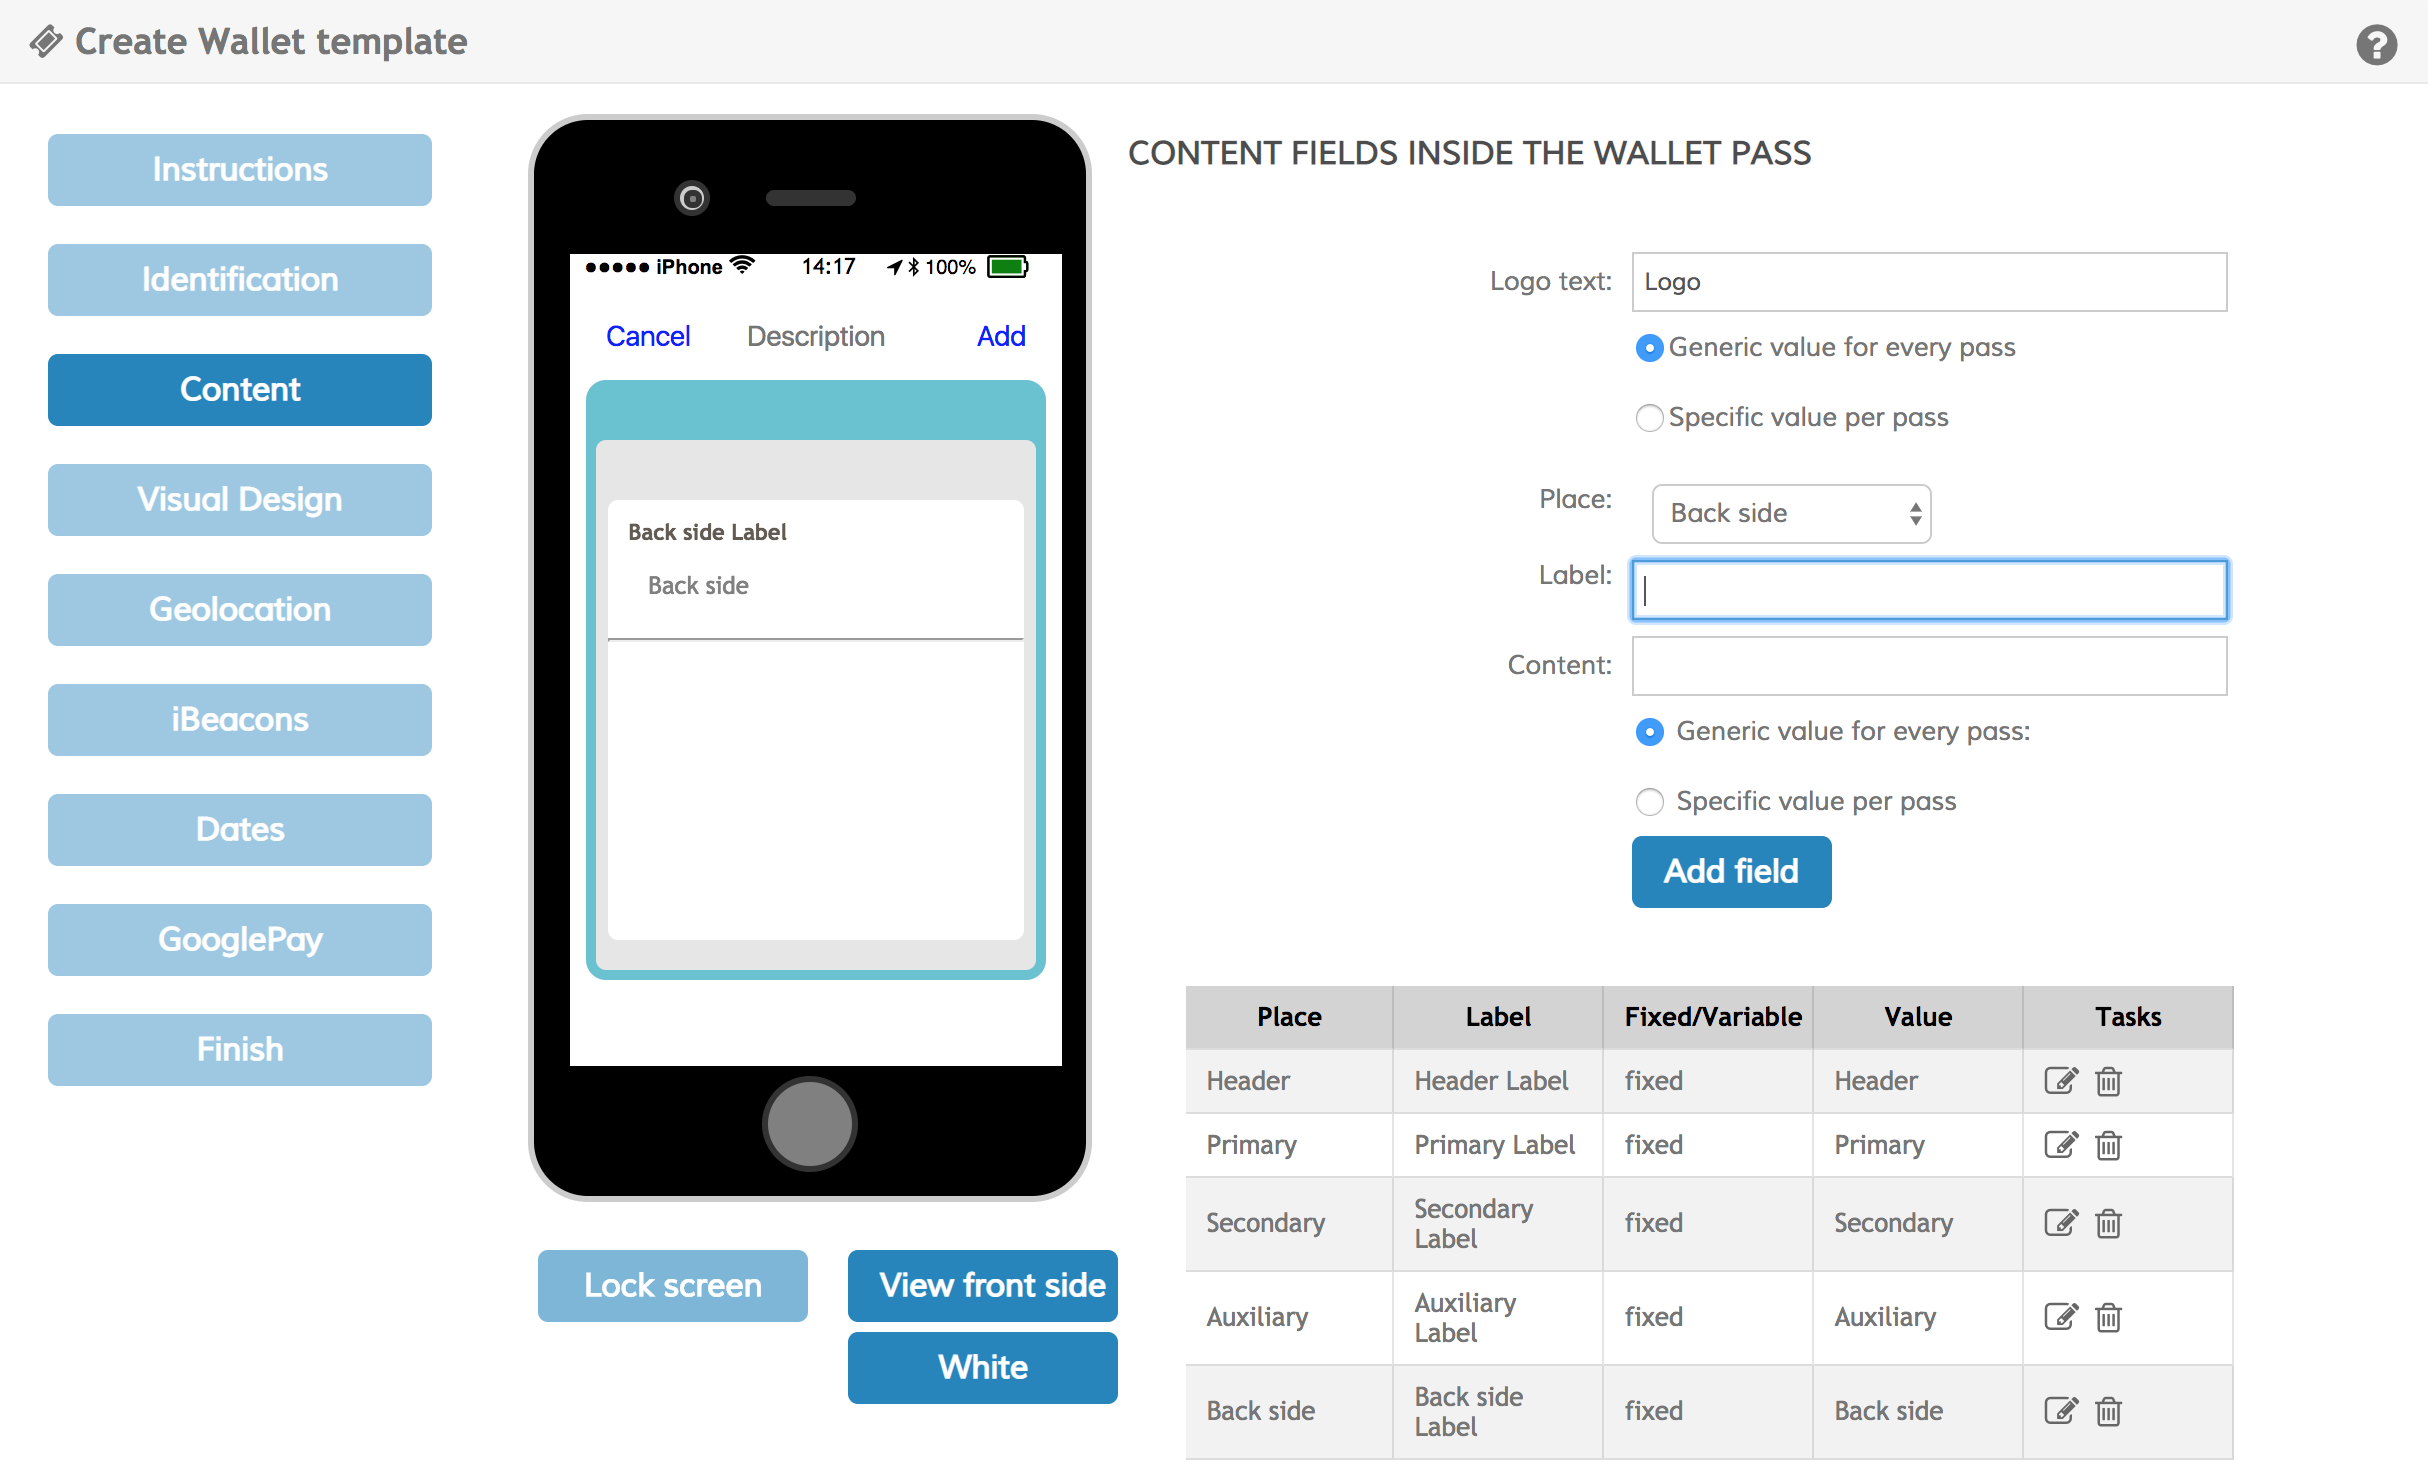
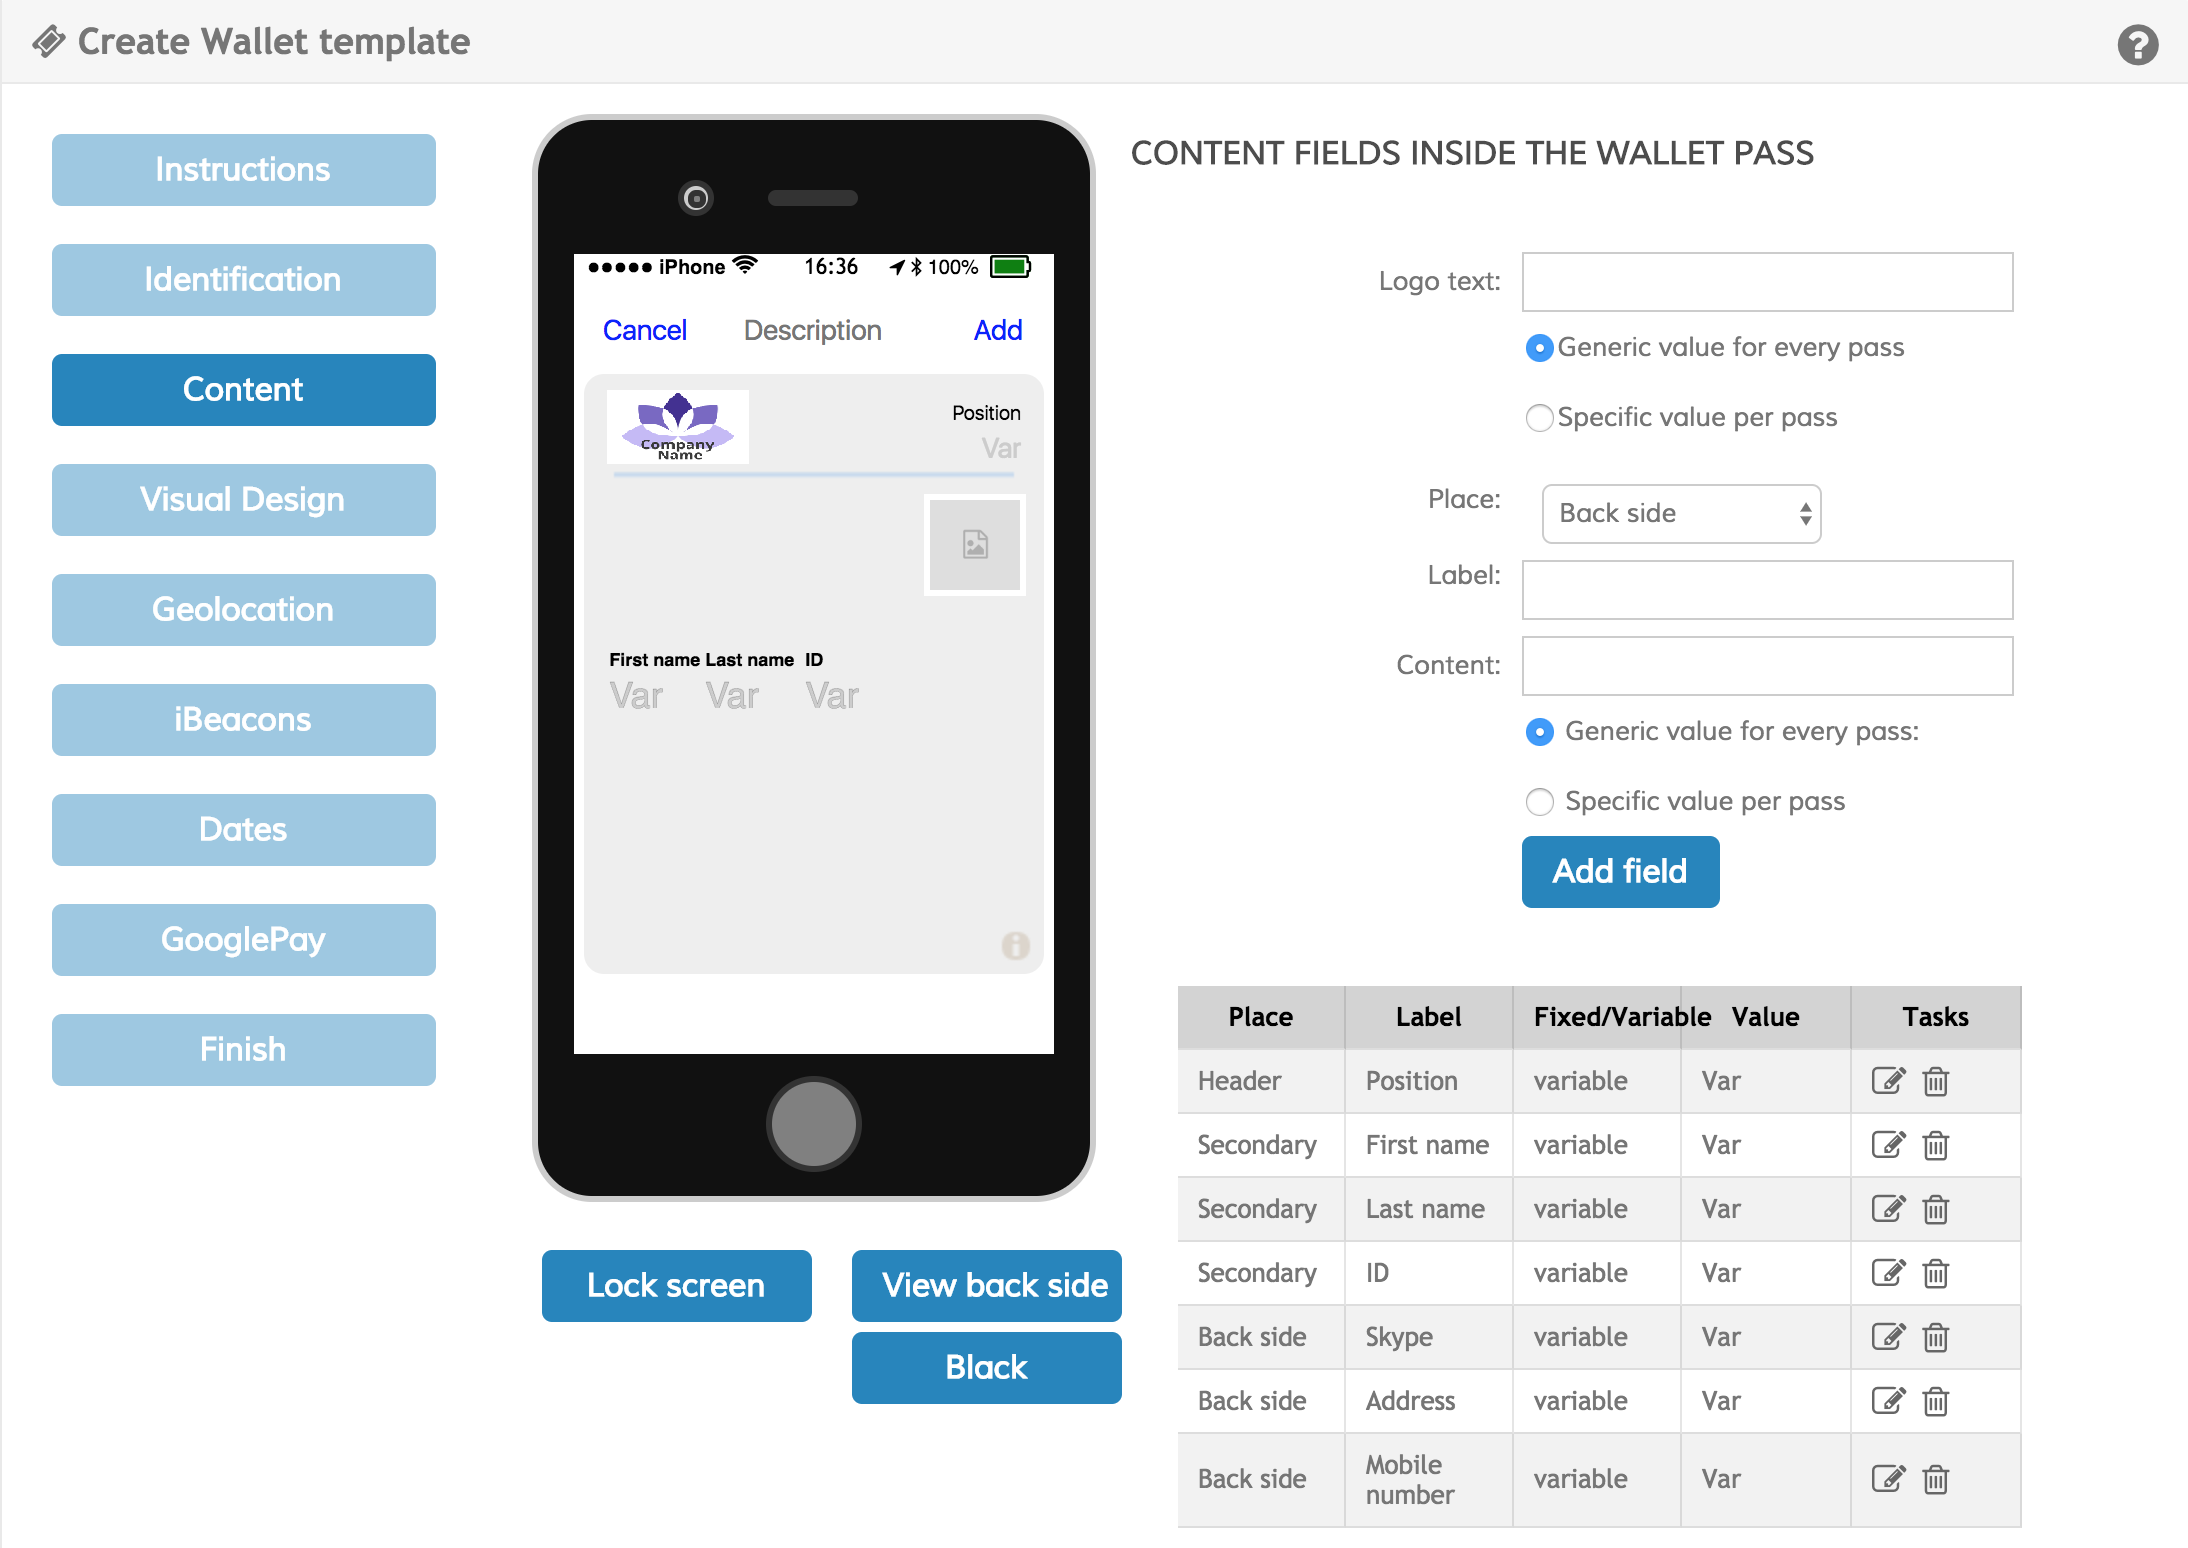
Content
In the Content tab, the text of the message that will contain the pass is established along other content options.
| Field | Description |
|---|---|
| Logo text | Text next to the logo. Optional. |
| Place | Pass sector where you want to add the label-content pair. Places are: header , primary , secondary , auxiliary and Back side . Before adding text to the pass, you must select the location of said text. |
| Label | Label that accompanies the content. Less relevant than the content. |
| Content | Content of the field that you want to add. This is more relevant than the label. The content can be a general message for all passes, or it can be a personalized message. If you want to customize, you must select the Specific value per pass option, otherwise, leave the default value Generic value for every pass . |
Click on the Add field button to register the field in the pass. You will see the result on the mobile phone simulator screen.
To see how back side fields look, press the View back side button.
To return to the front, click on the View front side button. Each content field has associated edit and delete actions.
When you want to modify a content field, click on the icon with the pencil to modify that field (the field row will be highlighted in yellow). Once you finish editing the selected field, click on the Add field button to update the changes in the form and in the template.
If you want to delete a field from the content, press the delete icon. The element will disappear from the table and from the phone simulator.
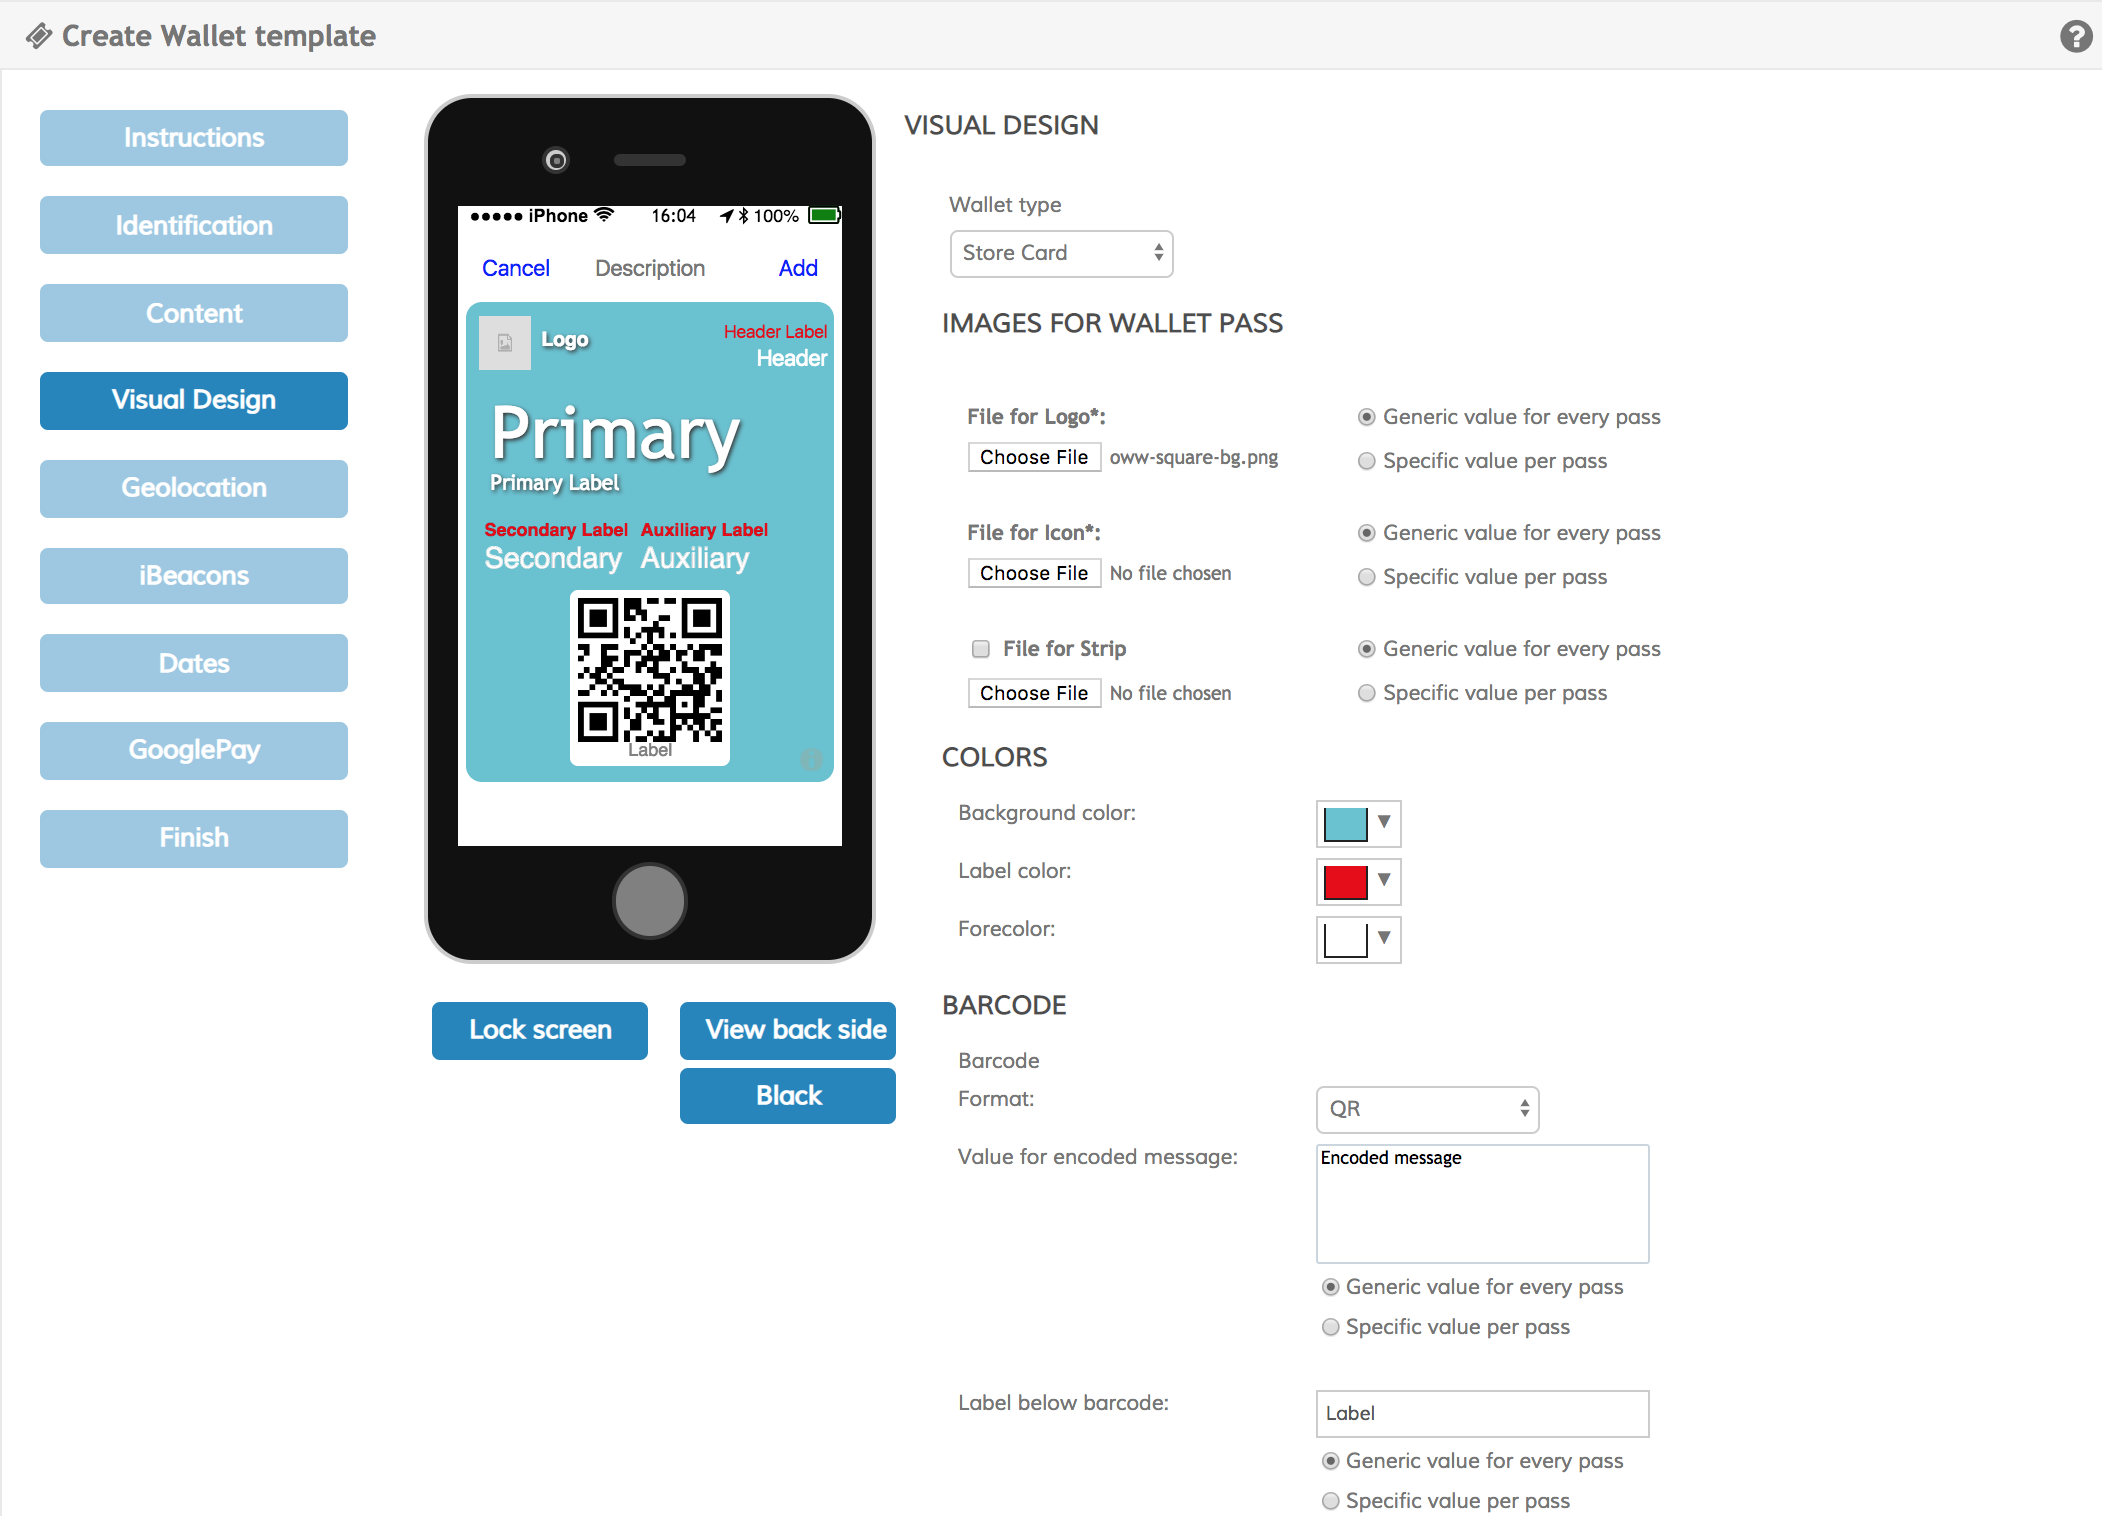
Visual Design
In the Visual Design tab, the type of wallet, colors, images and encoded message are configured.
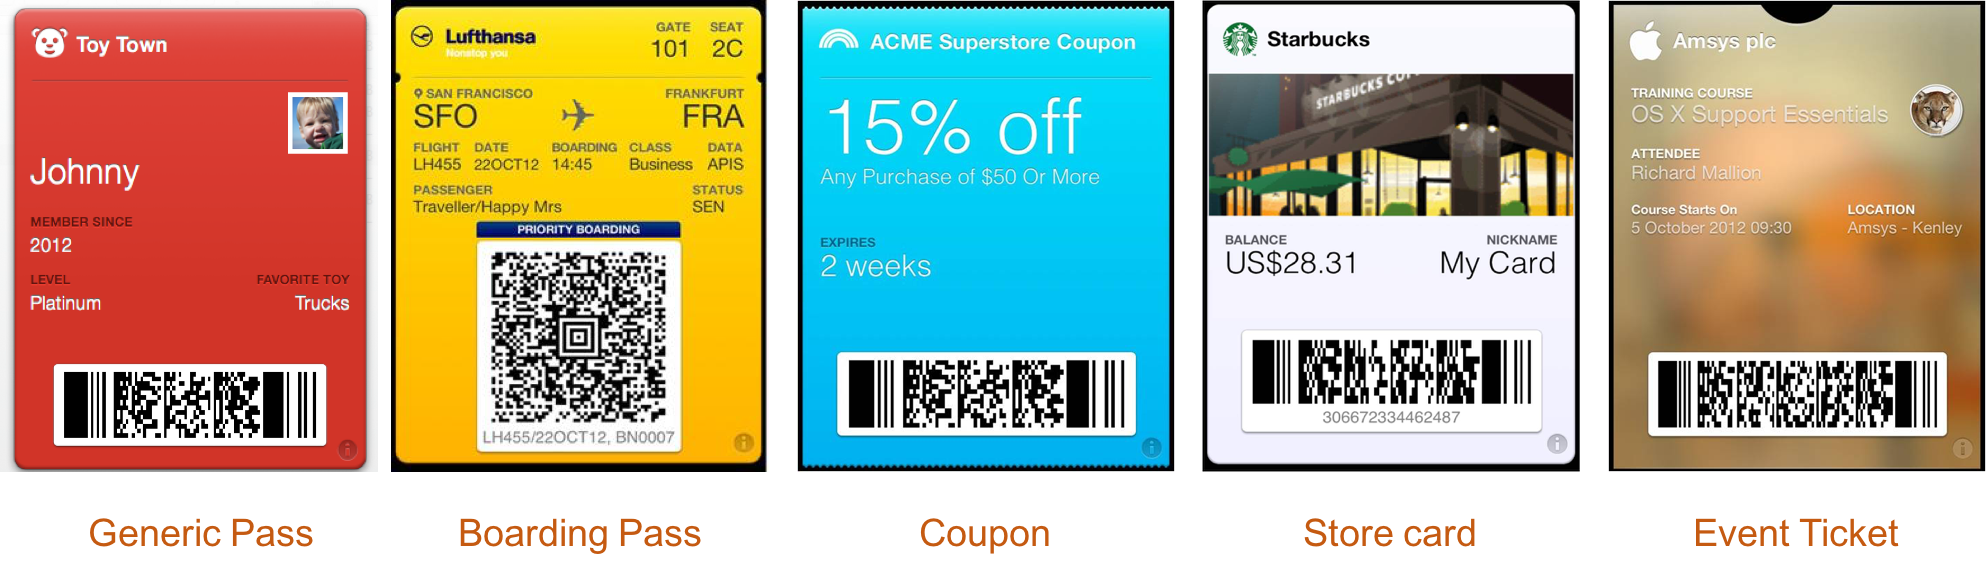
| Wallet Type | There are five types of Wallet Passes:store cards, boarding passes, coupons, event tickets and generic (general purpose). |
| Within boarding passes, you can select between: Air, boat, bus, generic or train. |
Images of the pass depend on the type of wallet:
| Logo | Icon | Footer | Strip | Background | Thumbnail | |
|---|---|---|---|---|---|---|
| Boarding ticket | X | X | X | |||
| Coupon | X | X | X | |||
| Shopping card | X | X | X | |||
| Entry to Event | X | X | X | X | X | |
| Generic Pass | X | X | X |
Both the logo and icon are mandatory, other images are optional. To use an optional image, simply select the corresponding check box. Images you upload can be any visual size and up to 10 MB in file size. In the process of creating the template, your images will be scaled (preserving the aspect ratio) to fill their allocated space. Images with a different aspect ratio to their assigned space are trimmed after scaling. As a reference only, space is assigned as follows:
- The Background image is displayed behind the entire front of the pass. Expected dimensions are 180 x 220 points.
- The Footer image is shown near the barcode. Allocated space is 286 x 15 points.
- The icon is displayed when a pass is displayed on the blocking screen, or when applications such as Email indicate that a pass is attached to an email. The icon must measure 29 x 29 points.
- The logo image is shown in the upper left corner of the pass, next to the logo text. Assigned space is 160 x 50 points; In most cases, it should be narrower.
- The Strip image is displayed behind the main fields. Assigned varies with each device: On iPhone 6 and later: Assigned space is 375 x 98 points for event tickets, 375 x 144 points for gift cards and coupons, and 375 x 123 in all other cases. On older hardware The allotted space is 320 x 84 points for event tickets, 320 x 110 points for other pass styles with a square barcode on devices with 3.5 inch screens, and 320 x 123 in all other cases.
- The Thumbnail image is displayed next to the fields on the front of the pass. Assigned space is 90 x 90 points.
The Background color applies only if there is no background image. You can adjust the color of labels and contents of fields with the color selectors Label color and Forecolor respectively.
There are four types of bar codes available in Wallet: QR, PDF-417, Aztec and Code128. The image below shows these types:


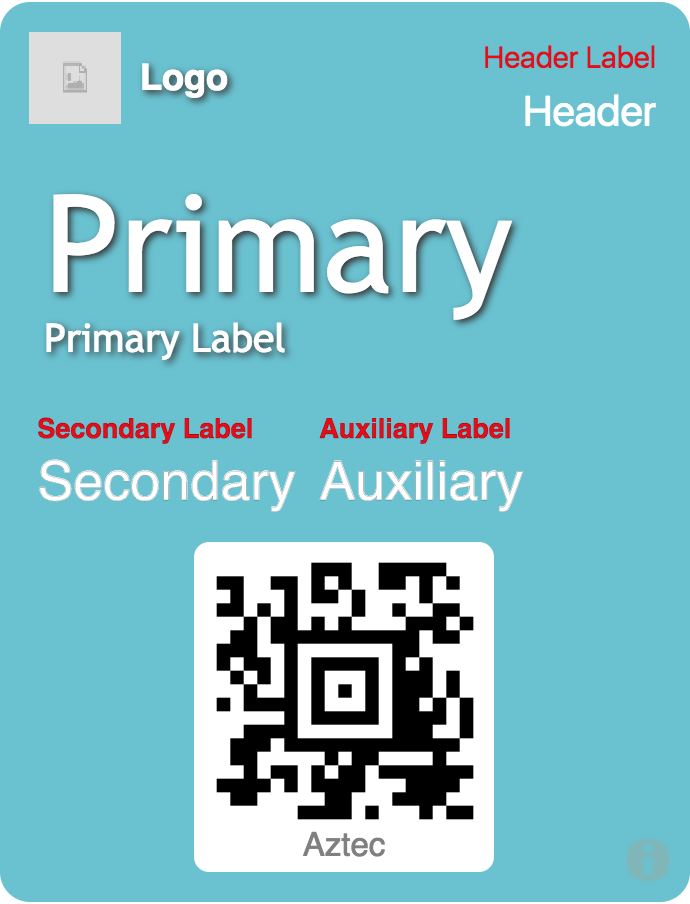
Any kind of text can be stored in the barcode, with the exception of Code128 barcodes, which have a limited charset and do not support Unicode characters in their content. If you want to add a bar code message, select the type of bar code you want to use, write the content and label with general information for all the passes or allowing it to be variable, verifying the specific value per pass.
Geolocation
In the Geolocation tab you can add up to ten different locations associated with a pass.
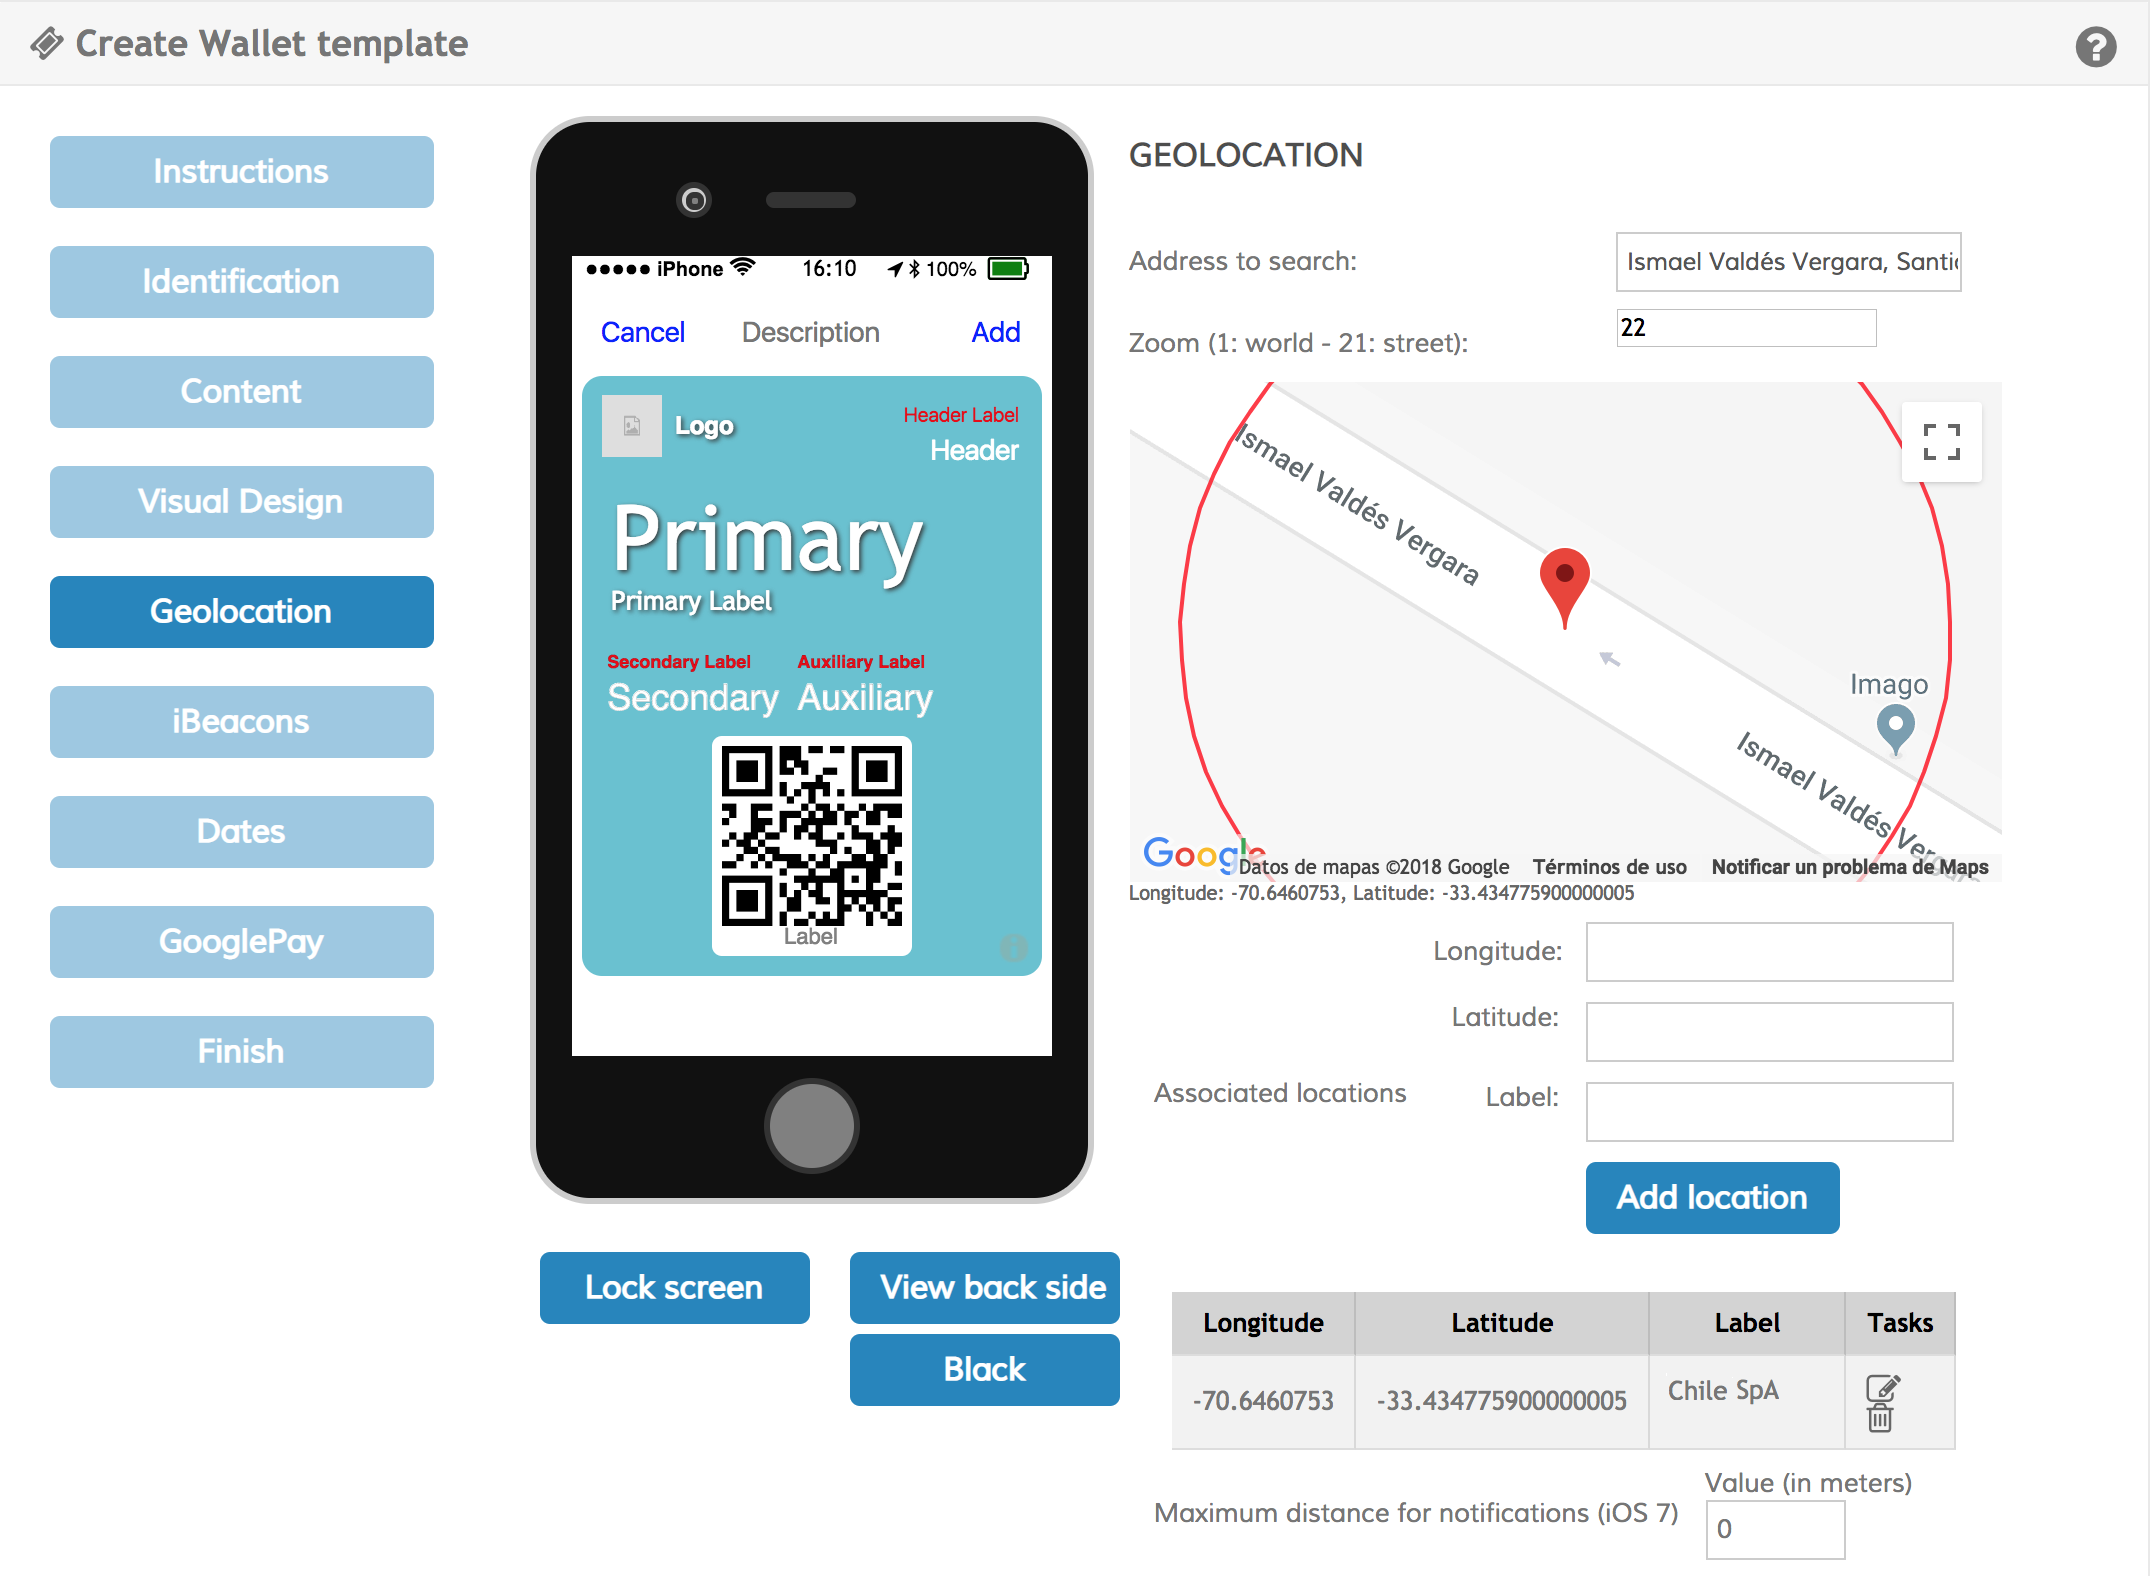
Use the Google Maps widget to locate the place you want to attach by typing your address in the Address to search text box, or look for it by browsing directly on the interactive map. Once you are in the right place, click the Label text box and write a label for that location. Click Add location to attach it to the pass. If you want to edit a location, click on the edit button or, if you want to delete it, click on the delete button.
As a general strategy to get the right address, write a known place of reference and then move to your desired location; Use the red circle in the middle of the map to verify that you are focusing in the right place. If you want to set the maximum distance to receive notifications from one location, in the Maximum distance for notifications box and set a non-zero integer number (valid only for iOS 7).
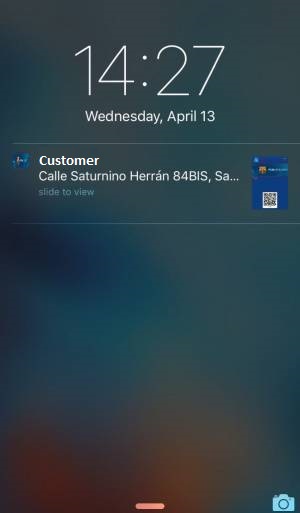
Once a pass is delivered to and downloaded in the user's device, it will be activated and appear at the lock screen when the user arrives at a location associated with the pass.
IBeacons
In the IBeacons tab you can add up to ten different IBeacons associated with a pass.
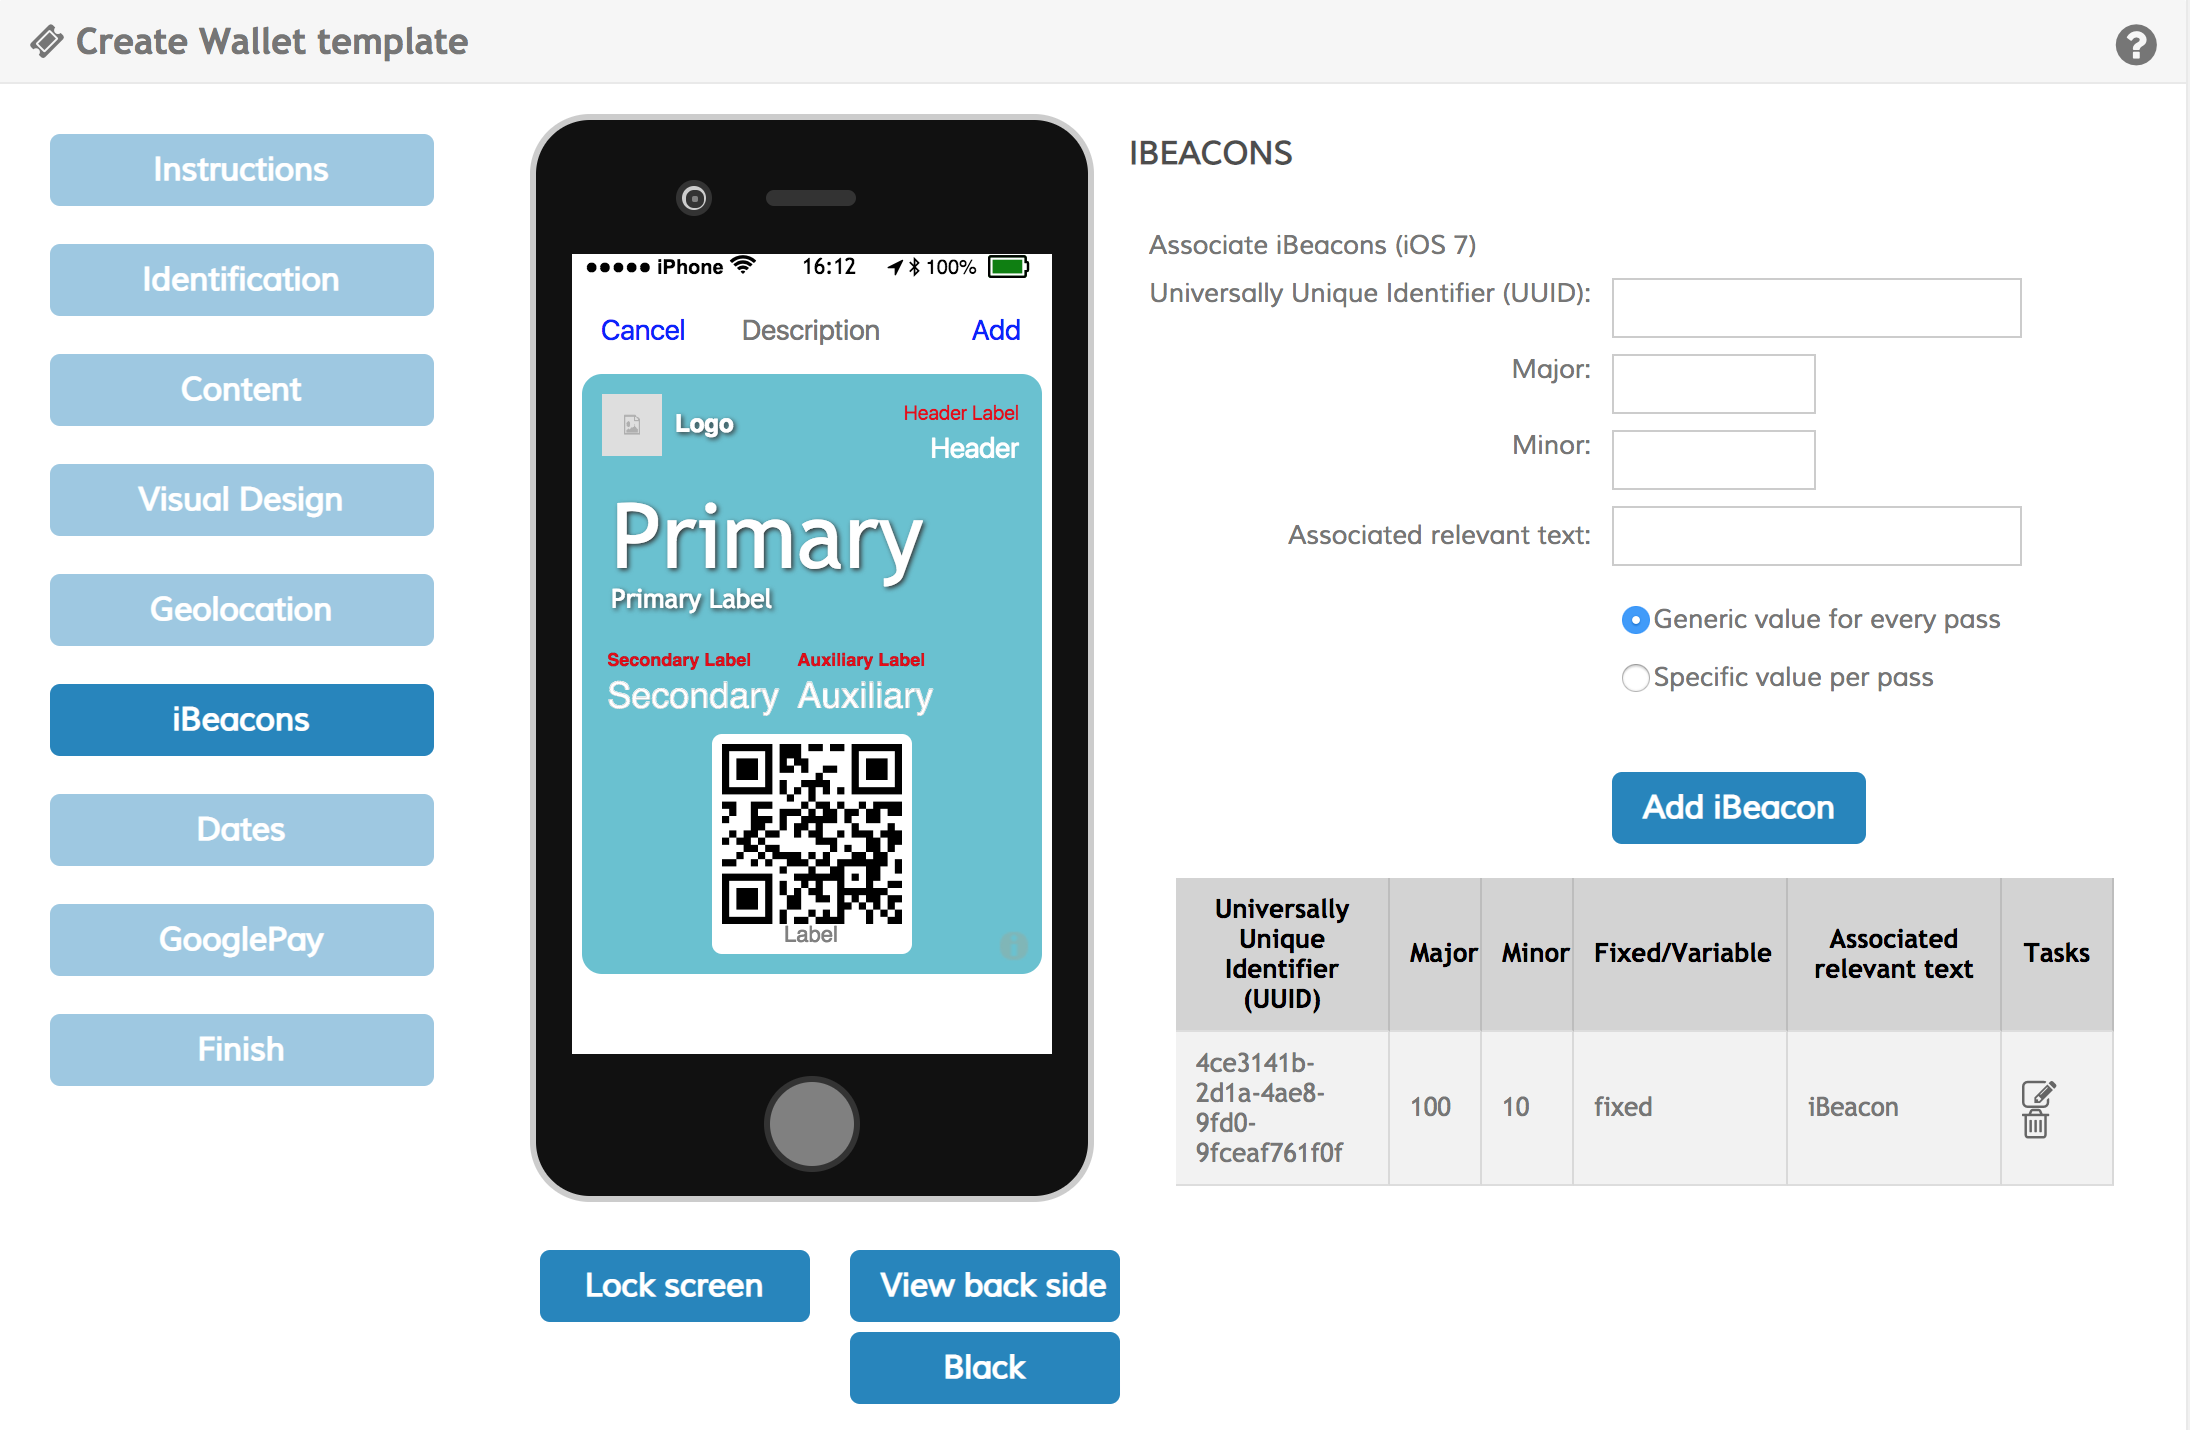
Each iBeacon has a universal unique identifier (UUID) related to the device owner company, a Major number to identify subsidiaries of the company, that is, branches, stores, resellers, etc. and finally a Minor number to identify small places in the interior, i.e. departments, sections, etc. For the Associated relevant text you can write a generic message for each pass or set it as a specific value per pass.
Dates
In the Dates tab, you can set relevant or expiration dates.
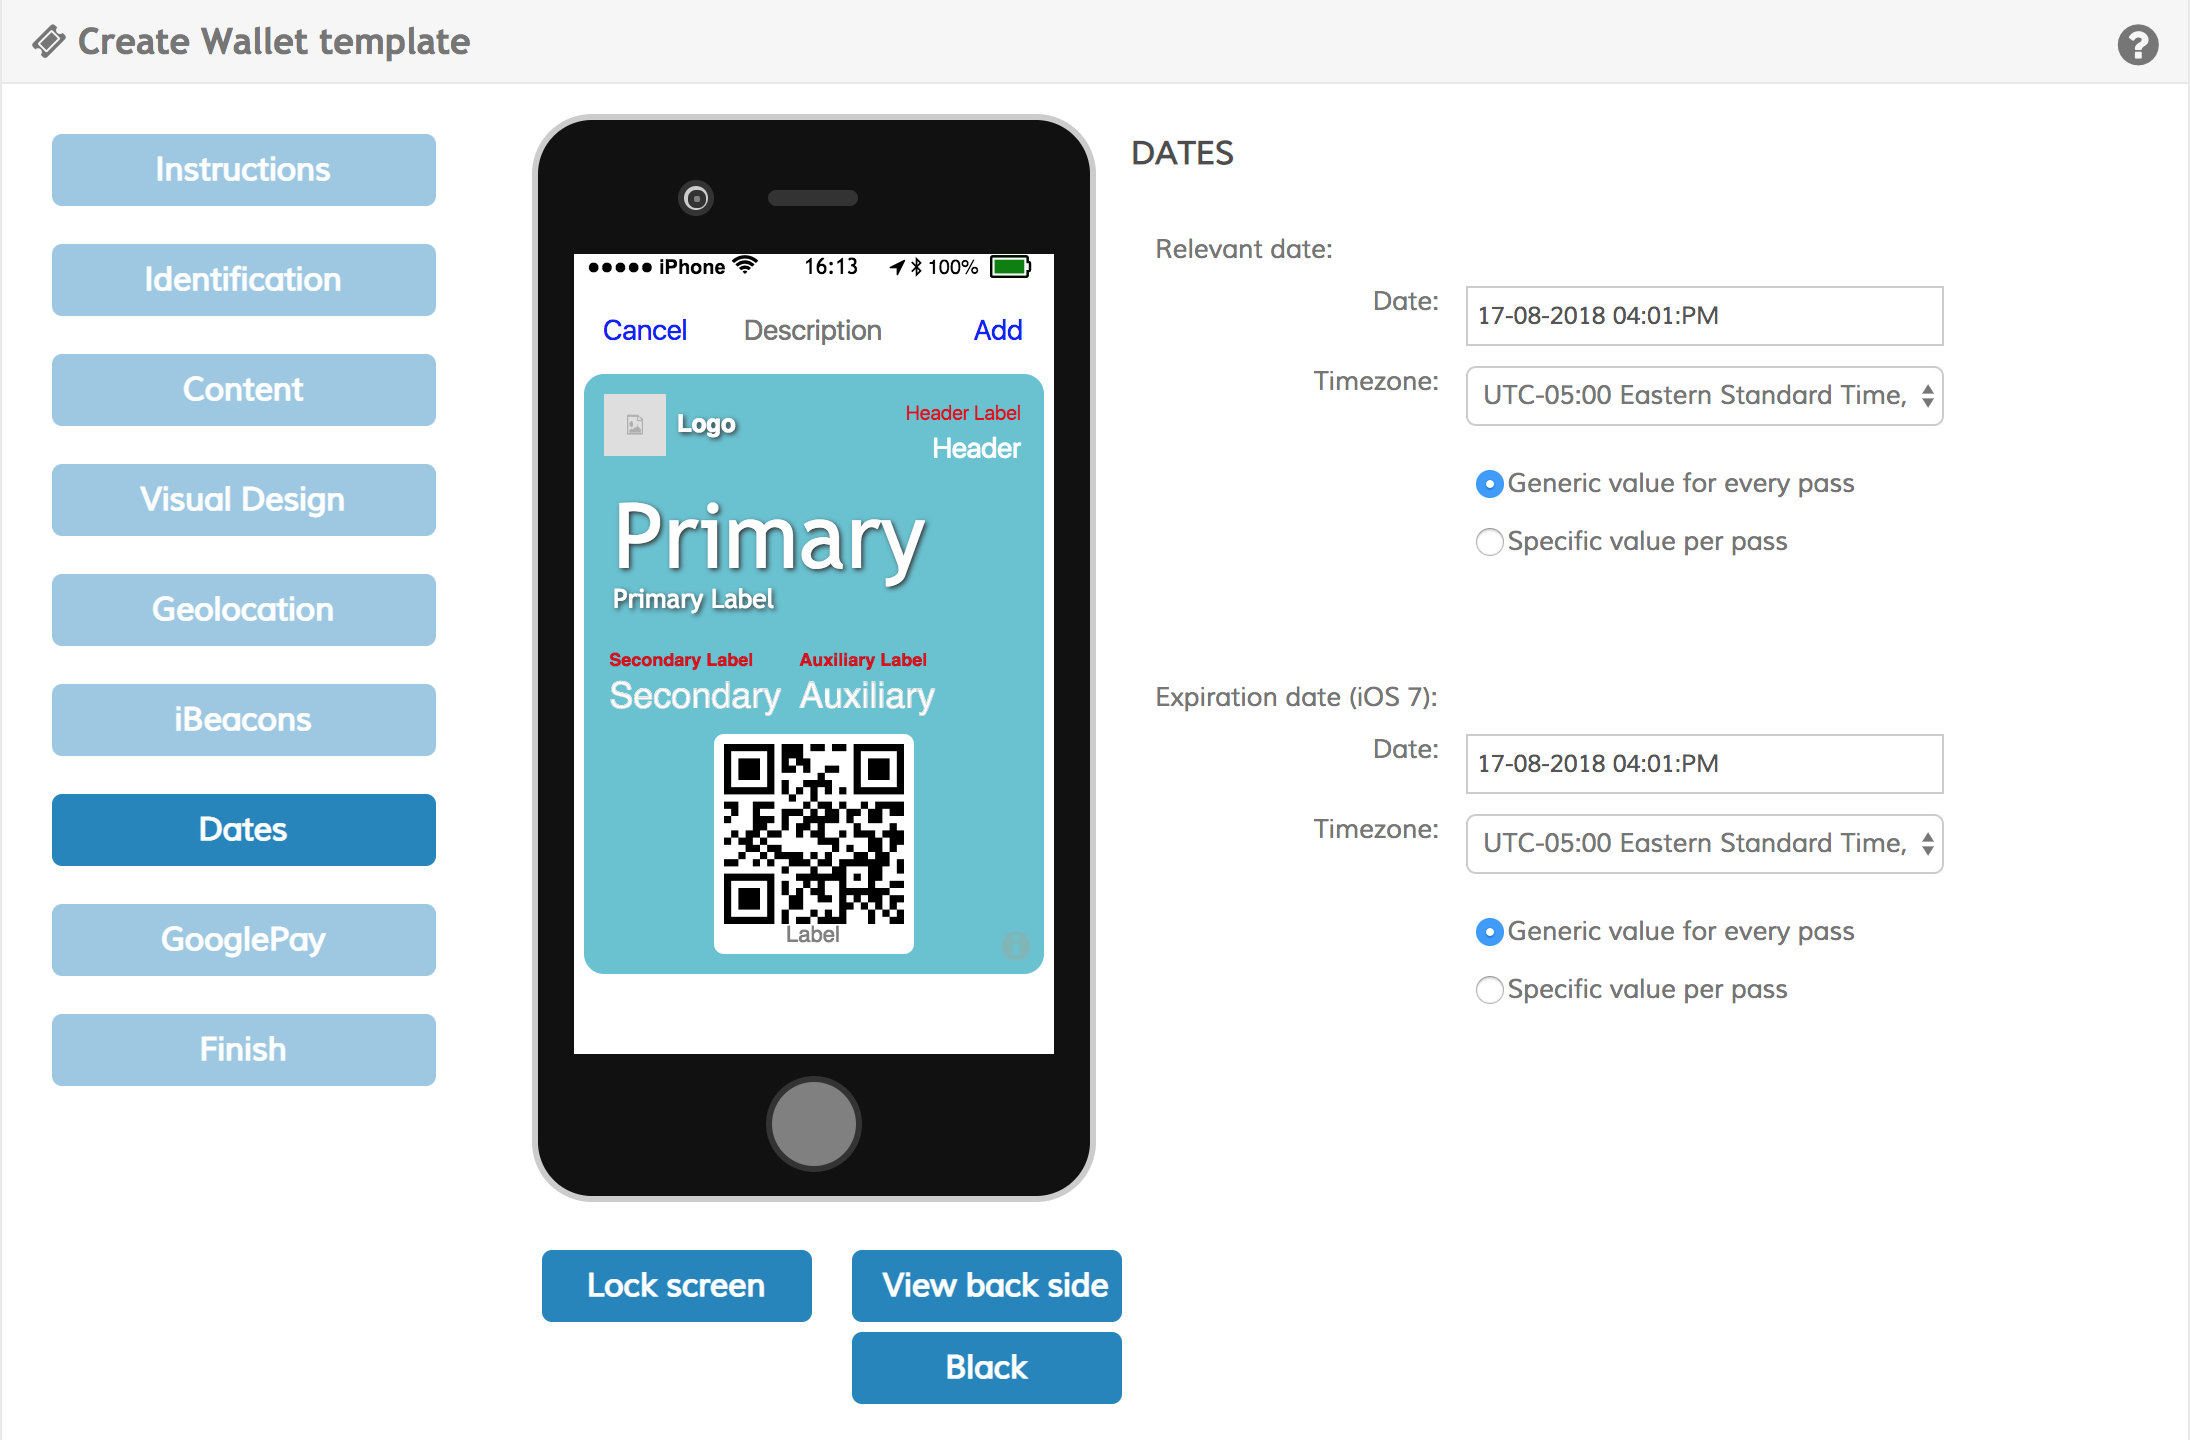
A relevant date is the date and time the pass is most important or useful, eg. the flight time for a boarding pass, the time of the concert for an event ticket, the day of offer for a day coupon, etc.
The expiration date tells the pass its validity is canceled, then the wallet deletes its bar code and places a label on it “ The pass is no longer valid ”. An expiration date does not mean the pass will be deleted . The pass will remain in the wallet since only end users can remove passes from their wallet application.
These dates can be customized by user, or you can set general dates for all passes. Use the time zone to specify the local time where it applies.
Google Pay
Wallet functionality in the Campaign Manager has been enhanced to support compatibility with Google's wallet/payment solution called Google Pay. The GooglePay app can be downloaded from the Play Store in these countries. This app allows the user to store and pay using his/her debit and credit cards and also store different passes, just like Apple's Wallet but with different visual layouts.
In Google Pay there are five different templates available: offers, Gift cards, event tickets, boarding passes and loyalty cards. The Wallet type you choose in the system will be translated to its Google Pay counterpart according to the following mapping:
| Wallet type | Google Pay Template |
|---|---|
| Boarding Pass | Boarding Pass |
| Coupon | Offers |
| Event Ticket | Event Ticket |
| Generic | Loyalty Card |
| Store Card | Loyalty Card |
Google Pay layouts
Not all fields shown below are translated, layouts in Google Pay have been simplified to generate passes that look as similar as possible in both platforms, using Wallet data. When making a wallet cross-platform campaign using the campaign manager put data in the right places using the rules below:
| Offers | Loyalty Card | Event Ticket | Boarding Pass |
|---|---|---|---|
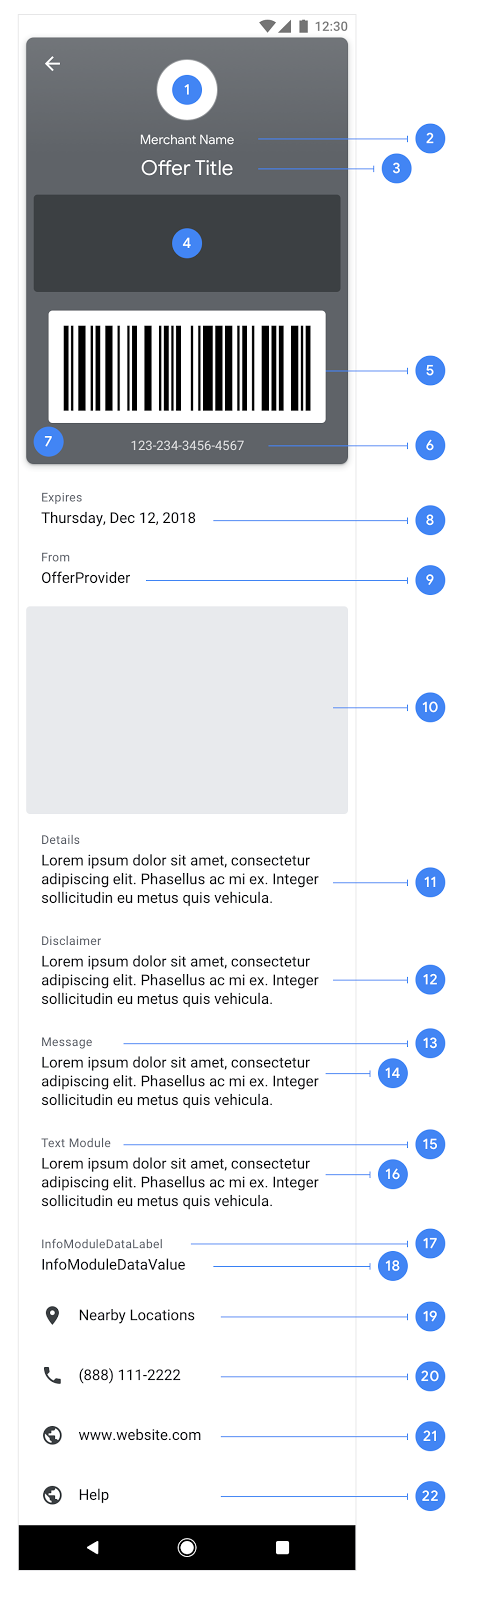
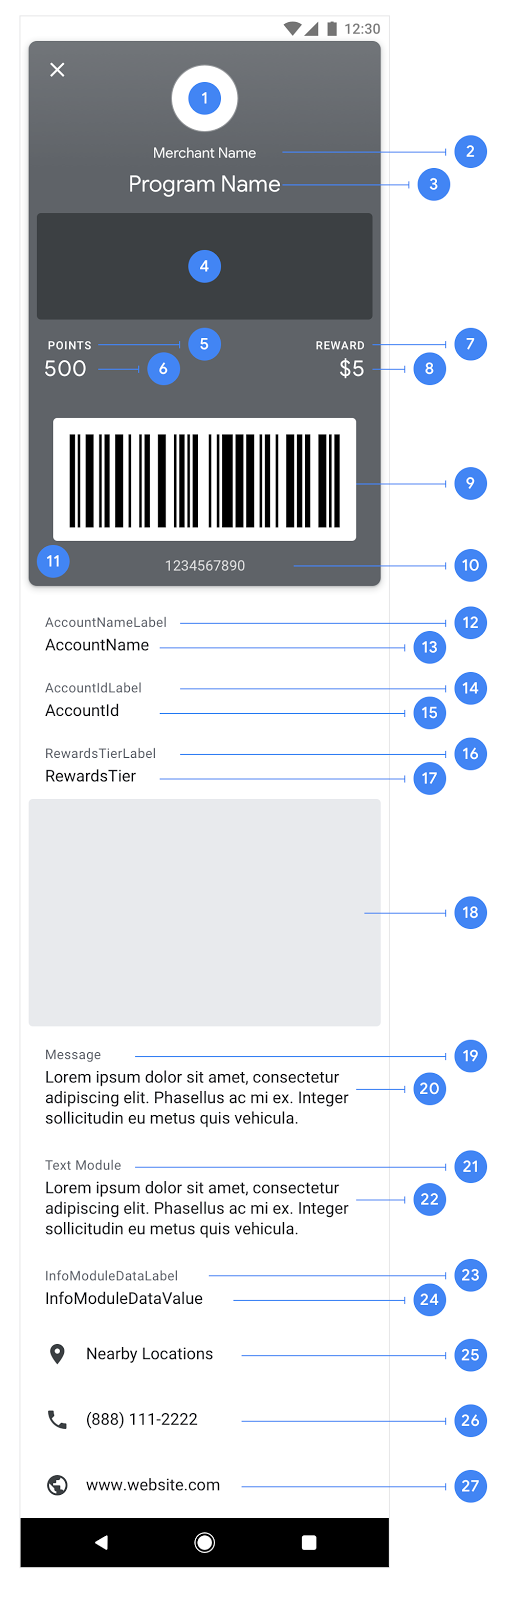
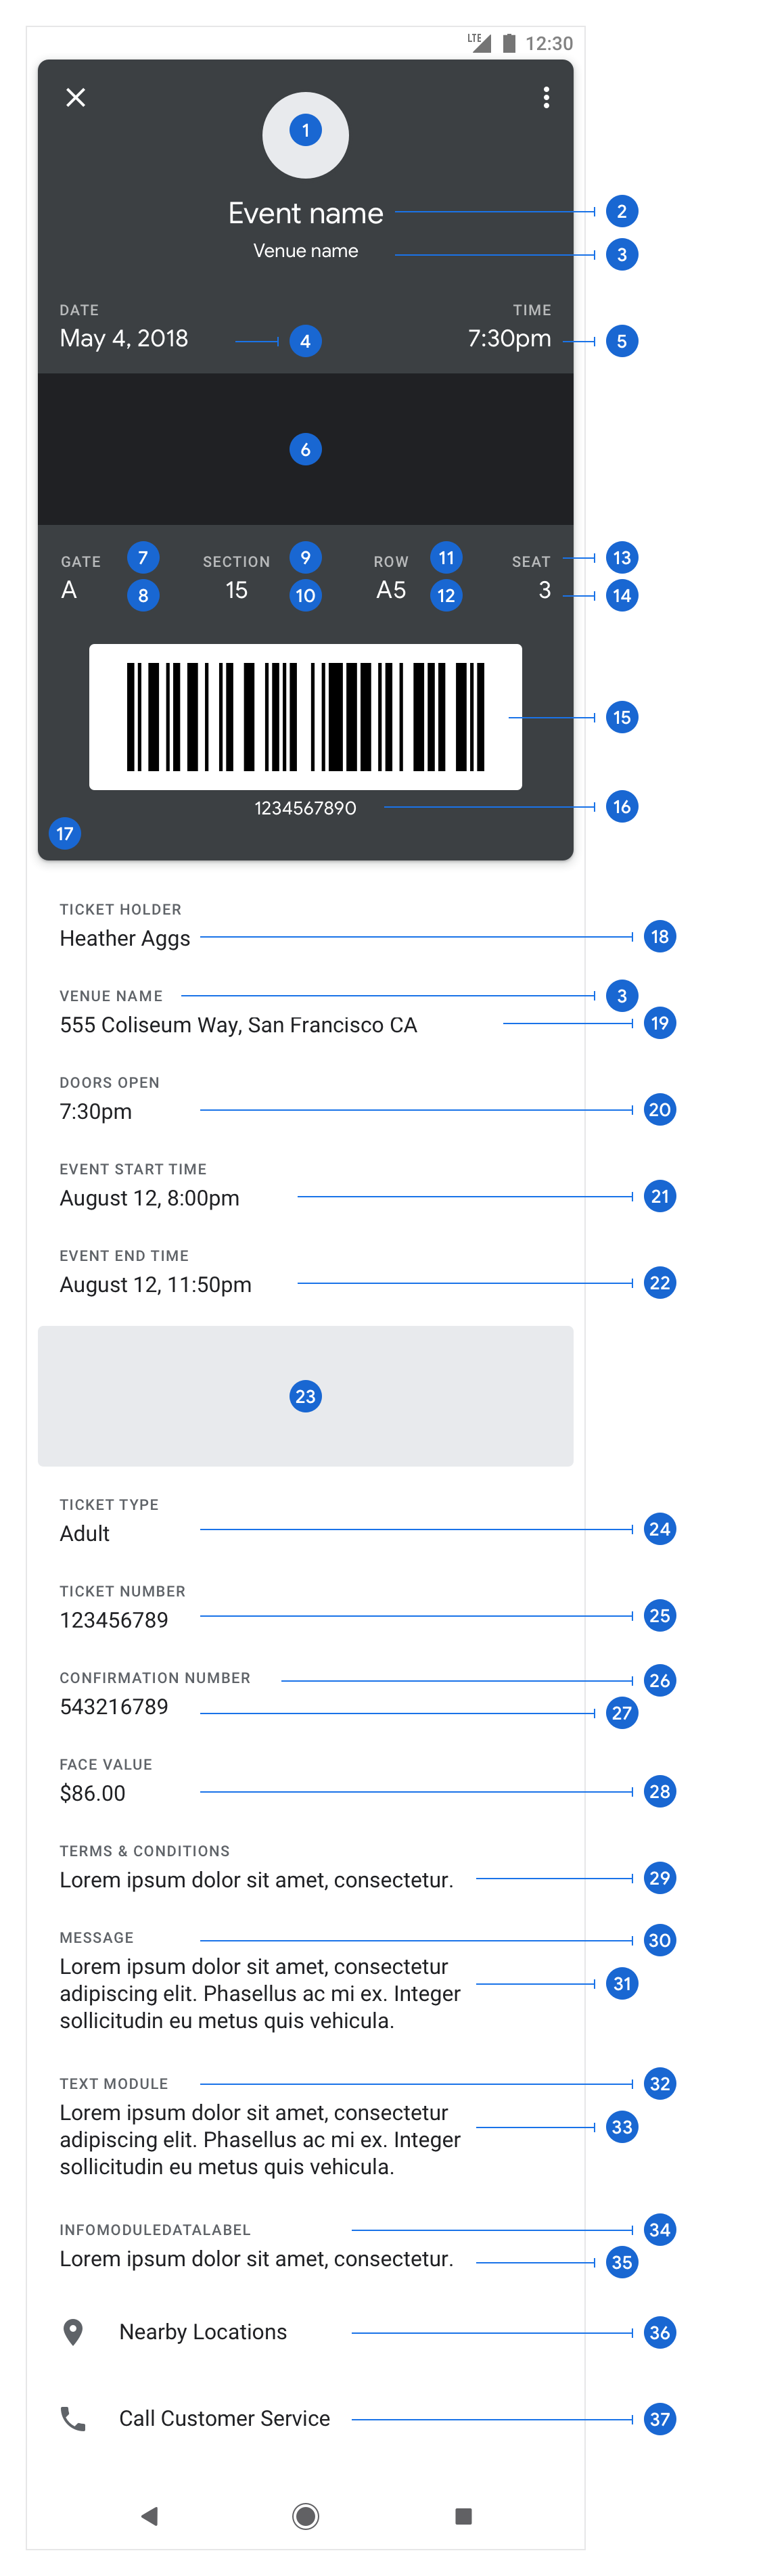
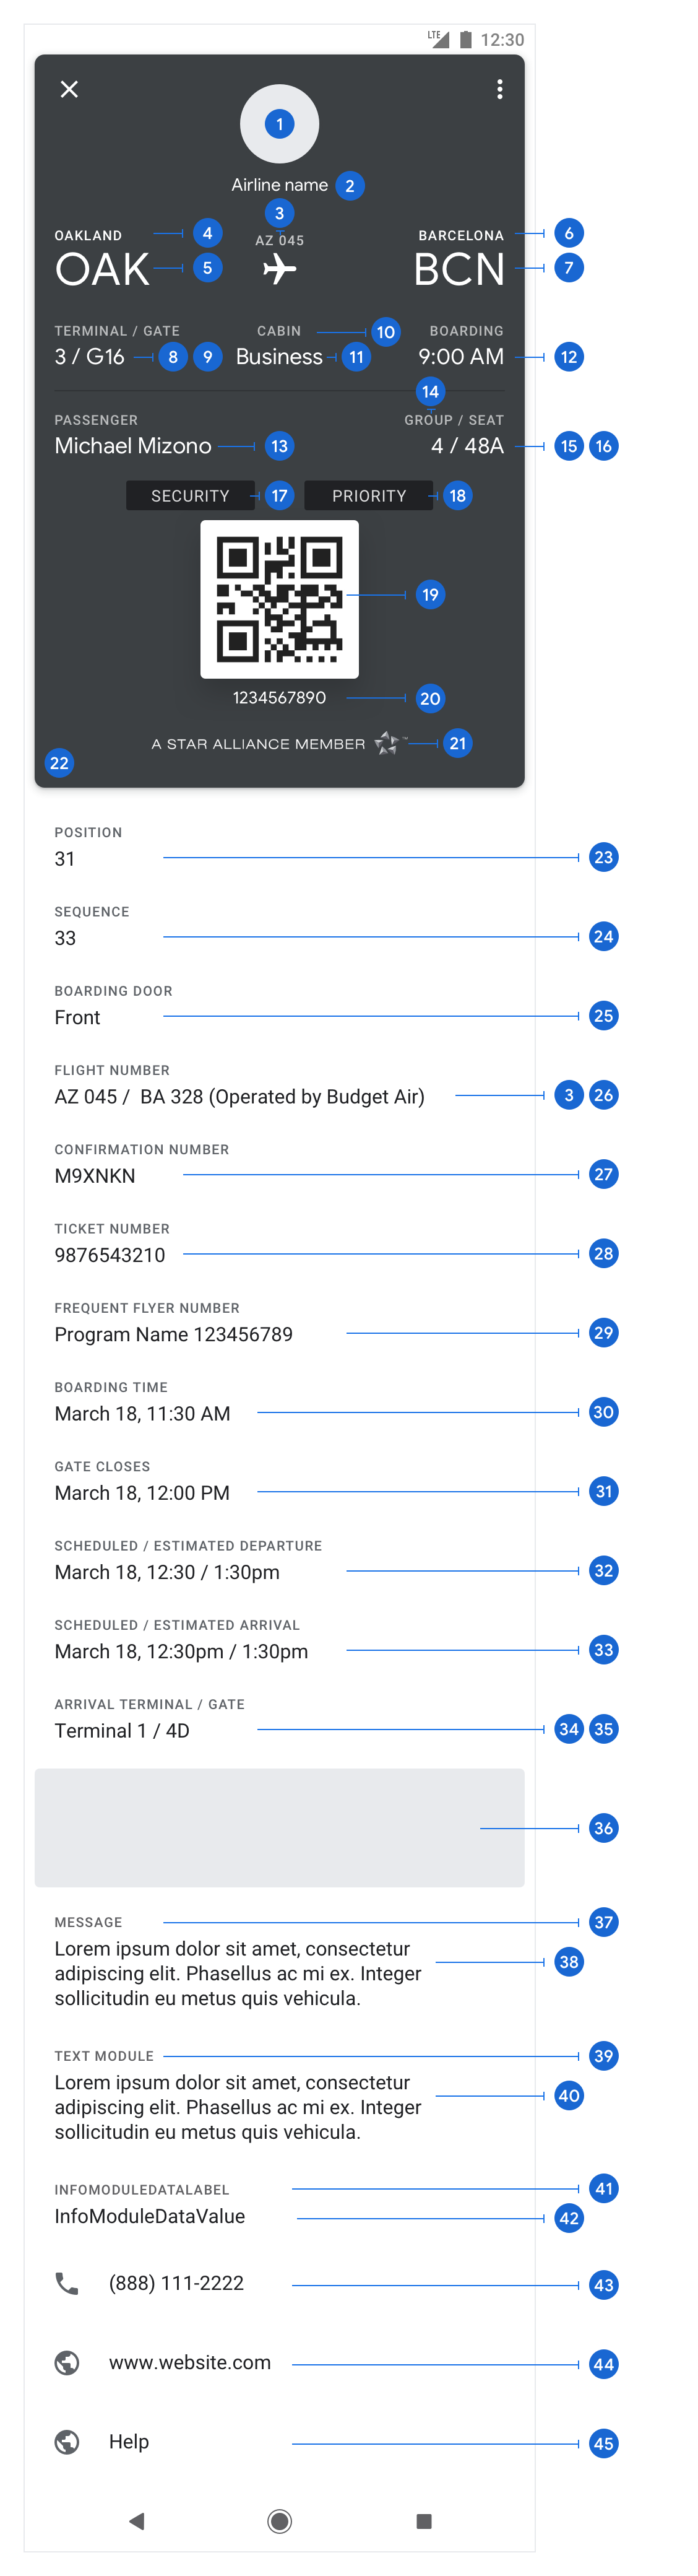
| 1. Title Image: supplied by Icon Image 2. Issuer Name: supplied by system information of your brand. 3. Title: supplied by Template name 4. Hero Image: Default supplied by strip. 5. Supplied by Barcode value. 6. Supplied by Barcode label 7. Background Color: supplied by template background color. 8. Expires: supplied by expiration date. 9. Offer provider: same as 2, 10. Main Image Supplied on Google Pay composer tab. 11. Supplied by first Back side field value. 12. Supplied by second Back side field value. 15, 16. Remaining header, primary, secondary and auxiliary labels and values. 19-21. Back fields containing links, mobilenumbers and locations with the proper syntax (shown below). | 1. Program logo: supplied by Icon Image 3. Issuer Name: supplied with system information of your brand 3. Program name: supplied by template name 4. Hero Image: Default supplied by strip or thumbnail (depending on Wallet type). 5. Points label: supplied by first primary field label 6. Loyalty points balance: supplied by the first primary field value. 9. Supplied by Barcode value. 10. Account id: supplied by first Auxiliary field value. 11. Background Color: supplied by template background color. 12. Account name label: supplied by the second secondary field label 13. Account name: supplied by the second secondary field value 14. Account id label: supplied by the first Auxiliary field label. 15. same as 10. 18. Main Image Supplied on the Google Pay composer tab. 21,22. Remaining header, primary, secondary, auxiliary labels and values. 25-27. Back fields containing links, mobilenumbers and location values with the proper syntax (shown below) | 1. Event Logo, supplied by Icon image 2. Supplied by Template Name. 3. Supplied by the first Secondary field label. 4, 5. Supplied by the first header field value. Value must be an ISO8601 formatted date time with timezone (i.e. 2019-06-28T18:00:00+01:00) 6. Hero Image. Default supplied by strip image. 7,8. Supplied by the first auxiliary field label and value, respectively. 9,10. Supplied by the second auxiliary field label and value, respectively. 11,12. Supplied by the third auxiliary field label and value, respectively. 13,14. Supplied by the fourth auxiliary field label and value, respectively. 15. Supplied by barcode. 16. Supplied by barcode label. 17. Background Color: supplied by template background color. 18. Supplied by the first Back side field value. 19. Supplied by the first Secondary field value. 20. Supplied by the third Back side field label and value. 21. Same as 4 and 5. 23. Main Image Supplied on the Google Pay composer tab. 25. Supplied by the second Back side field value. 29. Supplied by the fourth Back side field value. 32, 33. Remaining header, primary, secondary, auxiliary labels and values. 36,37. Back fields containing links, mobilenumbers and location values with the proper syntax (shown below). | 1. Airline Logo: supplied by Icon. 2. Supplied by system information of your brand. 3. Supplied by the first Header field. Label used as Airline IATA Code, value used as Flight Number. 4, 5. Supplied by Origin Airport Name and IATA Code set in the Google Pay composer tab. 6,7. Supplied by Destination Airport Name and IATA Code set in the Google Pay composer tab. 8. Supplied by the first Secondary field Value. 9. Supplied by the second Secondary field value. 11. Supplied by the third Secondary field label. 13. Supplied by first Auxiliary field value. 16. Seat number supplied by third Secondary field value. 19. Supplied by barcode. 20. Supplied by barcode label. 22. Background color: supplied by template background color. 26. Same as 3. Field value used as flight number. 27. First Back side field value. 32. Departure time set in the Google Pay composer tab. 34. Taken from the second Back side field value. 35. Taken from the third Back side field value. 36. Main Image supplied on the Google Pay composer tab. 39, 40. Remaining header, primary, secondary, auxiliary labels and values. 43,44,45. Back fields containing links, mobilenumbers and location values with the proper syntax (shown below). |
Any locations available in the Wallet template are added to the Google Pay card. Links shown at the bottom are mapped exclusively from back side fields that use one of the following prepends in their value:
| Link Type | Prepend syntax |
|---|---|
| URLs | http*{your url} |
| Google Maps locations | maps:{location name} |
| Phone numbers | tel:{phone_number} |
| Emails addresses | mailto:{email} |
By using these prepends, links are added in fields as follows:

These prepends are used only for translation and will not appear on fields in Apple passes.
Differences and similarities between Wallet and Google Pay
Both wallet apps allow to store passes with text, images, barcodes and metadata. In the following table are listed the characteristics and constraints of them
| Feature | Wallet | Google Pay |
|---|---|---|
| Colors | Set by user | Background color set by user, others are set by the app based on background, or using the title image's main color (non-black, non-white) |
| Barcode Formats | QR, PDF417, Code128 and Aztec, optional | Same of Wallet will be used, optional |
| Geolocation metadata | Available, up to 10 locations per pass | Available, no limit per pass |
| iBeacon metadata | Available, up to 10 iBeacons per pass | NOT AVAILABLE |
| Images | From 2 up to 5 (depending on the template) | 1 up to 3 |
| Visual orientation | Vertical | Vertical |
| Storage | Device's internal memory | Cloud, linked with recipients' Gmail accounts |
| Expiration date | Available in all templates, optional | Available in all templates, optional |
| Relevant date | Available in all templates, optional | Departure Date in boarding passes, Event Start Date on Event Tickets |
| Digital signing | Applied, using Apple WWDRCA and .p12 Certificate | Applied, using .p12 Certificate |
Activate Translation
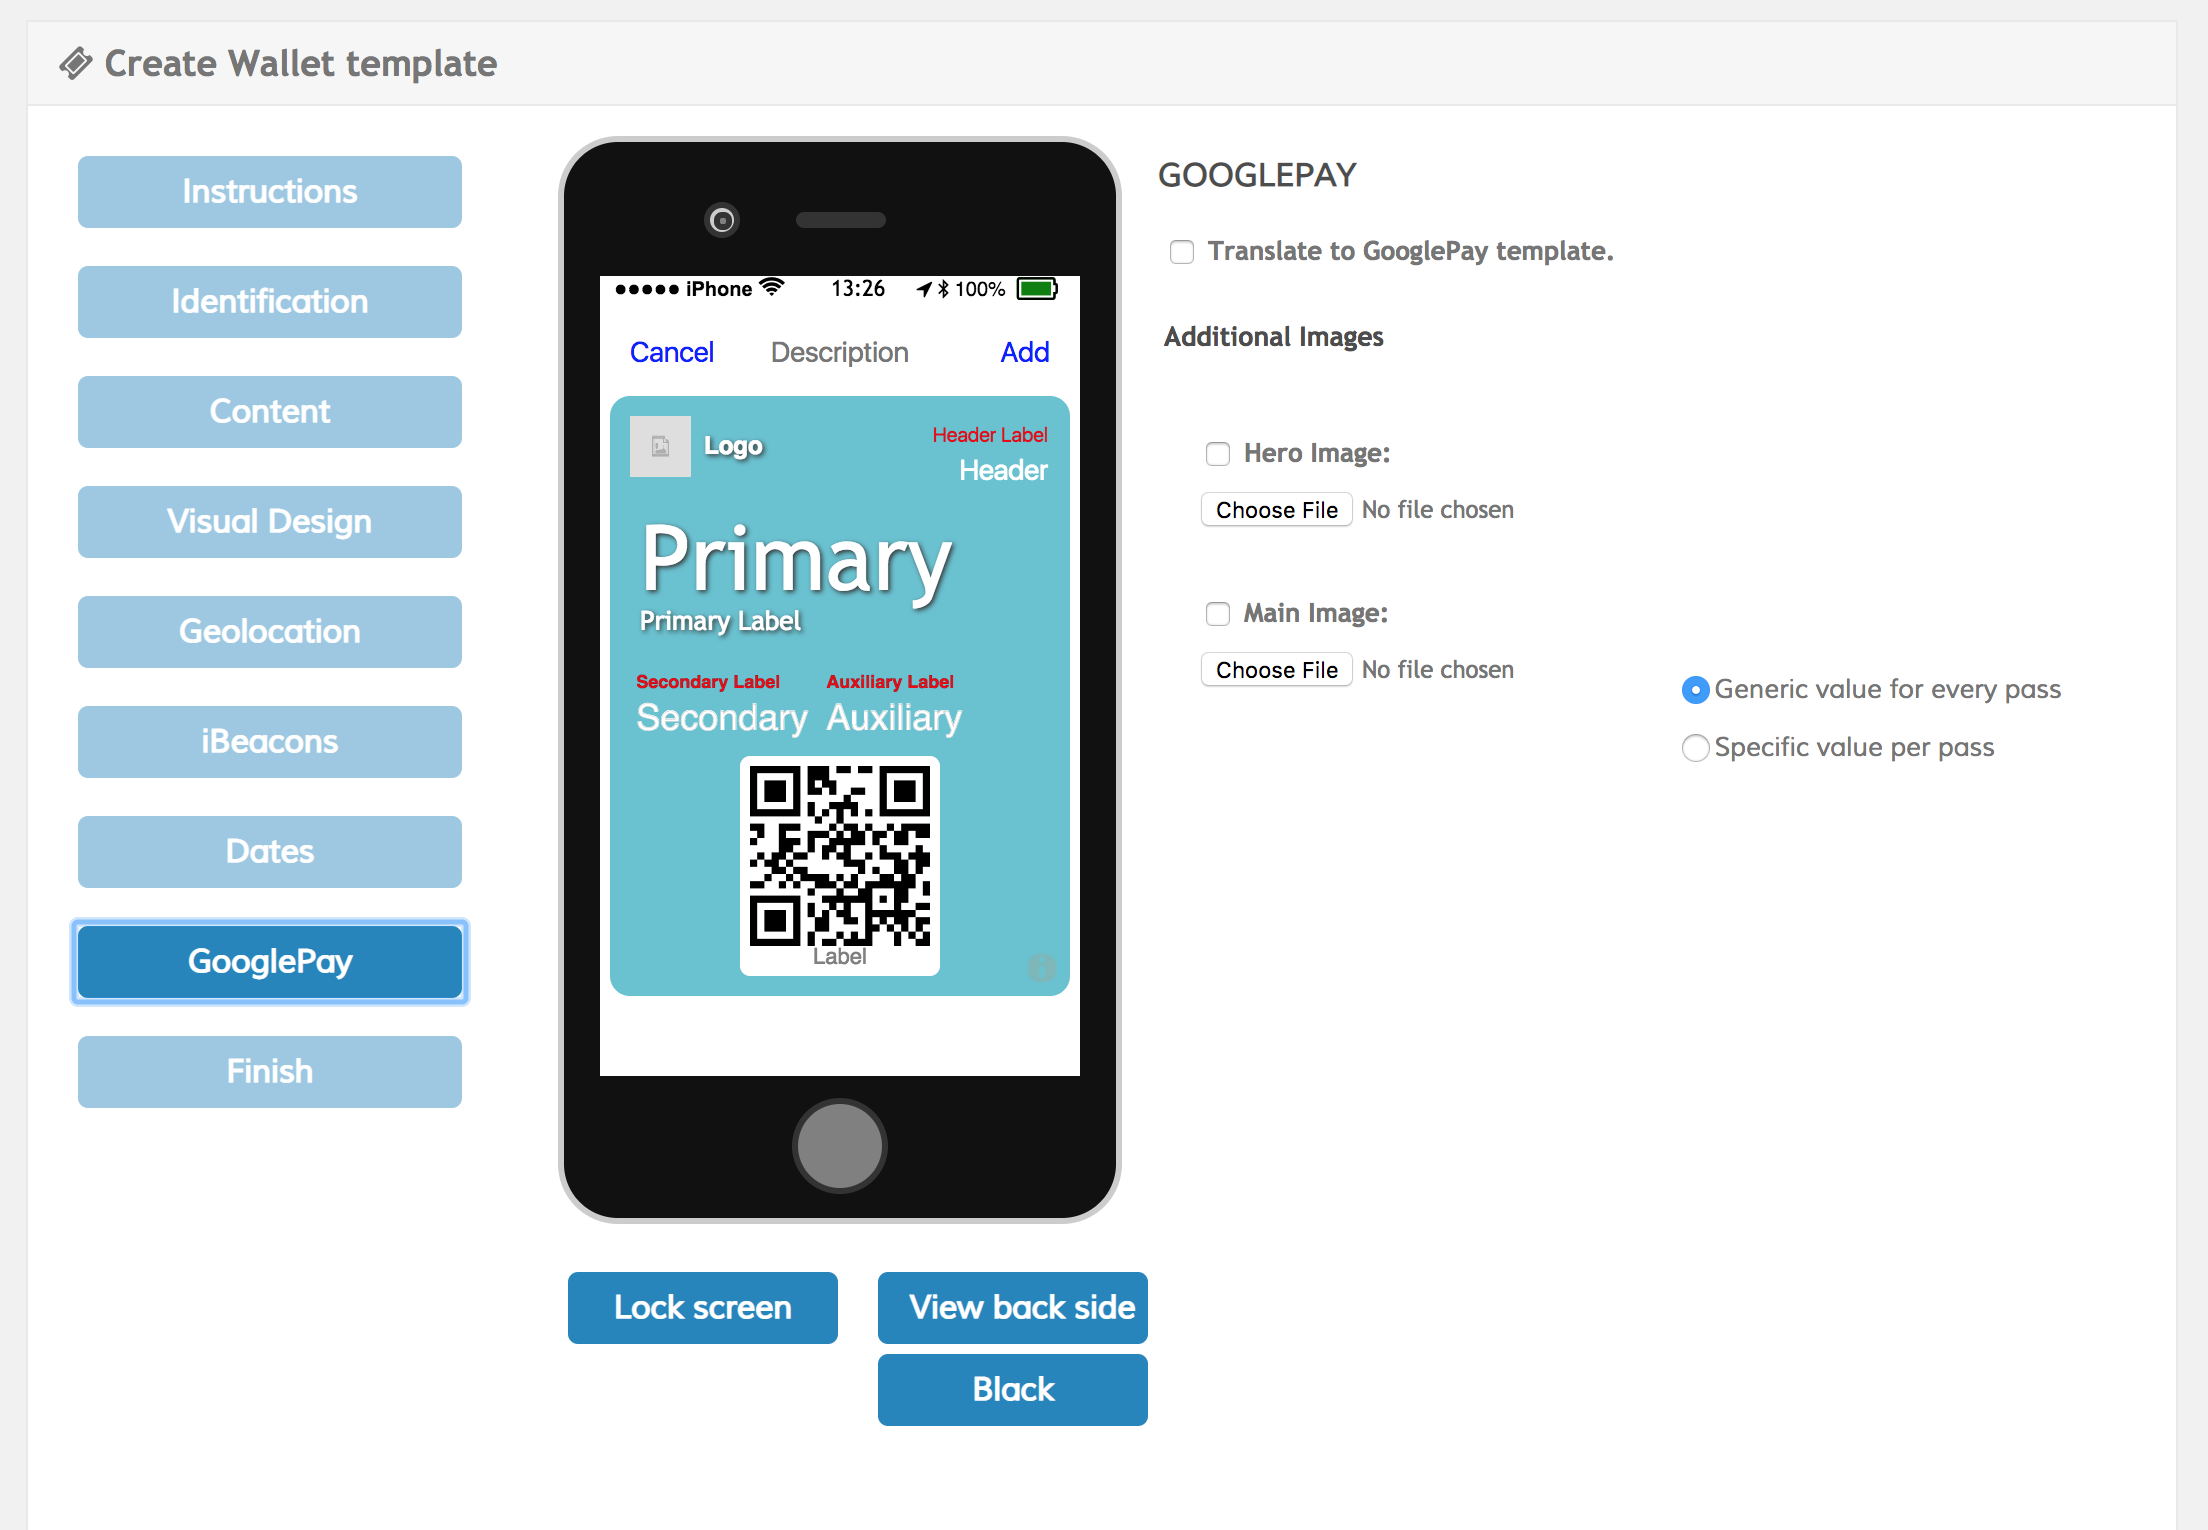
In the composer's Google Pay tab you can enable/disable translation of a template to Google Pay by checking/unchecking the Translate to GooglePay template option. Once the template is saved, the corresponding Google Pay template will be generated.
Google Pay templates require two fixed images as default common values to all cards (like the Generic value for every pass fields): the Icon and the Strip/Footer/Thumbnail (depending on Wallet type), these must be present in the template before activating translation, and the composer will warn you if have not added them.
Since the display of Hero and Main Images in Google Pay abides by different rules, you can upload separate images to that end in this tab. The Hero Image is fixed for all passes and by default, is taken from the Strip/Footer/Thumbnail of the apple pass, to specify a different image, check the Hero Image box.
The Main image is entirely optional and can be different for every end user, if you want to use it, check the Main Image box and set a Generic or Specific value.
In order to ensure proper display on all devices we strongly recommend you use images with at least a 3:1 aspect ratio, and for the Hero Image, the size should be of at least 1032×336 pixels.
Google Pay Boarding Passes
Google has designed its boarding passes to be used for flights only, and template generation requires some additional fields, requested when you translate a Boarding pass type template.
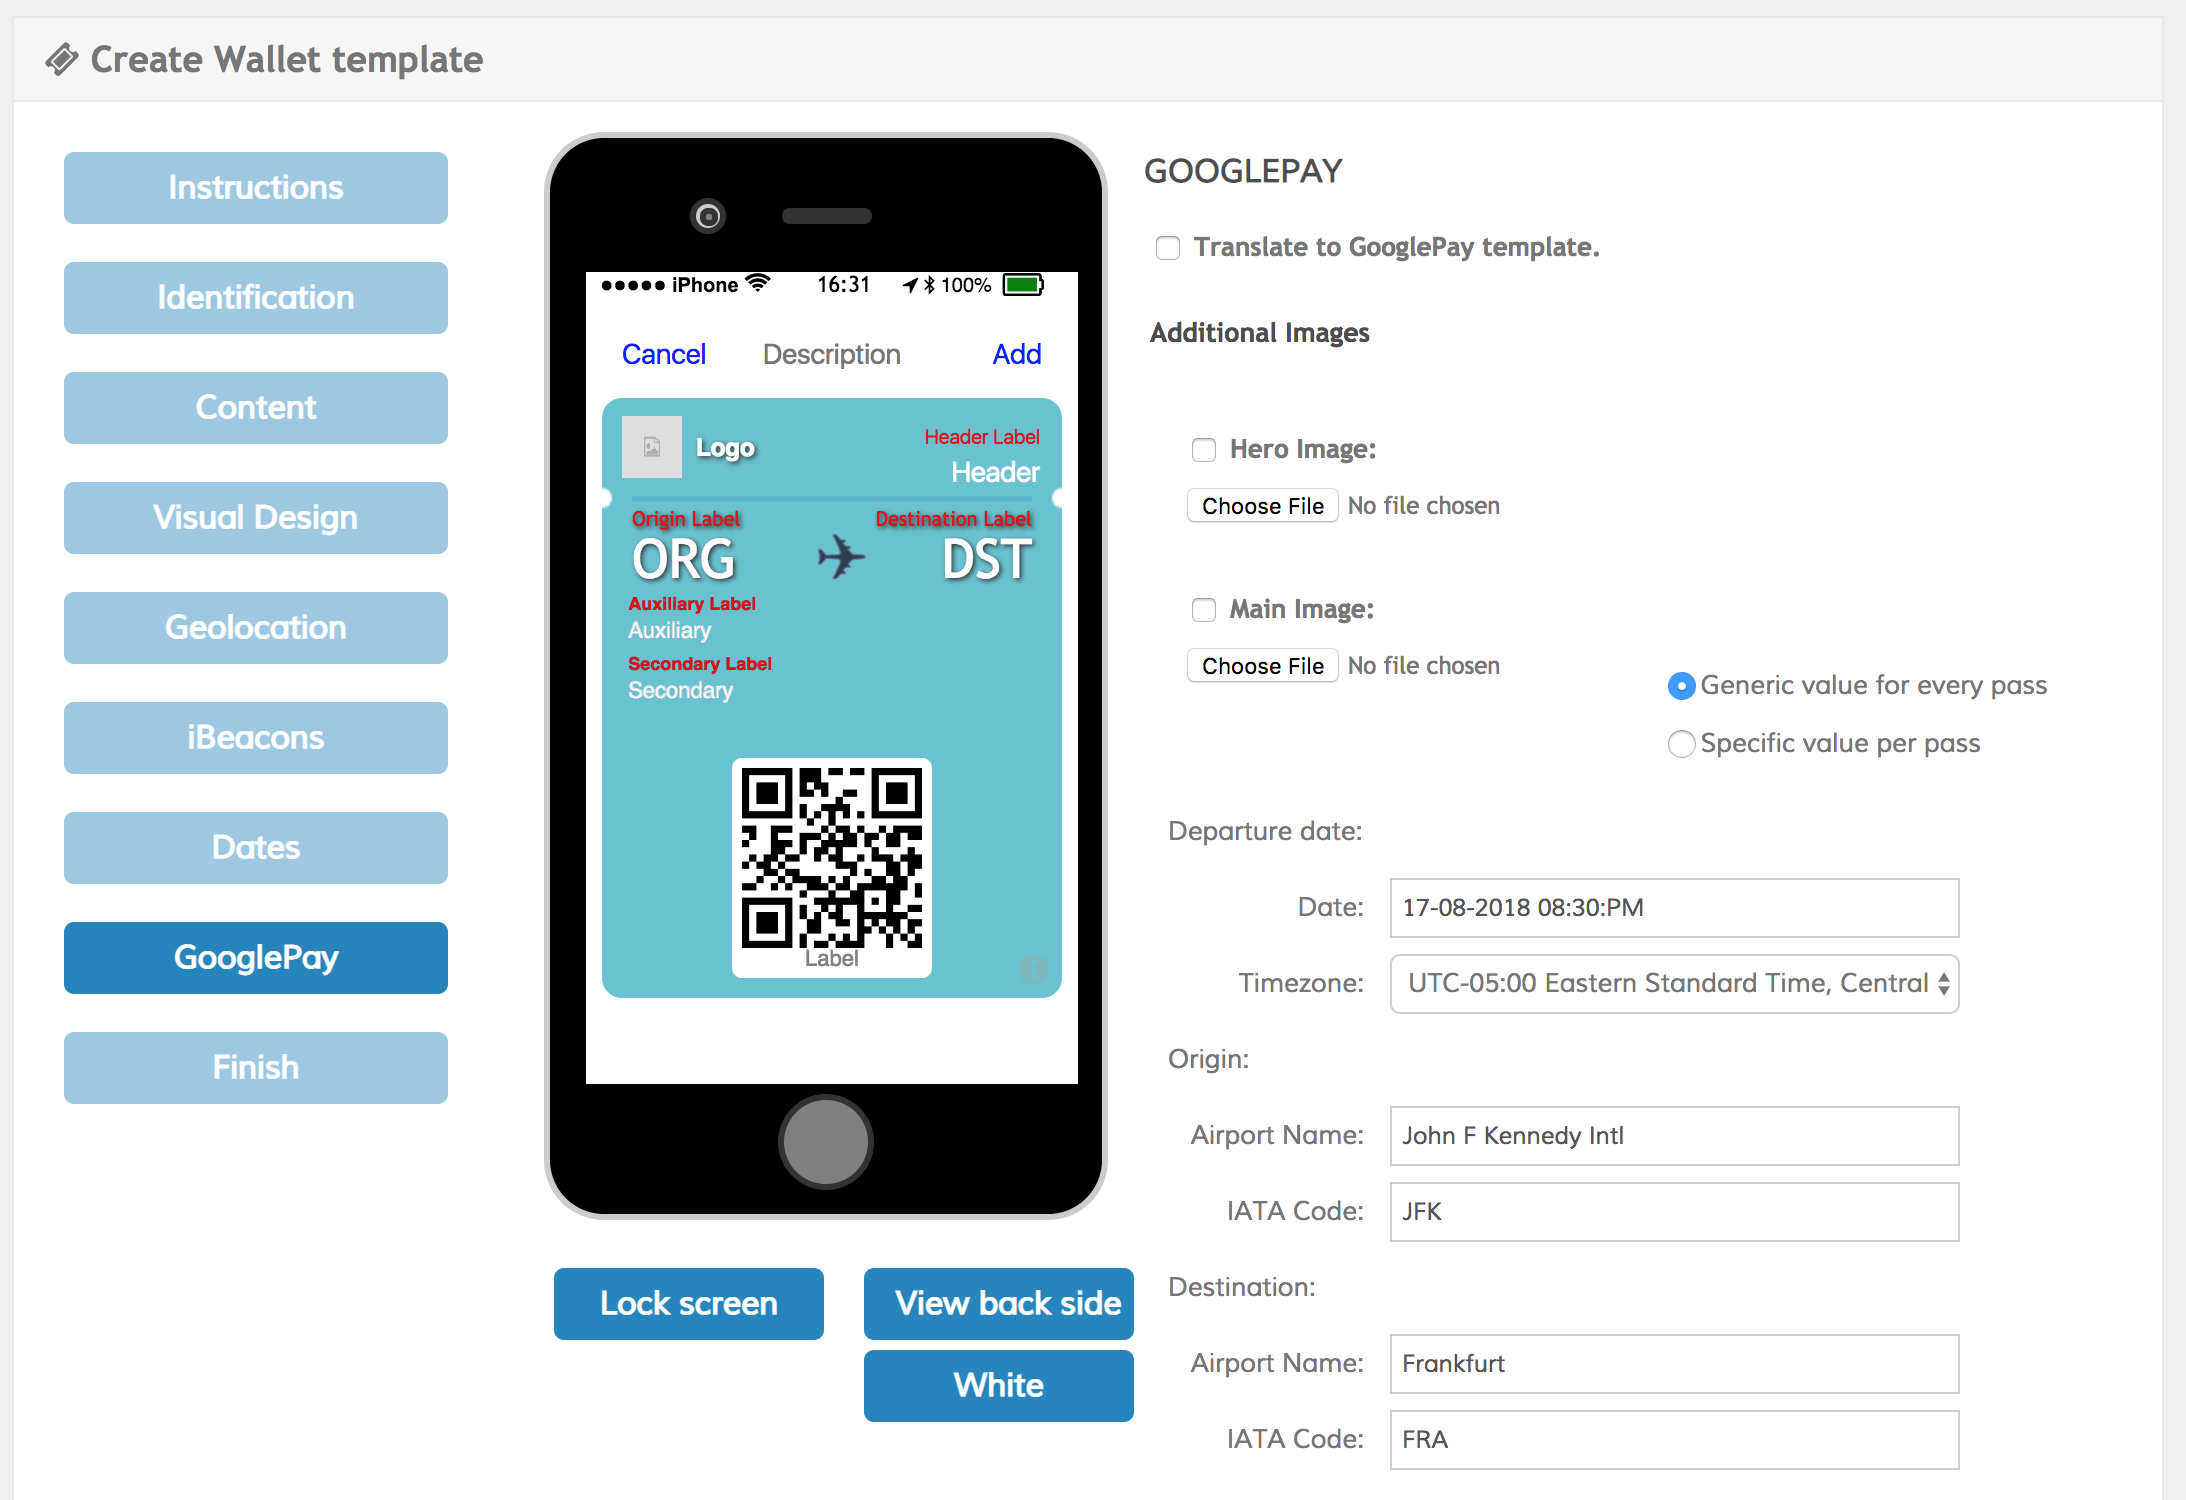
Specify a Departure Date in the timezone of the Origin Airport, this will be used as a mean of Relevance to make the pass easily accesible on Android devices when the date approaches. The Origin and Destination airport name and IATA codes are used by Google to generate the card and are placed where the first two primary fields label and value would be in an Apple Boarding pass. Make sure you supply valid IATA Codes on all options as these are required by Google.
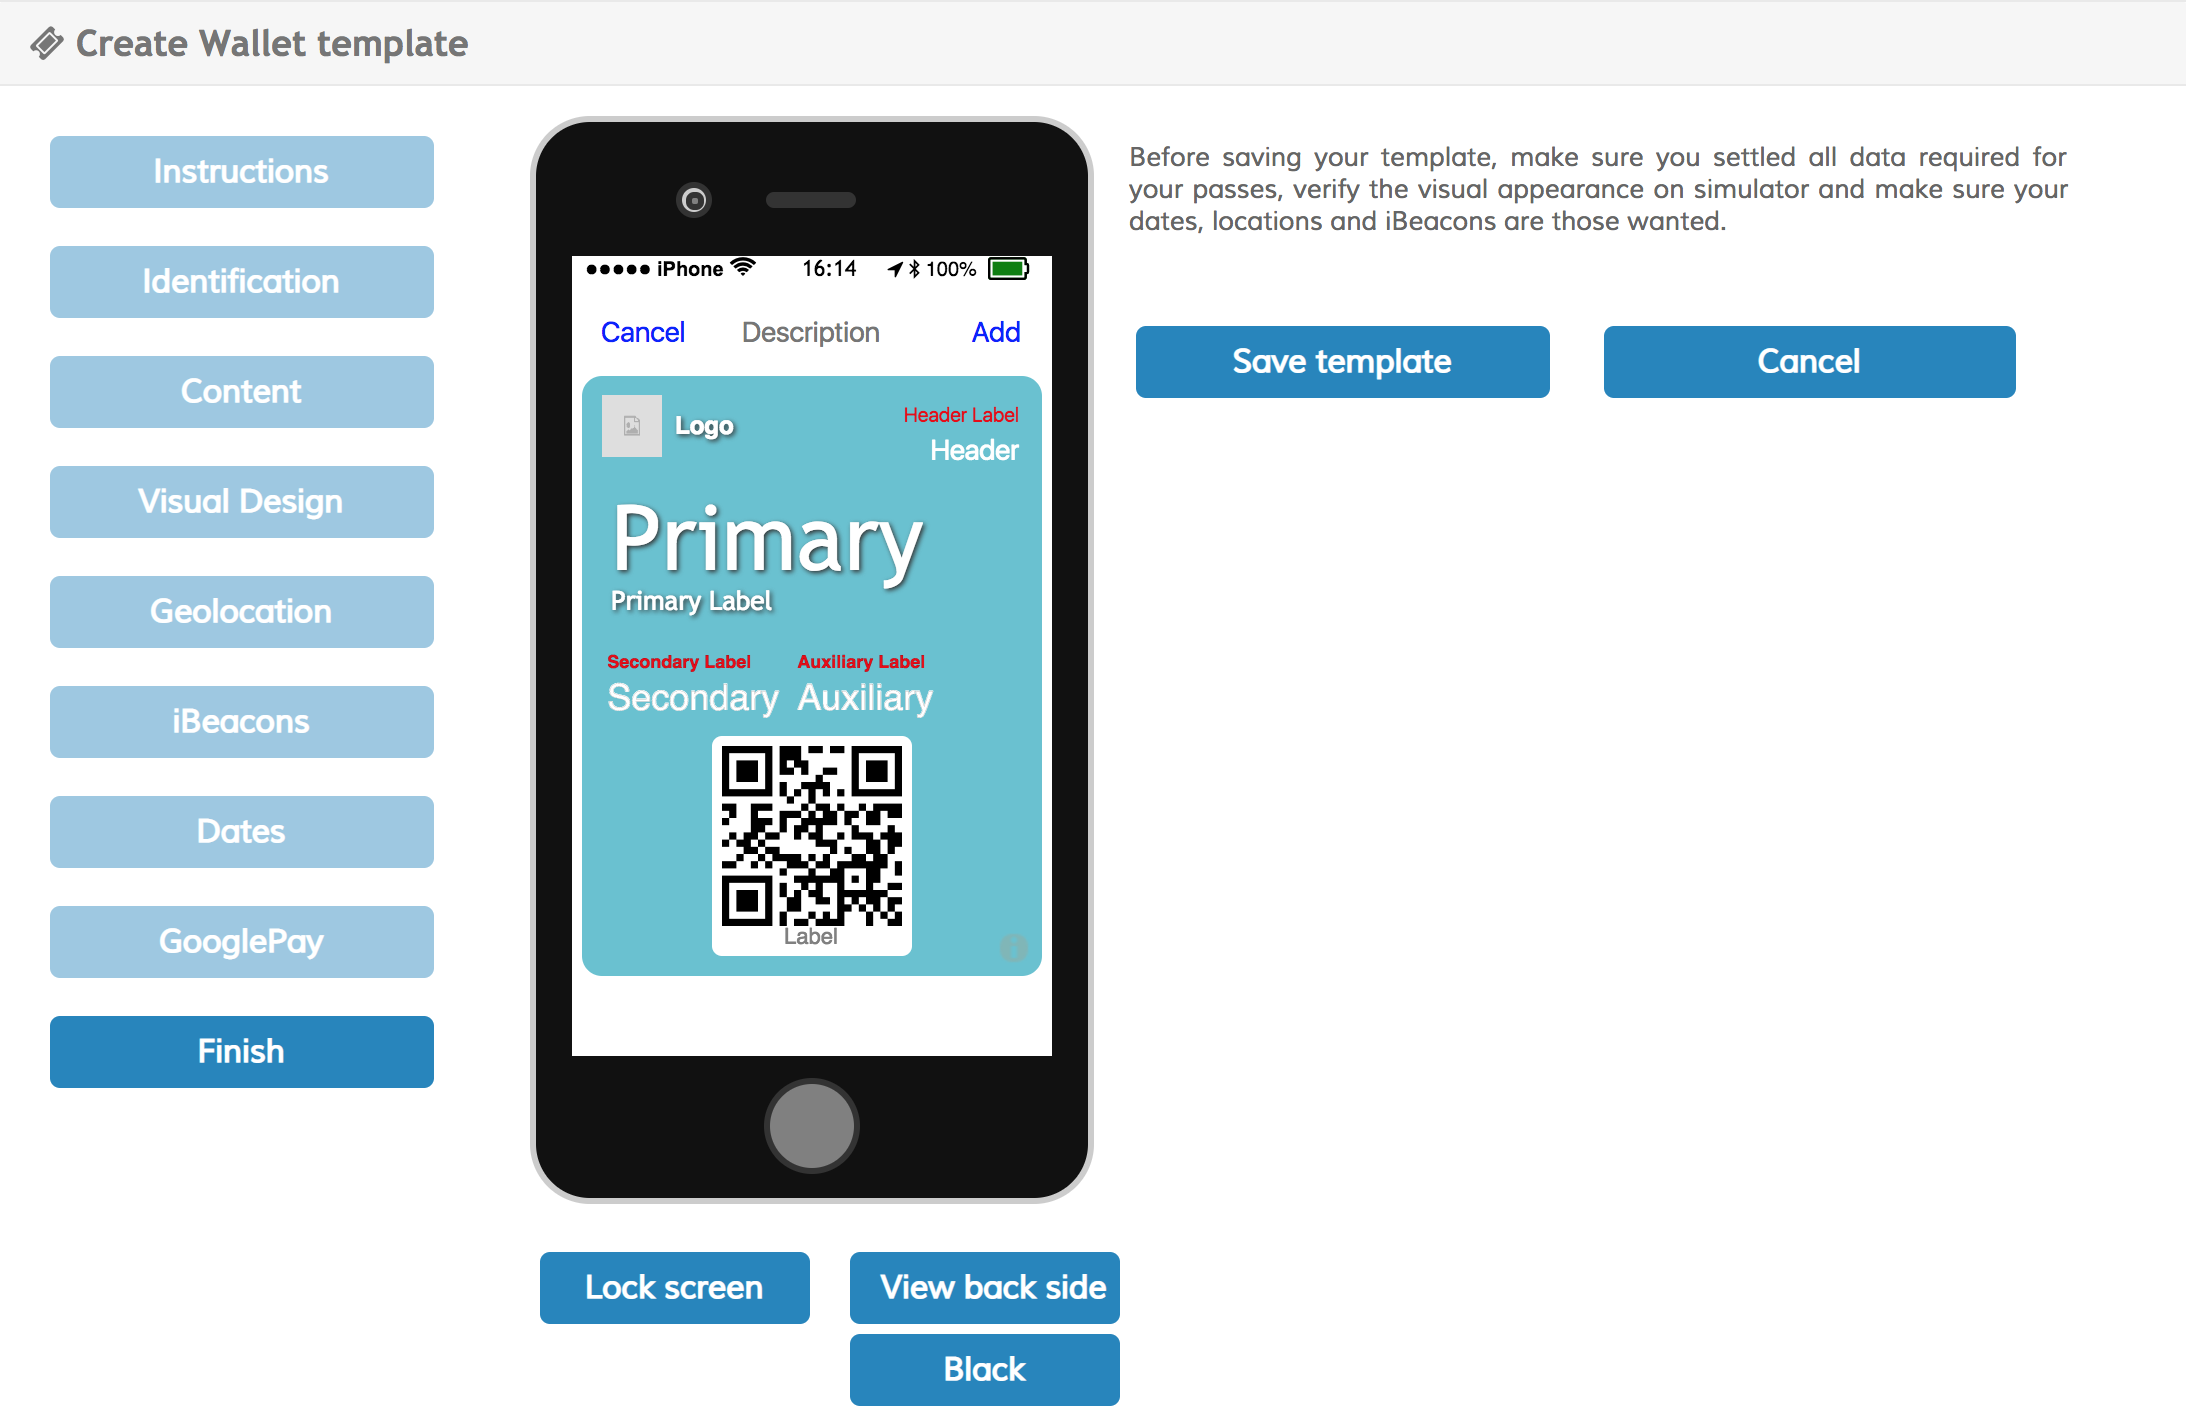
Finish
In the Finish tab you must click on the Save template button to store your changes. The Save and Update button appears when editing an existent template and allows you to store your changes and automatically update the pass on any devices that may have it on their wallet. If you do not want to store the template for whatever reason, you can click on the Cancel button.
Pass Customization
There are many use cases for wallet passes in which you must customize fields of passes for each user. Boarding tickets, event tickets and store loyalty cards are some of the most common cases.
Fields that are customizable in wallet passes, have the option Specific value per pass available 
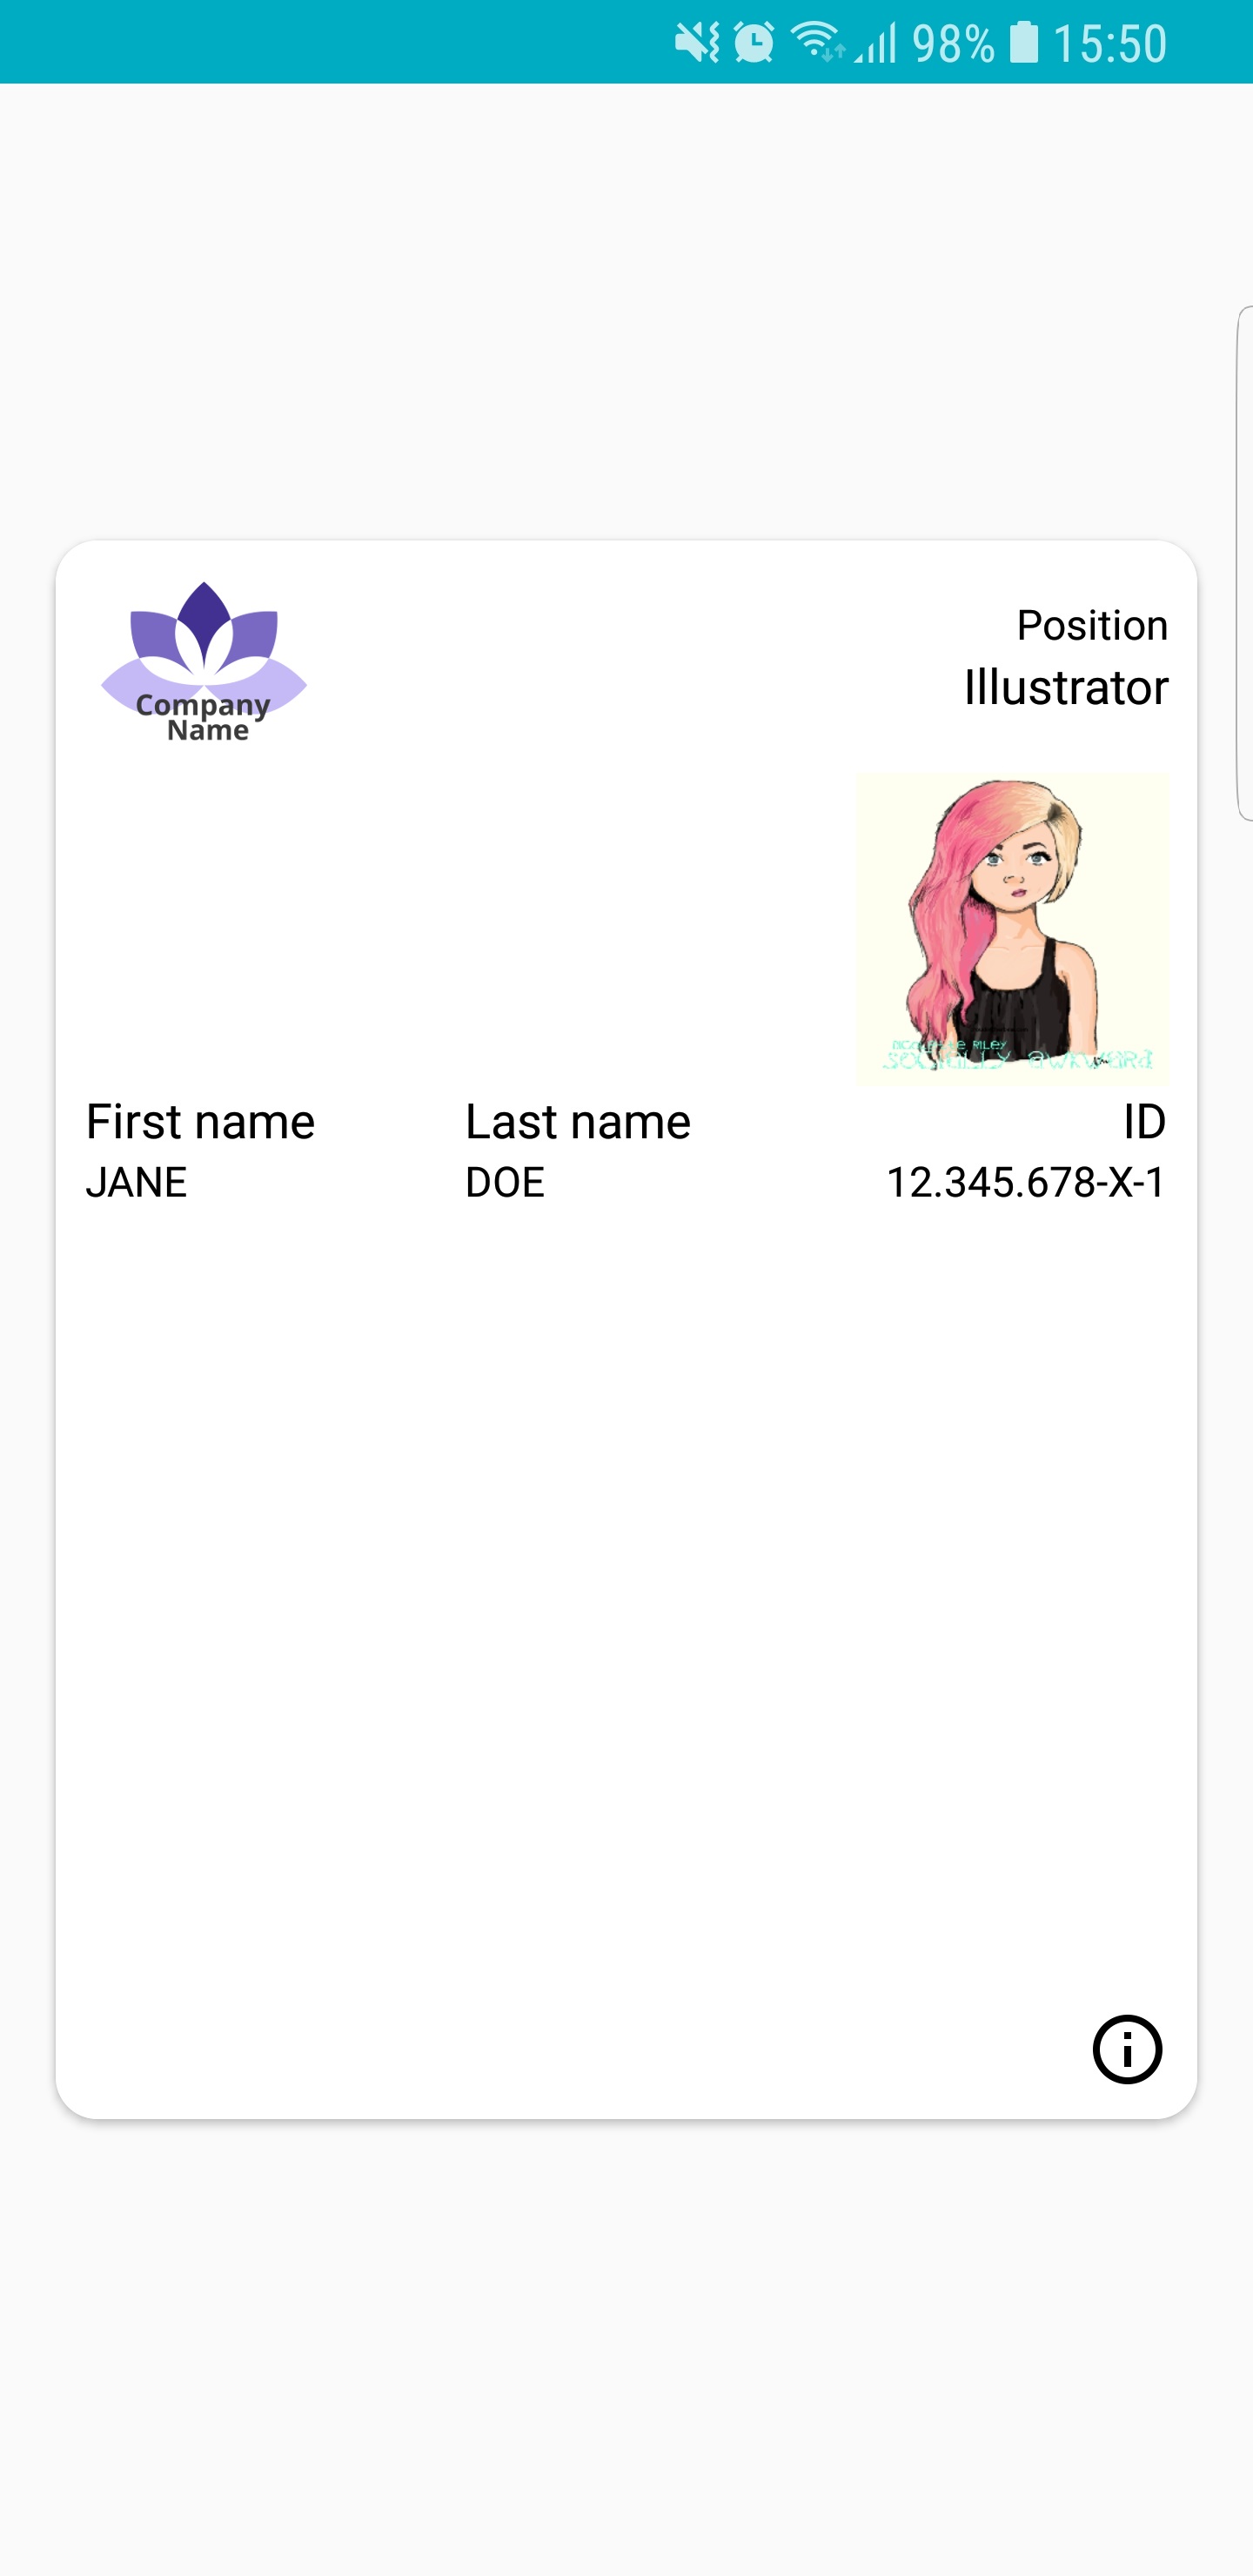
An example of setting up a pass with customizable fields would be the following:
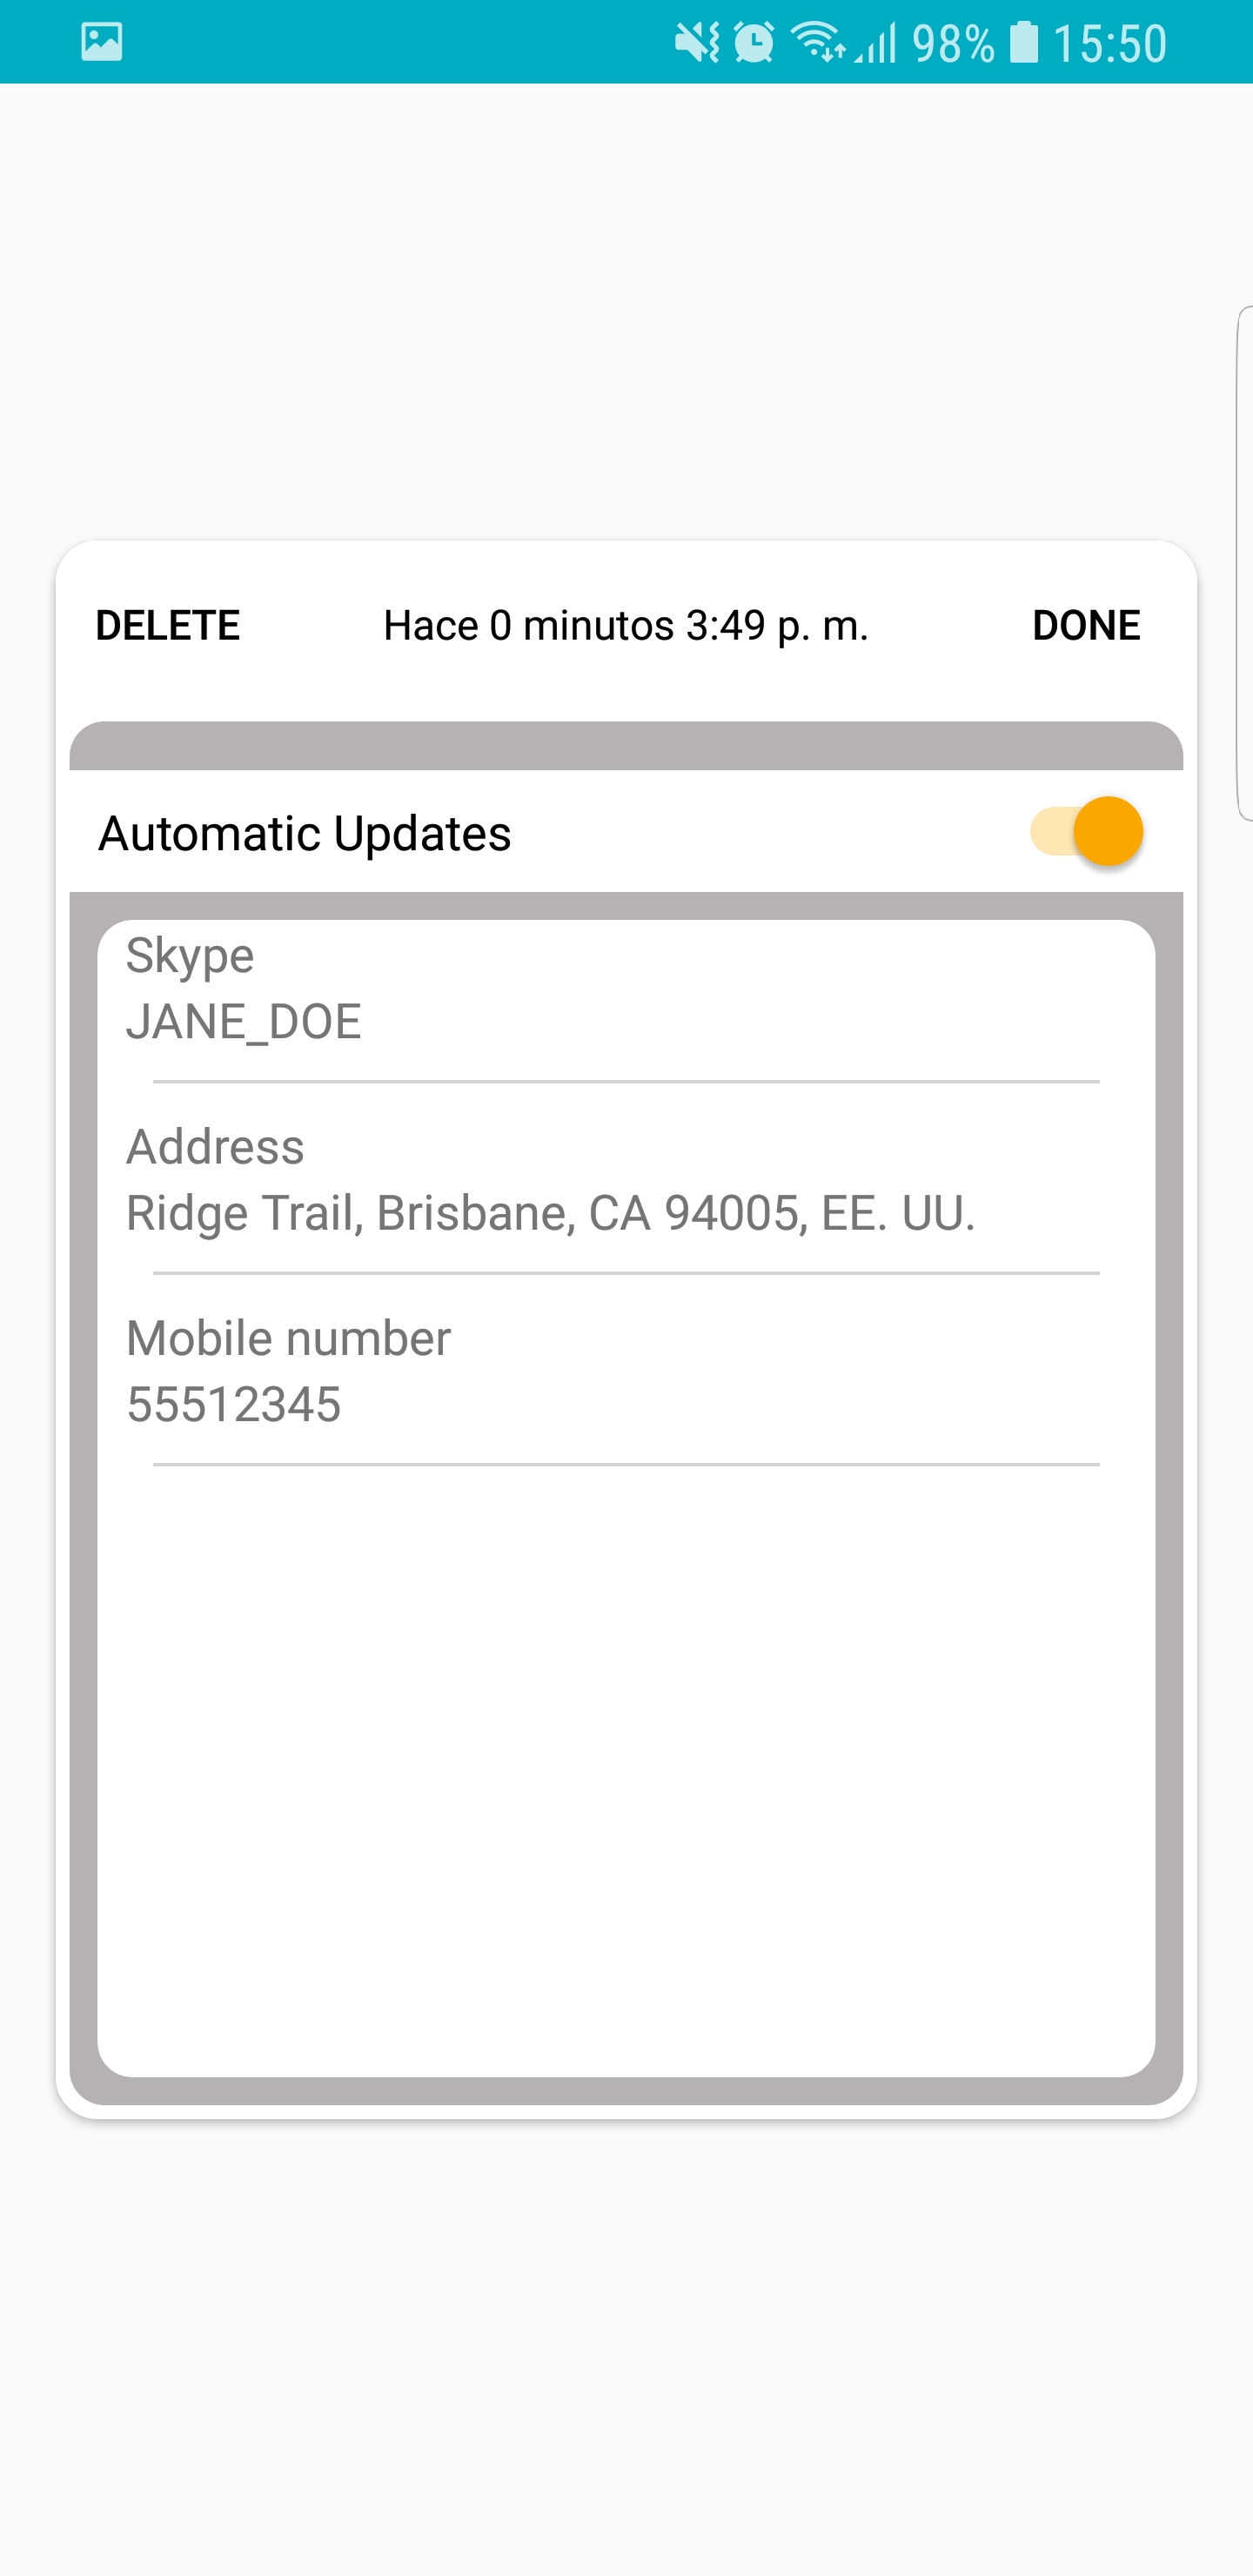
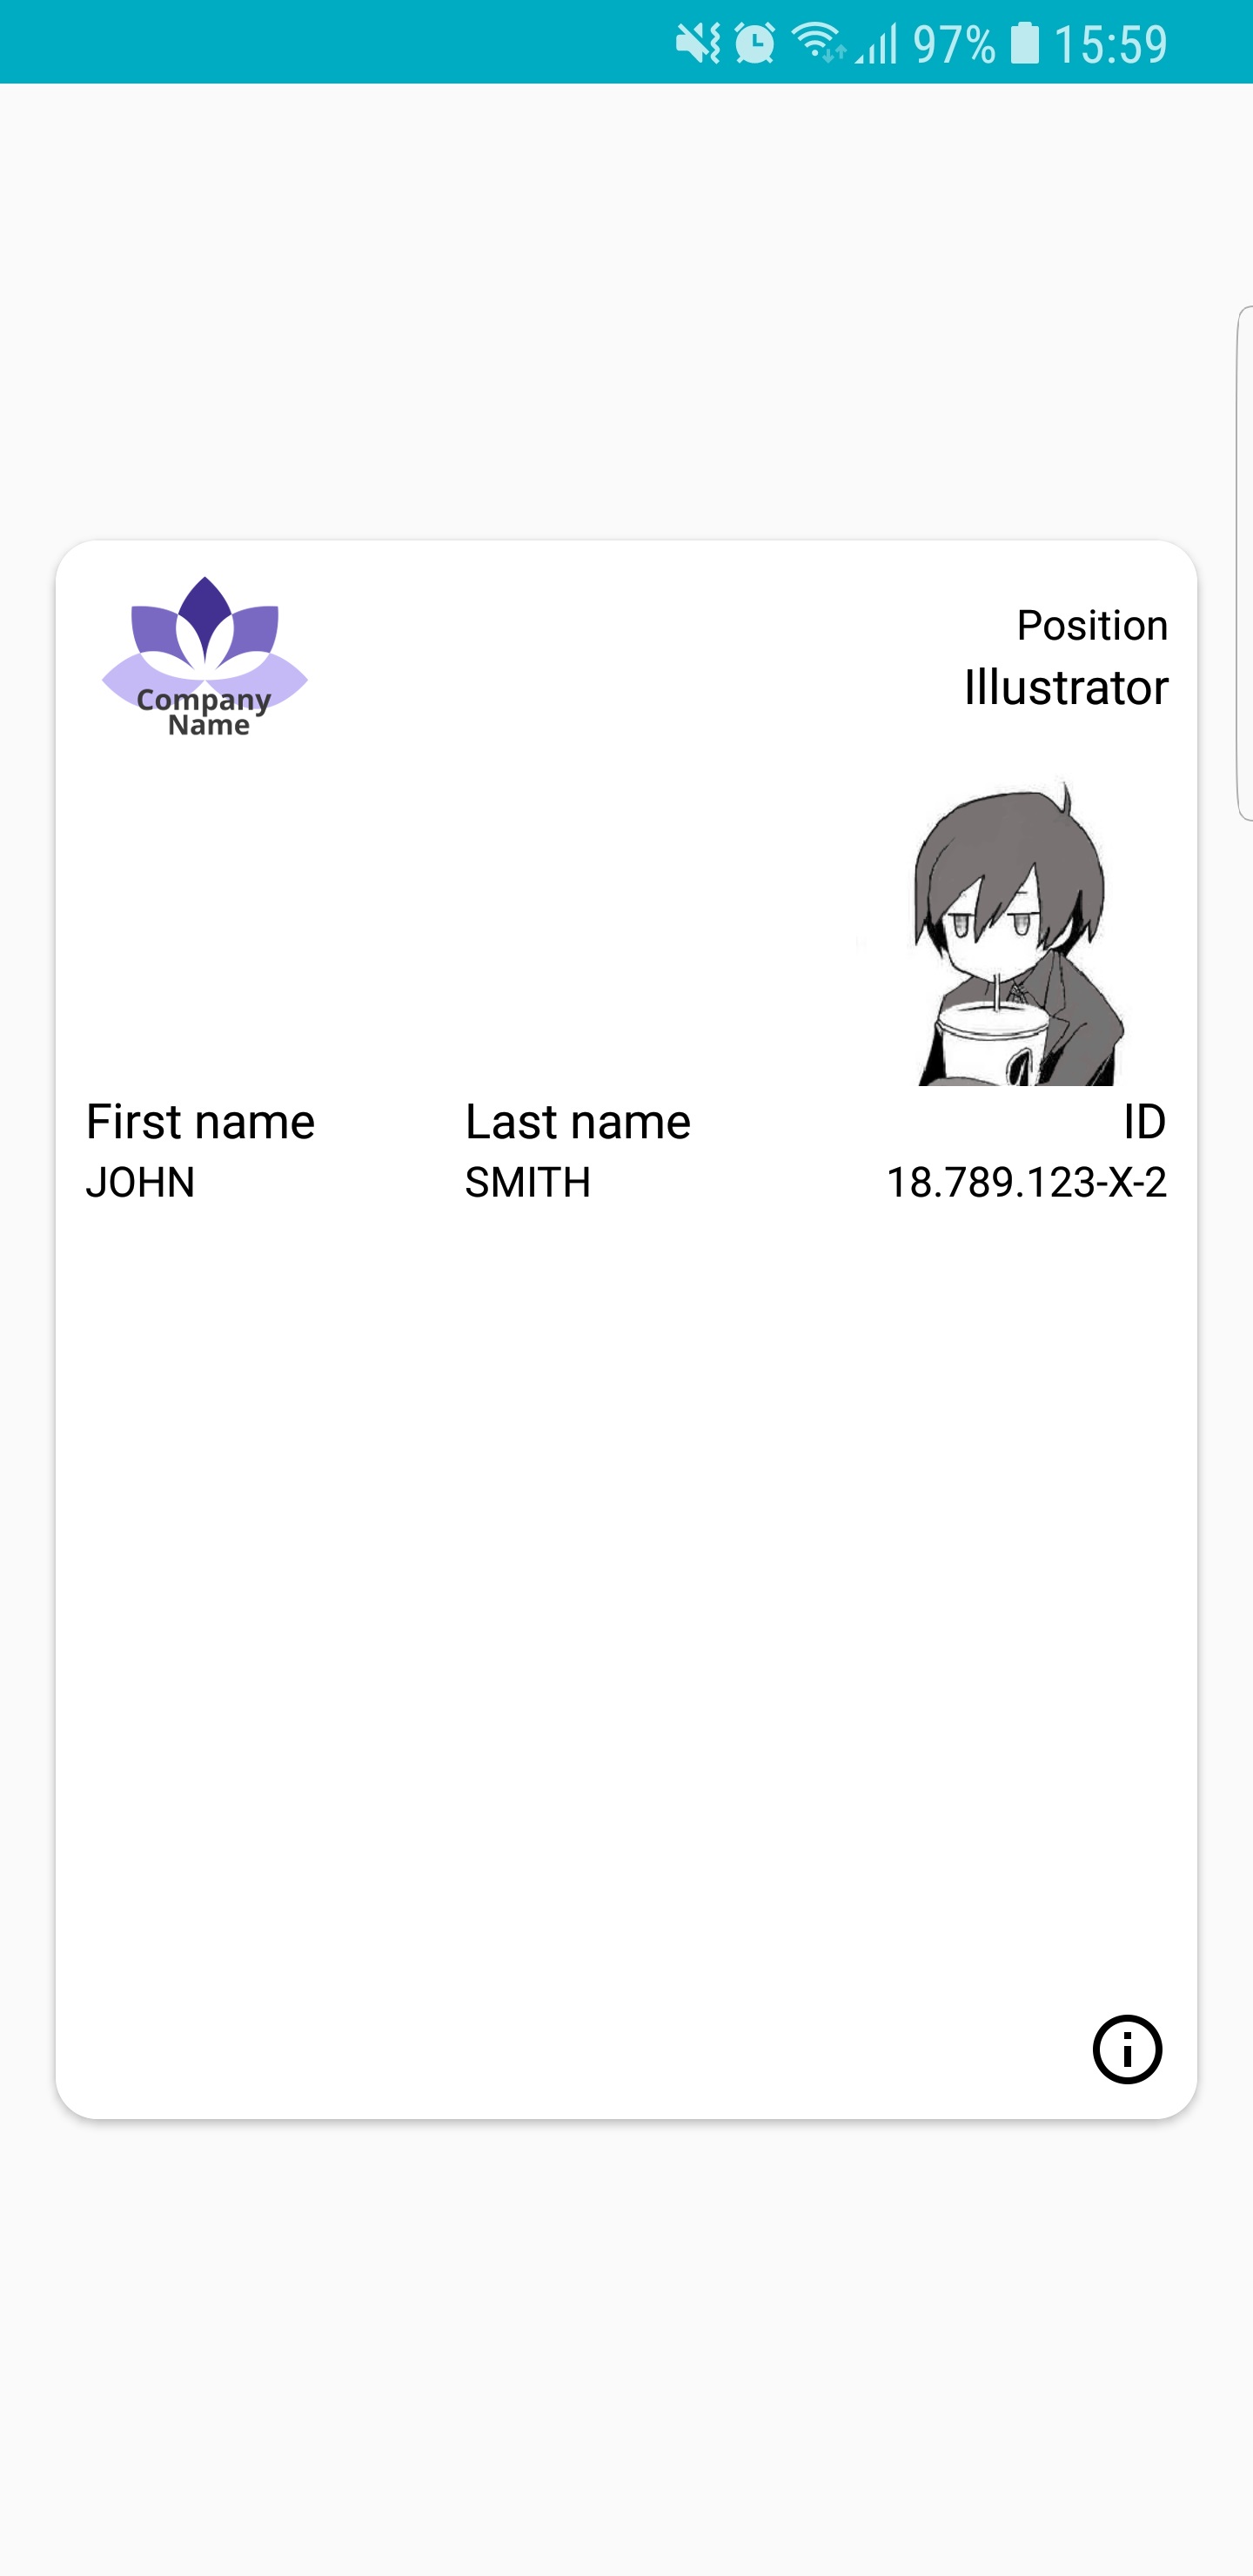
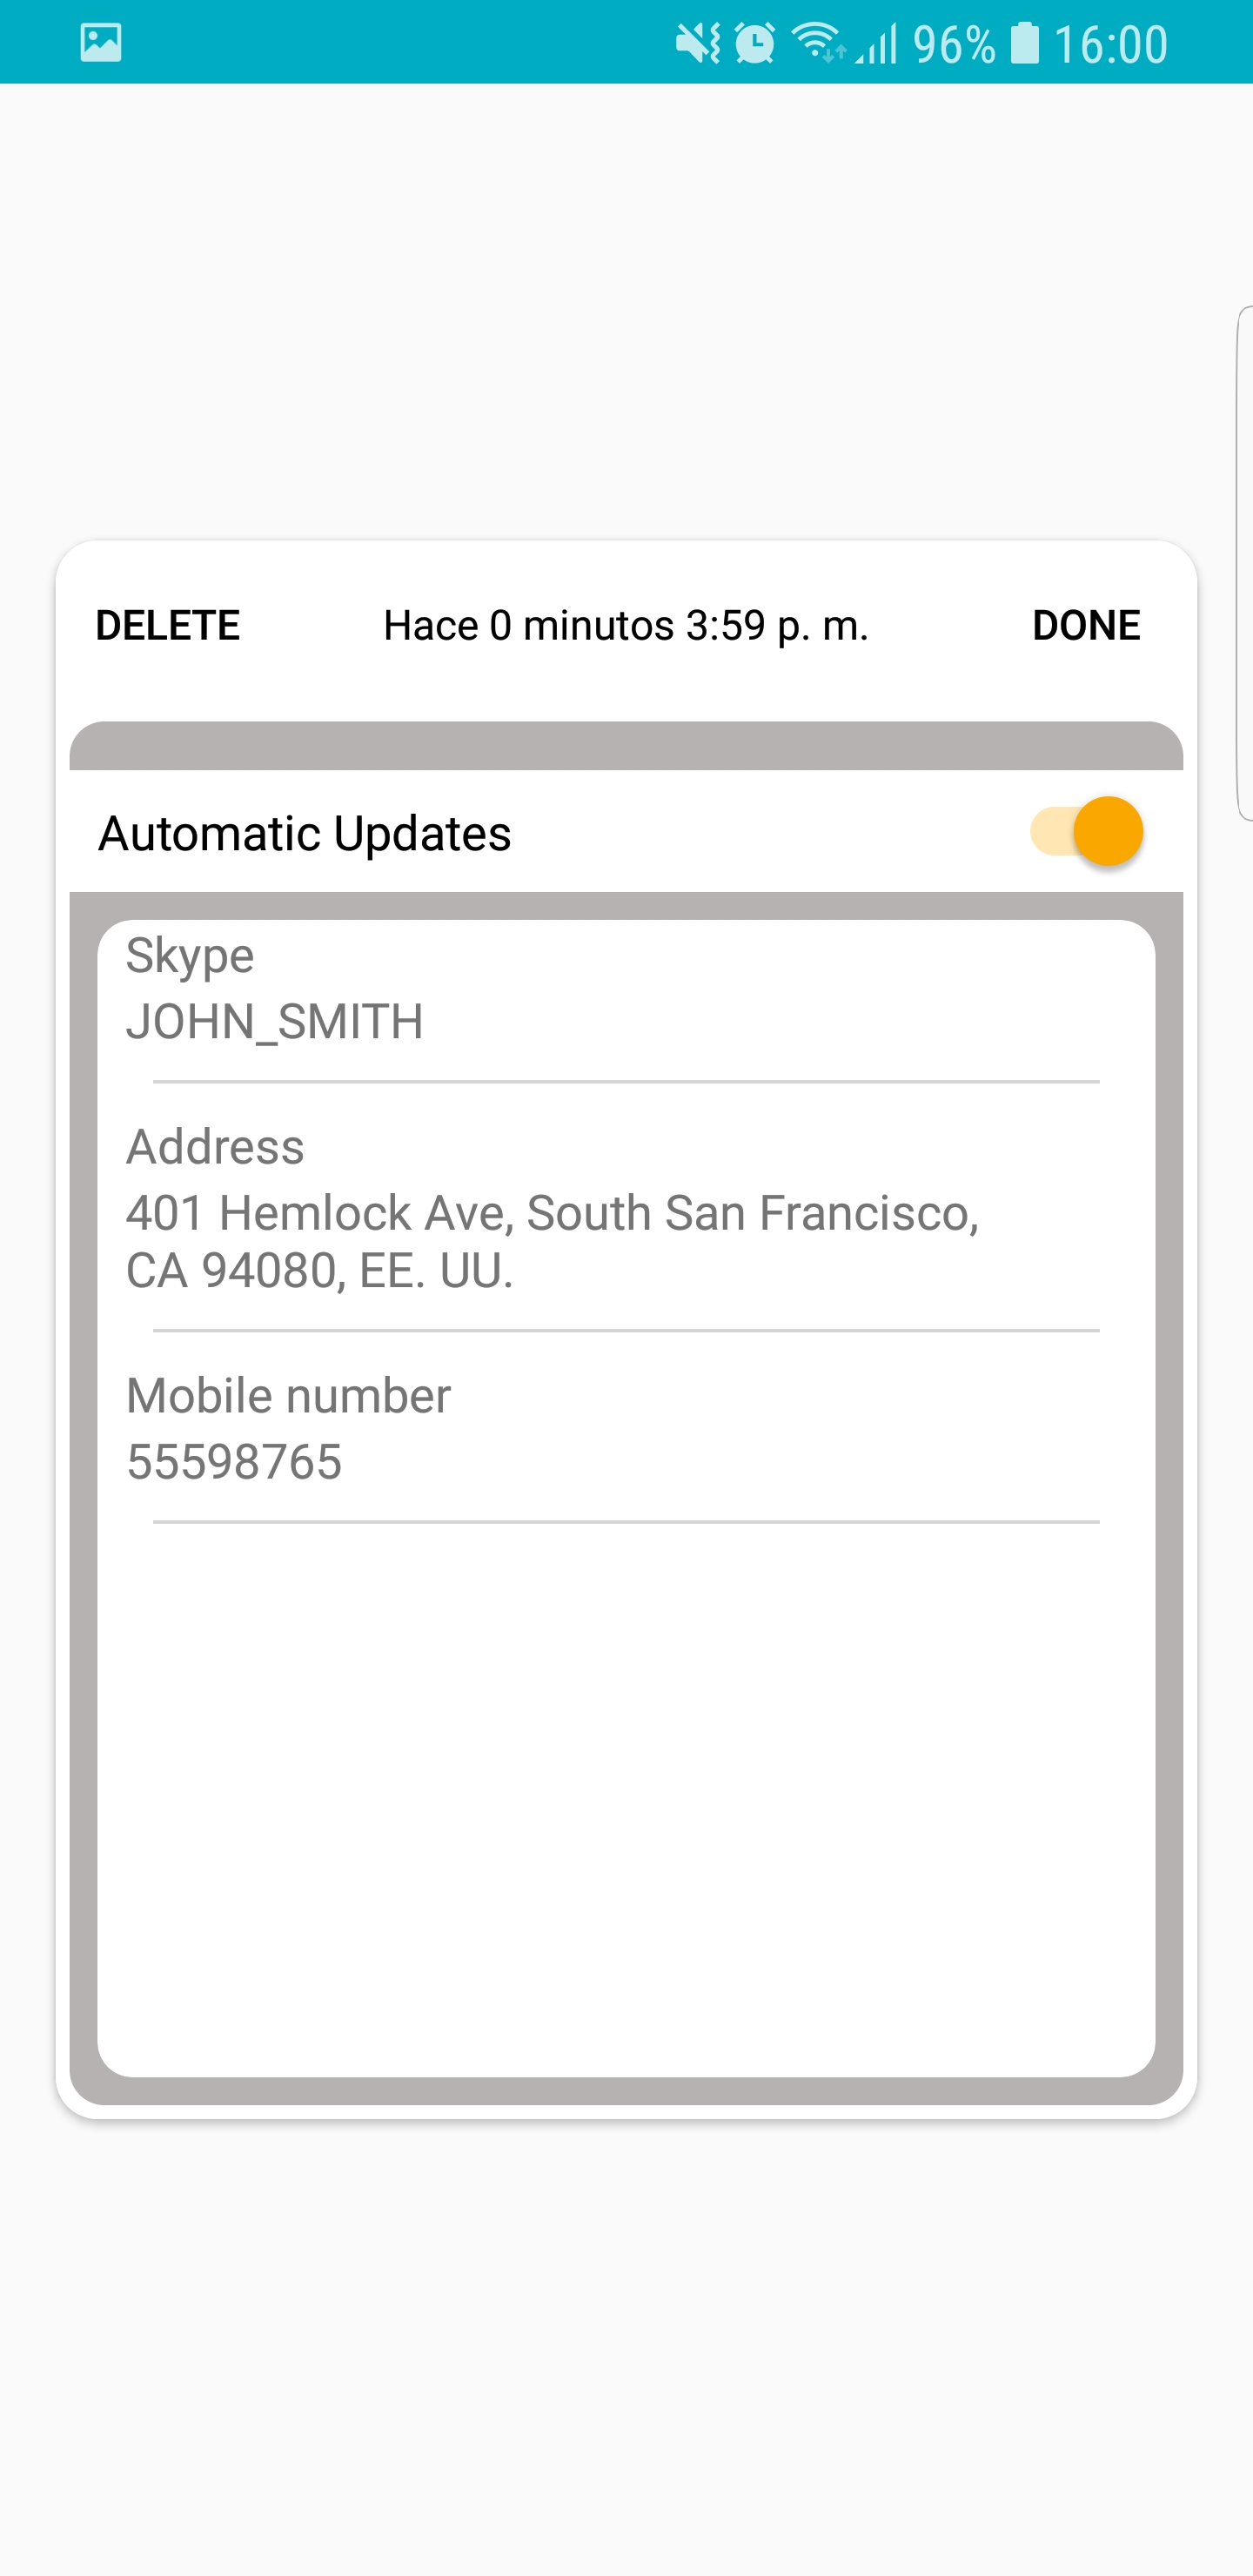
The content fields of the pass are variable. The values that these fields will have will be indicated in the list used to send the passes. Even images and barcode test can be customized.

An example of how the same personalized pass looks for two different users: