General Campaign Management Overview
The Campaign Manager is a web based tool that's available via HTTP and HTTPS. We recommend that you always use HTTPS when accessing the Web Interface. To log into the Campaign Manager please go to:
https://production.me.syniverse.com/comdata
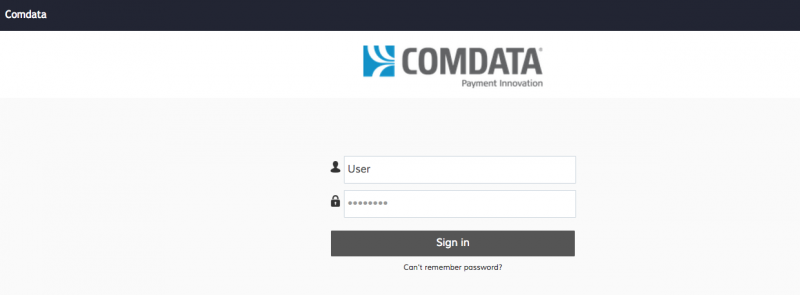
and enter your User/Password credentials:
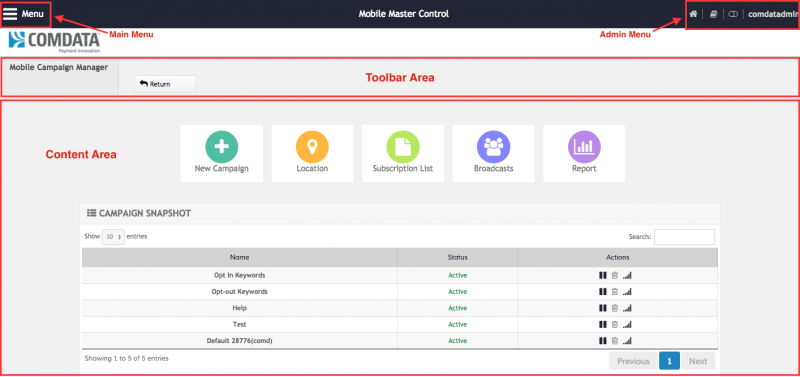
The Home Screen is the first page displayed after you log in to your account. The layout of the Home Screen varies depending on the role assigned to the account you are using. Every MMC screen is divided in 5 main elements:
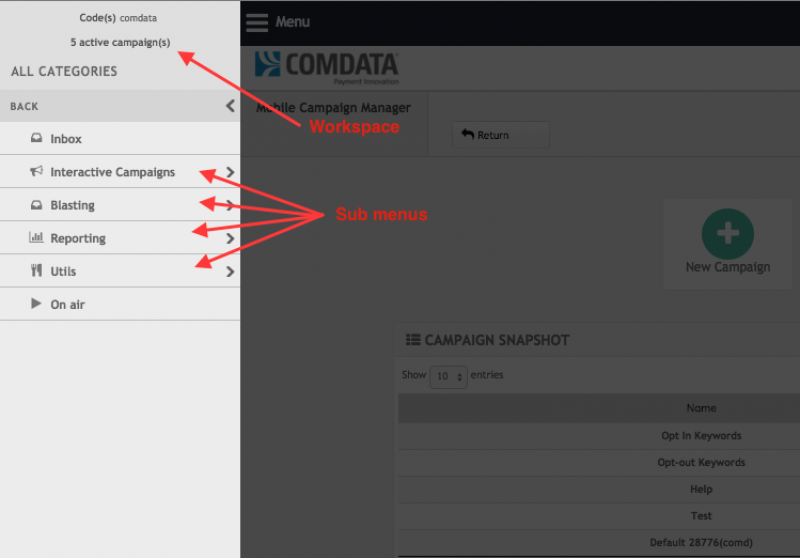
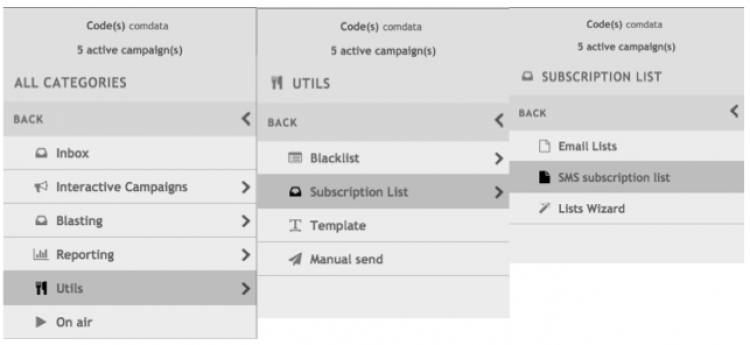
Clicking on the Main Menu Button will slide the Main Menu Panel from the left of the screen. In the Main Menu Panel you will see the a brief header with the available workspaces and the Main Menu options. When navigating the Main Menu you will find options preceded by a > sign. Those options are sub menus that group additional options. So for example if you wish to create an SMS Subscription List, you would click on Utils then on Subscriptions List and finally on SMS Subscription List.
How to create an SMS Subscription List
In order to create an SMS Subscription list we'll need a file from where information is going to be taken. Upload must be performed from a .CSV file where the first (and only mandatory) parameter is going to be the telephone number as shown in the image below:
To start uploading and creating an SMS subscription list, select from the Menu button in the toolbar Utils, then Subscription List, SMS Subscription List and finally New:
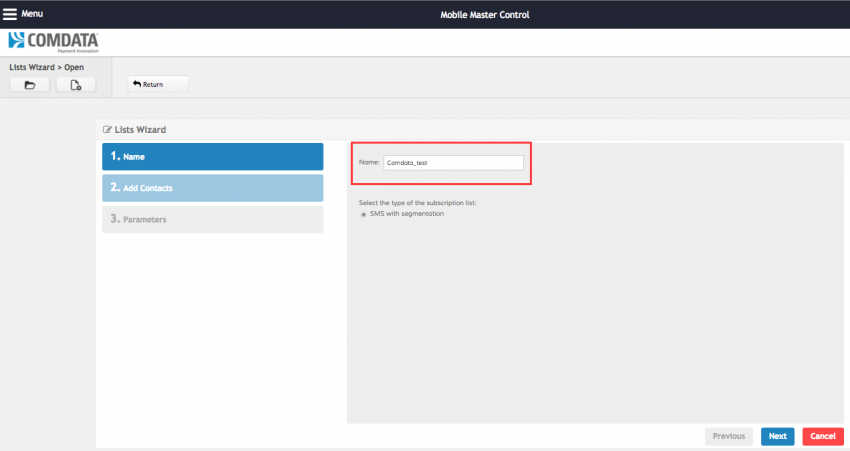
Now proceed to fill in requested information –Name- and click Next:
Files can be uploaded directly from your computer, they can be uploaded from an URL or you can use Dropbox. Please note that some browsers may have issues when uploading big files (over 100,000 records) from your computer. Click Next once you've selected the file to use.
The Segmentation wizard uses a heuristic approach to determine the data types used in the uploaded file. Dates, Strings and Integers are detected using a multitude of formatting filters. Once the types have been inferred from the segmentation data you will also have the option to modify them. All parameters are shown with its name, label and type. Label and Type can be modified prior to saving the list:
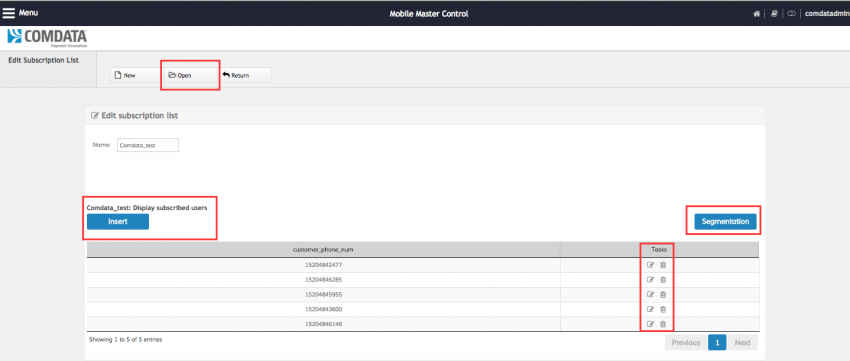
Once the list is created and the data uploaded you will be redirected to the list and from there you'll have the option to insert a new telephone number, edit or remove any contact or to apply any segmentation filter that fits with the list. By clicking in Open you'll be taken to SMS Subscription List main page where existing lists will be shown:
How to send broadcast
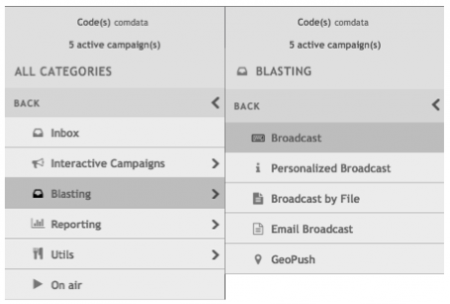
To send a broadcast we'll select from the Menu button in the toolbar Blasting, then Broadcast and finally New:
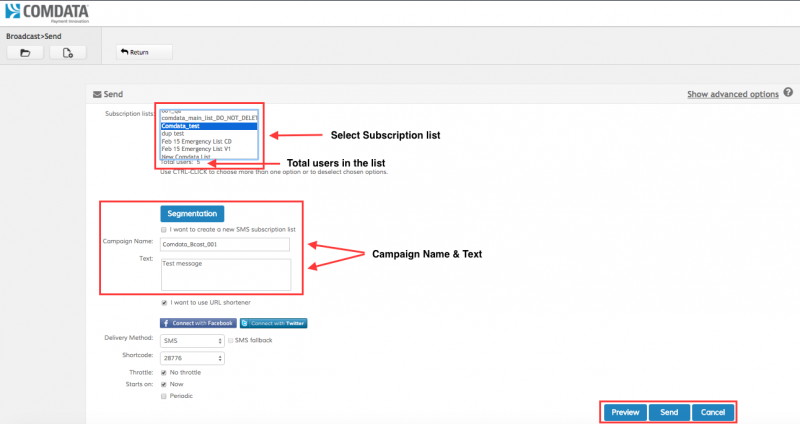
Now you have to select the list to which broadcast must be sent. Fill in Campaign name and Text information and click in preview:
After clicking in Preview a new window will open and from there we can see how many messages are expected to be sent, telephone numbers and text message:
It's important to highlight the following information:
- The List with Type set to Main List is the White List
- Upon uploading, the imported file will be collated against the main list and if the telephone number exists, no action will be performed. If the number does not exist the telephone number will be uploaded and the customer_optin_status will automatically be set to 1 (opted-in)
- Only users that are in the selected list and also in the main list with customer_optin_status 1 will receive the message
Opt-out Process
A keyword opt-out campaign is configured attached to the main list in order to handle the opt-in status. This means that if an user wants to stop receiving messages he / she must send the configured keyword in order to opt-out from the list and stop receiving messages.
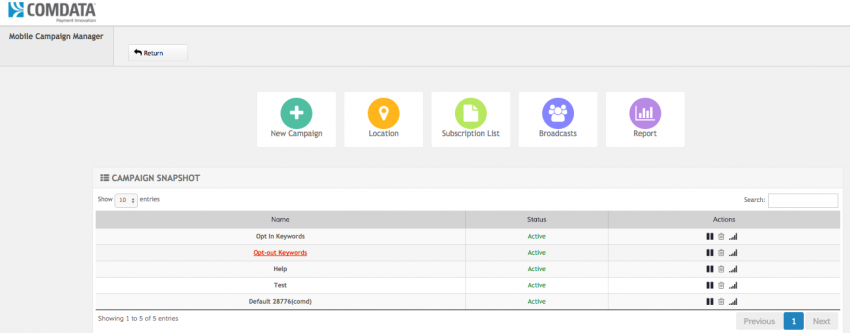
- From Home page the Opt-out Keywords campaign can be seen:
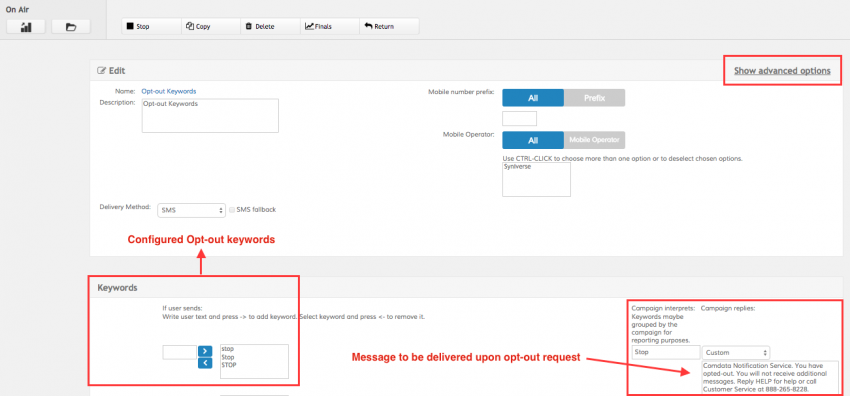
- STOP will be used as the opt-out keyword and is case insensitive:
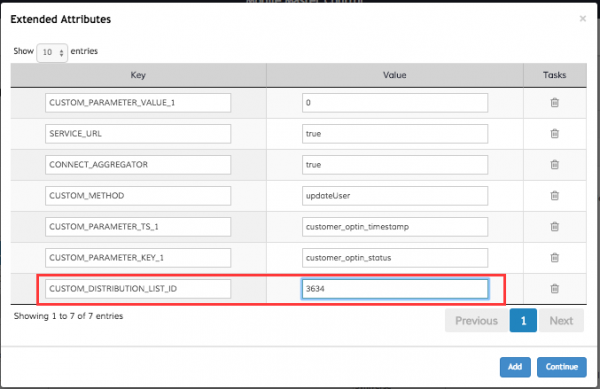
- By clicking in Show advanced options we'll see the Extended Attributes button that will allow us to configure all the attributes that are mandatory for an Opt-out campaign:
- The unique value that will change in these parameters is CUSTOM_DISTRIBUTION_LIST_ID value for the corresponding Main List ID
- Once an user has completed the opt-out process, it will be shown in the Main List as follows and the customer_optin_status will be set to zero (0):
Test cases and results
You can find here the test cases related to this implementation.
