Keywords Campaigns
Keyword campaigns are the most common SMS marketing campaign type. A keyword campaign is designed to reply to an end user when the end user texts in a specific keyword or phrase to a shortcode or longcode. This will be useful to configure HELP, OPT-IN and OPT-OUT campaigns.
Example Use Case - Only reply
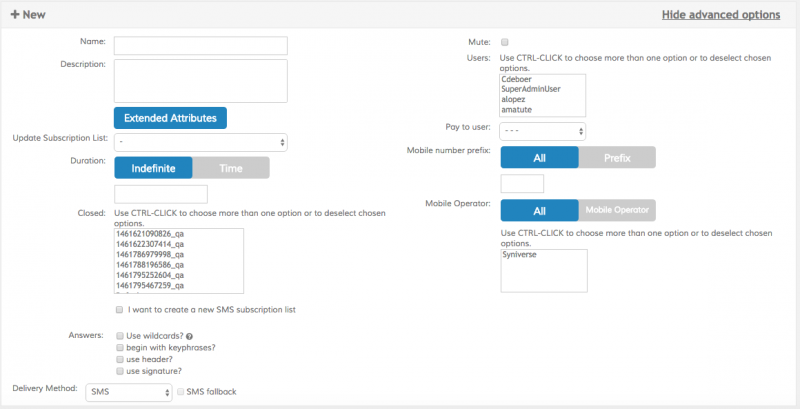
We want to set up a keyword campaign in the WU_USA code that will receive the word demo or DEMO and will respond with the message Thanks for your message!. To do this we click on the Main Menu Button, click on Interactive Campaigns and select the Keywords option. We will see the following screen:
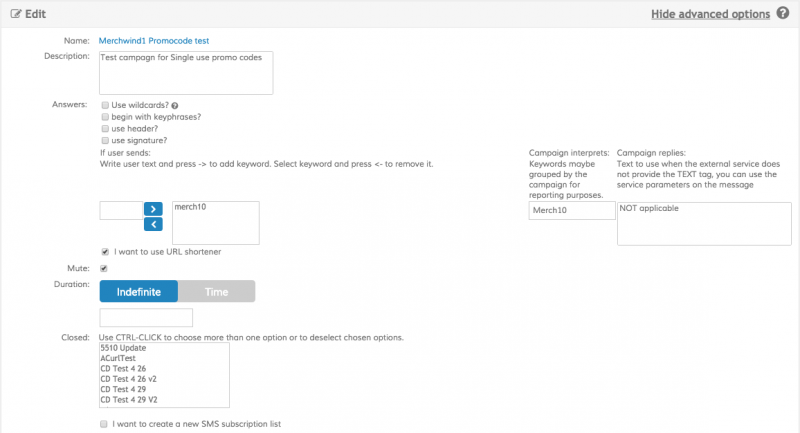
Click on Create New and fill in the required information. Here's the breakdown of the required fields:
| Field | Description |
|---|---|
| Name | The name of the campaign. Please use a concise name and avoid special characters |
| Description | A short description of the campaign |
The following options can be modified if you click the Show advanced options link
| Field | Description |
|---|---|
| Duration | Select Indefinite if you will deactivate the campaign manually once it has finished. If you wish the campaign to be deactivated automatically at a given date and time change the selector to Time, click on the box below and choose the desired date and time |
| Closed to | Use this field to select a closed Distribution List to limit the people who can interact with the campaign. If you don't select a distribution list the campaign will be open and anybody will be able to participate (this is the desired option most of the time). If you select at least one distribution list only users that exist in the list will receive the answers configured in the campaign, and only those users will show up in the reports (any text by a user not present on the distribution list will be responded by the default message). If you wish to create a closed distribution list on the fly (i.e. not use a preexisting one) select I want to create a new SMS distribution list and upload a CSV or Excel file containing the list of mobile numbers |
| Answers | Select Use wildcards? if you wish to use advanced regular expressions |
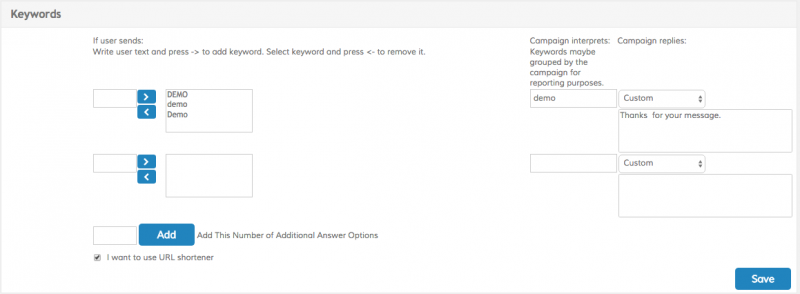
Use the Keywords section to map the expected input from the user with the appropriate response. Grouping several terms in the same keyword lets you answer several inputs with the same response text, but also simplifies reporting. When reports are generated all the inputs that match a certain keyword are grouped using the Campaign interprets field. So in this example:
Users that send demo or DEMO will receive the same message (Thanks for your message in this example), but they also will be grouped as demo in the reports. Now, click on Save if you wish to save but not activate the campaign (if you wish to activate it later) or click Activate to save it and make it available to your users.
If we want to add a new term to our Keywords campaign we would select the Open button in the toolbar:
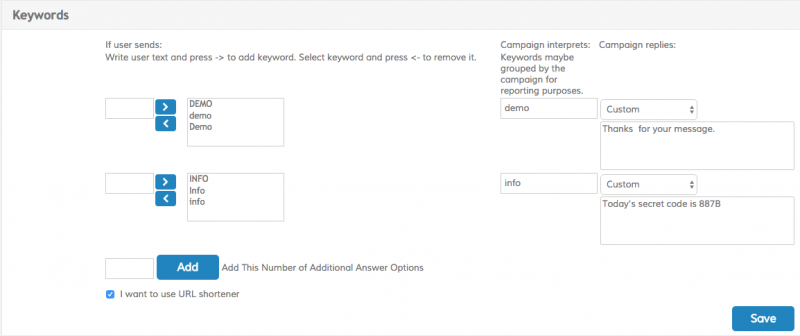
Then select the campaign you wish to modify and add a new keyword to the campaign. In this case we are going to create an info keyword that responds Today's secret code is 887B
You should use a configuration similiar to this one for HELP campaigns.
Example Use Case 2 - Reply and trigger actions
We want to configure an OPT-IN or OPT-OUT campaign that will reply to the user but it will also update some attributes in the main list.
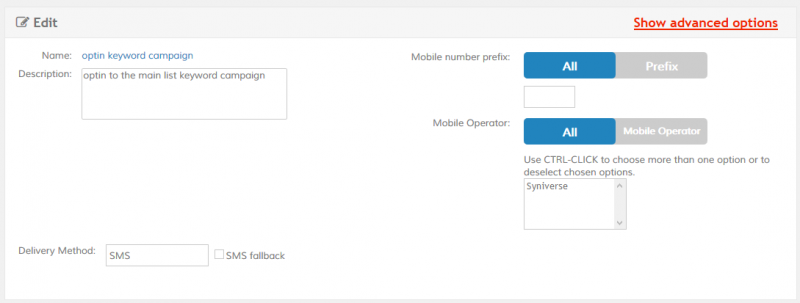
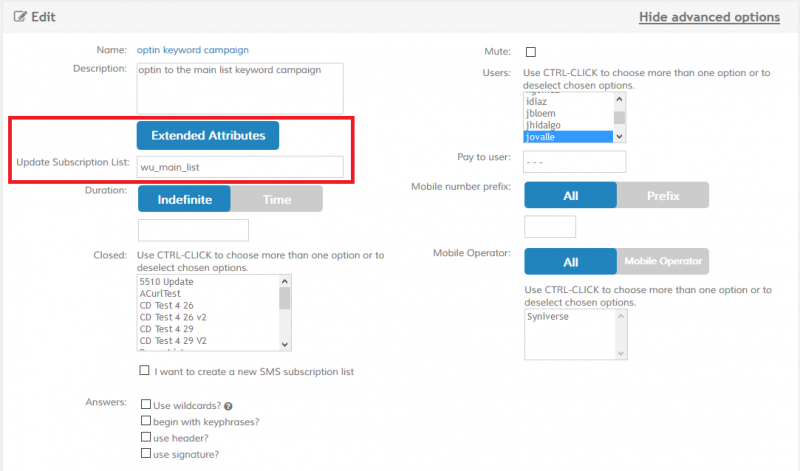
To do this we configure the campaign as described before, but we also use the Advance Options to select the list to update and to add the Extended Attributes required.
Clic the “Show advance options link”
Then, select the list to update in the “Update subscription list” field
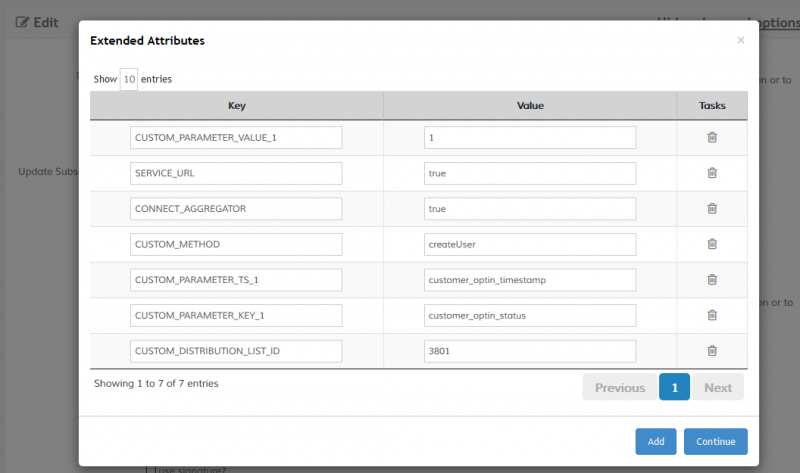
Finally, clic the “Extended Attributes” button and configure the method to be call and the parameters to be updated. In the case of opt-in and opt-out we configure the attributes shown in the picture below. Note that the CUSTOM_DISTRIBUTION_LIST_ID will be automatically added when you select the subscription list to be updated.
To view the live results of your campaign select the campaign from the Keywords main screen and click on the View Campaign Results button on the toolbar:
You will be presented with today's traffic for the campaign. If you wish to see the traffic for any other period of time use the Starts on and Ends on controls and click Search.
Tips
- Clicking on a mobile number in the Live Results screen will let you see all interactions for that user
- Use the Excel icon when available to export all the information to an Excel file
- Click on the Auto Winner button on the Live Results screen to select random winners from all the participants in your campaign
- Use the Pause and Play buttons in the main Keywords screen to activate and deactivate campaigns in real time
- Use the Clipboard icon on the main Keywords screen to create a new campaign with the configuration of an existing one
External WebService
Overview
Sometimes the response intended to the mobile user cannot be configured statically and needs to be a query into an enterprise system or website.
This is a common situation for businesses that already operate a comprehensive website where users can access the necessary information in real-time. In this case the business will naturally want to extend the access to the same information through a text-messaging interface.
The External Interaction is a very simple campaign that receives as input the user's MO and then calls an third party Web Service to retrieve a proper answer to respond.
Configuration
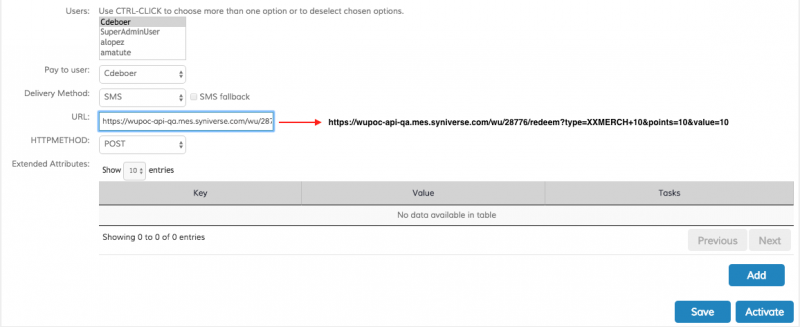
To configure an External Web Service we click on the Main Menu Button, click on Interactive Campaigns and select the External Web Services option. We will see the following screen:
Click on Create New and fill in the required information.
Click Save or Activate depending it has to go live later or at that moment.
The Call
The External Interaction sends (as a web parameter) the mobile number on each interaction as a reference to the mobile user, example: “Ogangi parameters on blue / Configured URL on brown”
http://third.party.url?mobile=13057763416
http://third.party.url/clientarea&clientid=syniverse&mobile=13057763416
The Response
The third party web service must respond with a XML message as follows:
<?xml version="1.0" encoding="UTF-8"?>
<message>
    <text></text>
</message>
| Tag | Description |
|---|---|
| <text> | Mandatory parameter, the text to be replied |
Example 1: A valid XML response with static text:
<?xml version="1.0" encoding="UTF-8"?>
<message>
    <text>This is a simple static message</text>
</message>
Reporting
Standard reports for keyword linked to Web Service type campaigns are similar to the simpler keyword campaign:
- Opt-in history
- Carrier distribution
- Full MO log – includes Mobile numbers, MO texts and timestamps
Raffle - Promo code campaign-
You can configure a set of prizes or promo codes to deliver to your users using a certain frequency and parameters we will discuss ahead.
Users can request a promo code by sending a text message with the keyword of the raffle or you can send them a promo code by using the following syntax in the text of your messages:
{r:kwraffle}
Here you will replace kwraffle by the keyword you configure for the raffle. In the example below you will use {r:mwpc}
Configuring a new Raffle
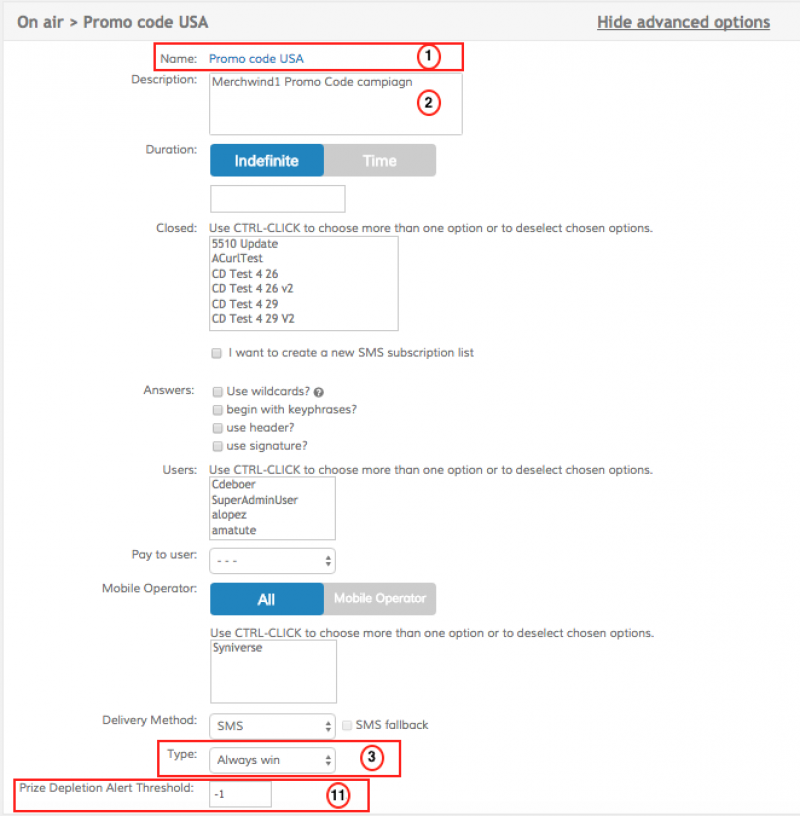
To configure a Promo code campaign we click on the Main Menu Button, click on Interactive Campaigns and select the Raffle option. Click on New and we will see the following screen:
To configure a successfully raffle you must enter the following information.
- The campaign name
- A descriptive text for this campaign
- Type: * Always win: Every user that sends an SMS to the campaign will get a promo code
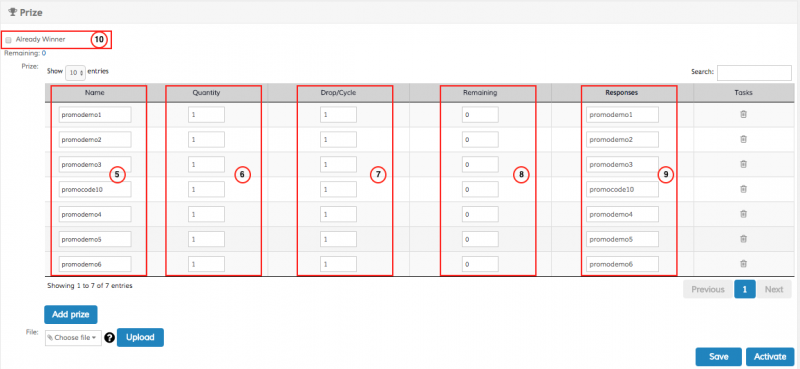
- Text keywords to initiate this campaign, user will send them using text messages and will get an SMS with a promo code
- The current promo codes name
- The total amount of promo codes you have available
- How many promo codes you want to be delivered for each cycle
- The remaining codes you have available will appear here just for convenience. This is not an editable field.
- The message a user will get with the promo code.
- You can set as many promo codes as you need by adding more using the Add Prize button.
- Already Winner: If an user has already requested a promo code he/she won't receive a new one
- Prize Depletion Alert Threshold: An email to the user that configured the Raffle will be delivered notifying that X amount of promo codes are left.
Reporting
Traffic report
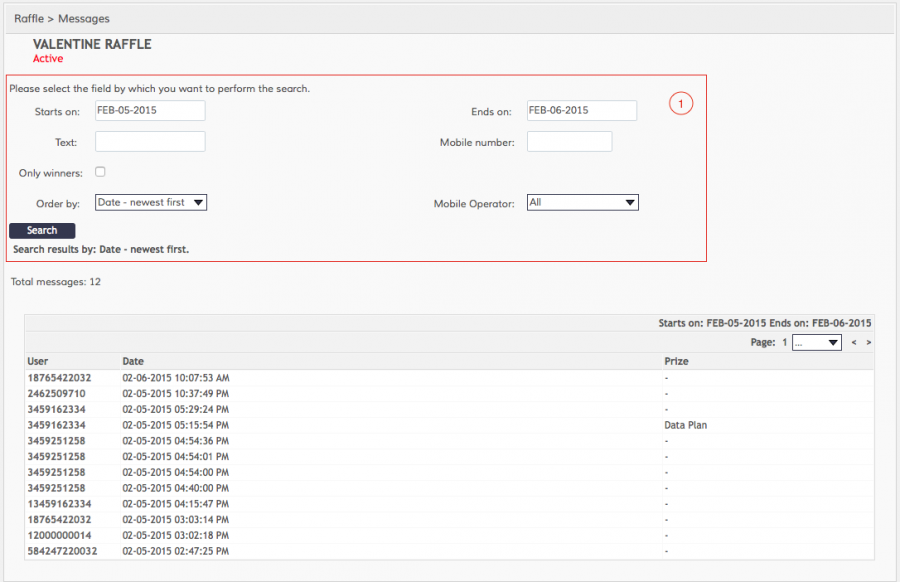
This is a basic report for every campaign in Messangi, you can view this report by following the path: Menu icon → Campaigns → Raffle → Results (Raffle > Message)
Prizes report
This report shows the winners and losers, for winners it will contain the information about the prize the user actually won.
To access this report you need to follow the path: Menu icon → Campaign → Raffle → Select the correct raffle in the option's upper right combo → Results (Option's bar)
Subscription Lists
SMS Subscription Lists
SMS subscription lists are aimed on SMS services. You can create a SMS campaign where the service will be closed to a list of users or you can use it as a contact list to send a broadcast.
In order to create an SMS Subscription list we'll need a file from where information is going to be taken. Upload must be performed from a .CSV file where the first and second (mandatory) columns are going to be the telephone number and the opt in status as shown below:
customer_phone_num,customer_optin_status
12000000001,1
12000000002,0
12000000003,1
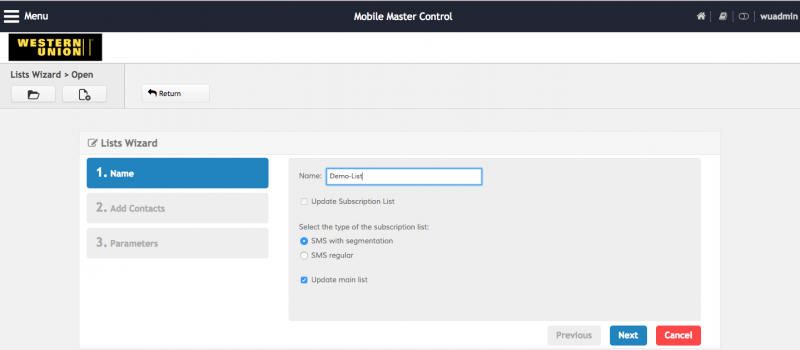
To create a Subscription List we click on the Main Menu Button, click on Utils option, click on Subscription List and select the List Wizard option. Following screen will be displayed:
Fill in the required information, select the type of list you'll create, either if it's a Segmentation list or a Regular SMS list and click Next when completed. Following screen will be displayed:
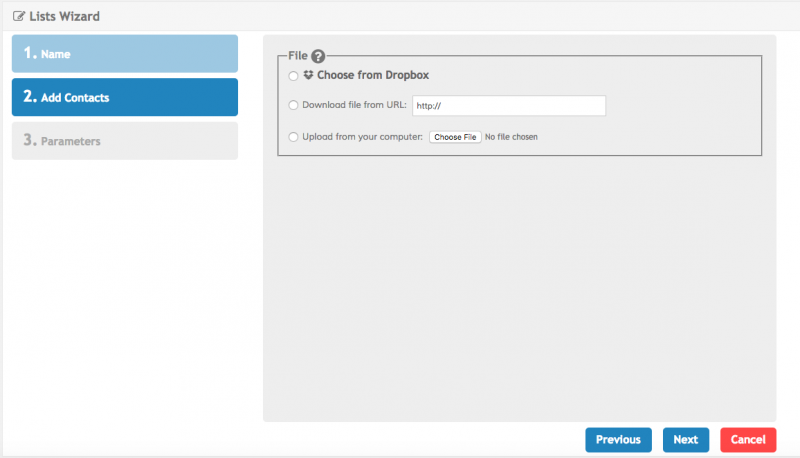
Here you must select the location of the contact's file and click Next. Following screen will be displayed:
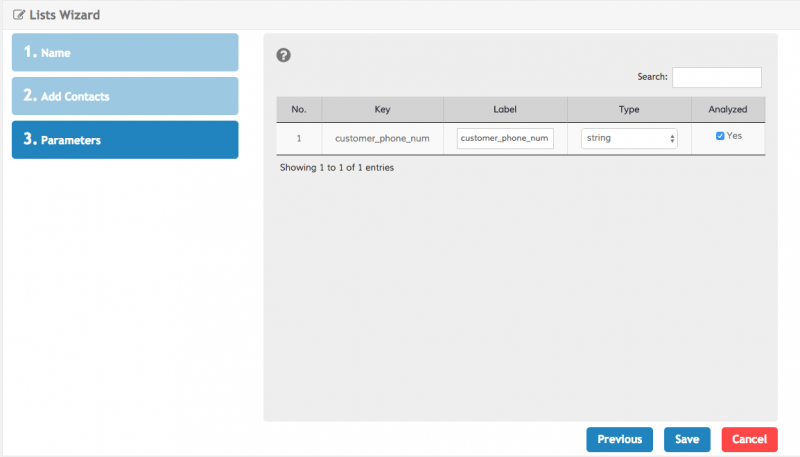
Based on the file's information, segmentation parameters like Label and Type will be shown. The Analyzed option is checked by default, by having it active the analysis process in each parameter will take into account approximations to the filtered request. This means that if you apply a filter requesting telephone numbers with 1234, the system will offer as a result all the telephone numbers with that pattern in it. In case the Analyzed option is deactivated, the system will show only exact results. When ready click Save.
Now you'll see the new list and by clicking on Segmentation button filters can be applied in order to get specific information.
Templates
The template will have the text of a message as a response to a REST API, that text may have parameters, which will help to personalize the message. In order to personalize the message we’ll use placeholders {x} that will have the field’s name with the information that must be placed in the message. Placeholder’s name must be written exactly as in the Json in the REST API petition e.g. {name}, {place}, {date}, {city}
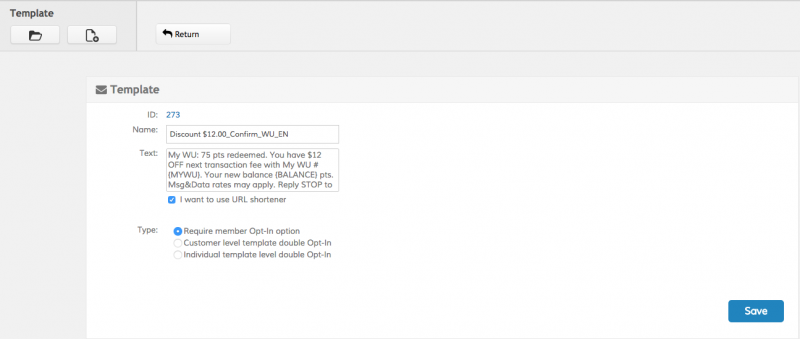
To create a Template we need to click Menu then go to Utils and template. Following screen will be shown:
Click on New and fill in the required information:
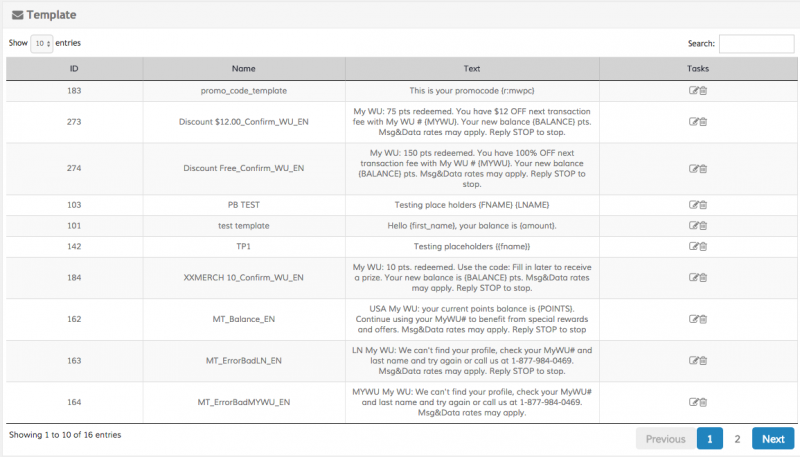
Once all the information is in place Save it and the Template home page will be shown. From here all the templates that are currently configured and active will be displayed. Each ID is unique for each template. We can edit, delete or create a new Template:
Note that you can add Raffle - Promo code campaigns in the text of the templates. Use the following syntax in the text of the template {r:kwraffle} replacing kwraffle by the keyword you configure for the raffle. That will insert a promo code when delivering the message.
For example, a template with text “This is your promocode {r:mwpc}” will deliver to the user the message “This is your promocode promodemo2” Where promodemo2 is a promo code took from the available promo codes configured in the Raffle campaign.
Broadcasts
A Broadcast campaign is an MT campaign that sends messages to specific distribution groups. Marketers will use blast campaigns to send out promotions to targeted mobile numbers. Distribution groups for blast campaigns can be an opt-in based group, a custom group or a combination of multiple groups.
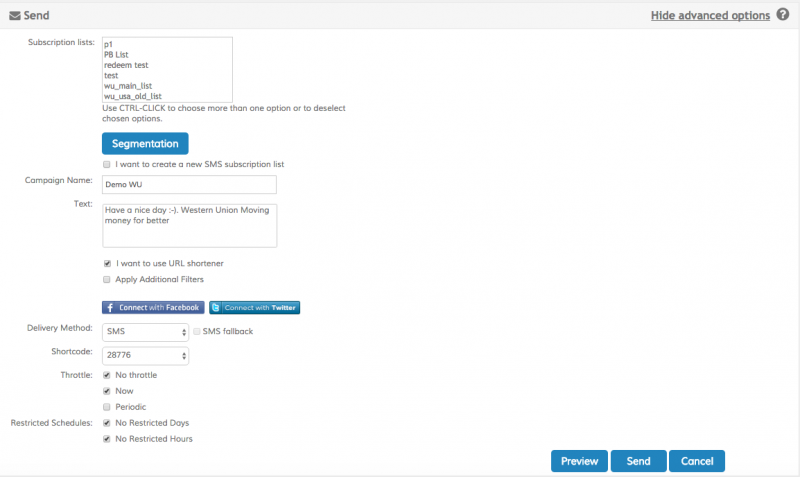
To perform a Broadcast we need to click Menu then go to Blasting and Broadcast. Following screen will be shown:
Click on New and fill in the required information:
It's important to highlight that the message will be sent only to users with customer_optin_status 1. Click Preview to see how the broadcast will look like and the expected messages and then click on Send when ready.
Reminder Broadcasts
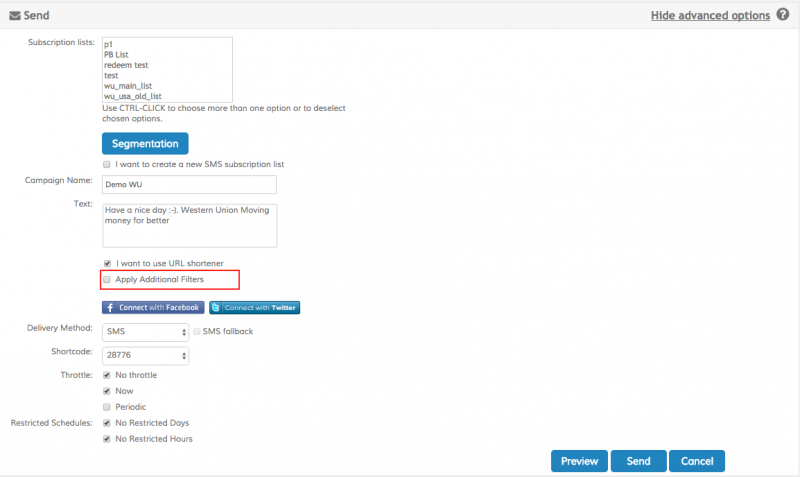
By checking the Apply additional filters option, the message will be sent only to users with customer_optin_status 1 and customer_redemption_status 0. Click Preview to see how the broadcast will look like and the expected messages and then click on Send when ready.
Opt out Batch Report
A report will be automatically generated on a weekly basis (thursdays with date from previous thursday to wednesday) and will be transferred to an SFTP account.
This report will be a CSV file including the following information:
Customer_mobile_num,Customer_optout_date,Customer_optout_timestamp,Customer_workspace_id
Example
Customer_mobile_num,Customer_optout_date,Customer_optout_timestamp,Customer_workspace_id
17000000001,20160429,2016-04-29T12:14:45-04:00,90
17000000002,20160429,2016-04-29T12:23:17-04:00,90
17000000003,20160429,2016-04-29T12:24:06-04:00,90
17000000004,20160429,2016-04-29T12:29:37-04:00,90
17000000005,20160429,2016-04-29T13:30:02-04:00,90

